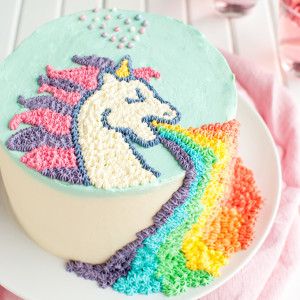
I made this crazy Puking Unicorn Cake for my niece’s twelfth birthday, and it sure made a lot of people laugh! It’s three layers of vanilla cake tinted pink, filled with vanilla buttercream and raspberry jam, and decorated with lots and lots of tiny vanilla buttercream dots!
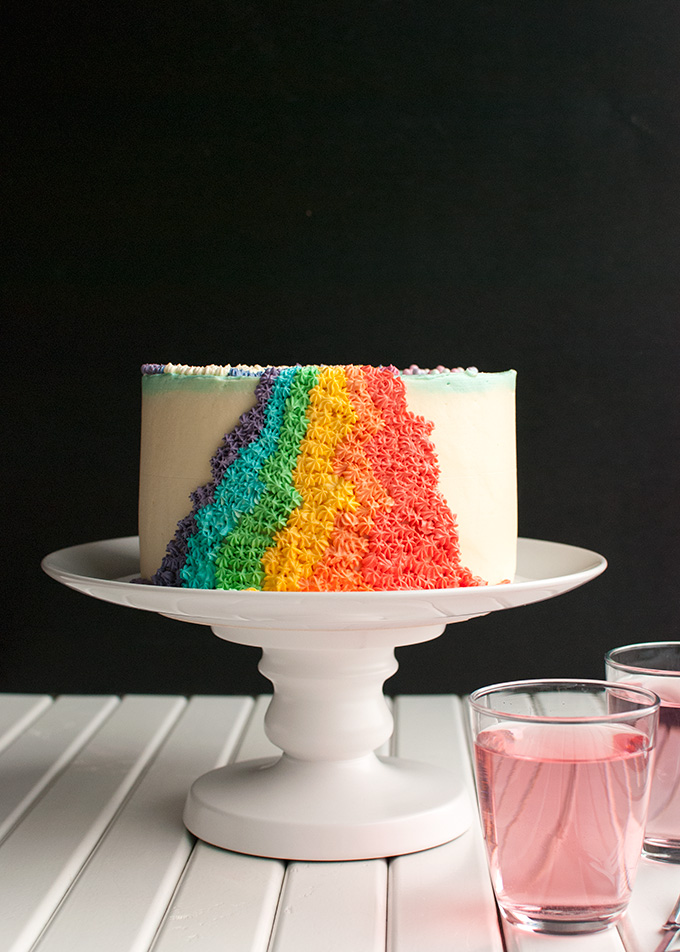 Looks pretty innocent from the side, right? Just a rainbow. Scroll down for the unicorn 😉
So. This cake. It made me laugh so hard! A few weeks ago, my niece stopped by my place after school to have tea and to tell me of her birthday plans. She turned twelve last week, and as usual she wanted me to make her a cake. Because that’s what I do in our family. So, she sat down, sipped her tea, and asked me if she could have a cake with a unicorn on it. A unicorn puking a rainbow.
…
Okay. Just get this: never in my entire life have I thought that one day I would be making a puking unicorn cake. I know puking unicorns are a thing, I’ve seen pictures of them on Pinterest, but I still think of unicorns as pretty white horses with magical powers and a pretty horn. That’s it. No rainbows. No puking. Maybe I’m a bit old-fashioned in the unicorn department?
Anyway, my niece wanted the unicorn to puke a rainbow. Oh, and she wanted it to be made out of candy. Oreos, gummy bears, M&M’s… that sort of thing.
First thing I did was talk her out of using candy to make the unicorn. Because, YES, there are definitely limits to my cake decorating skills (not to mention my patience) and I have no idea how to turn an Oreo into unicorn manes or a gummy bear into a unicorn horn. Instead, we decided to make the unicorn out of buttercream. And awww all right, a puking unicorn!
And seriously, making the rainbow was so. much. fun.
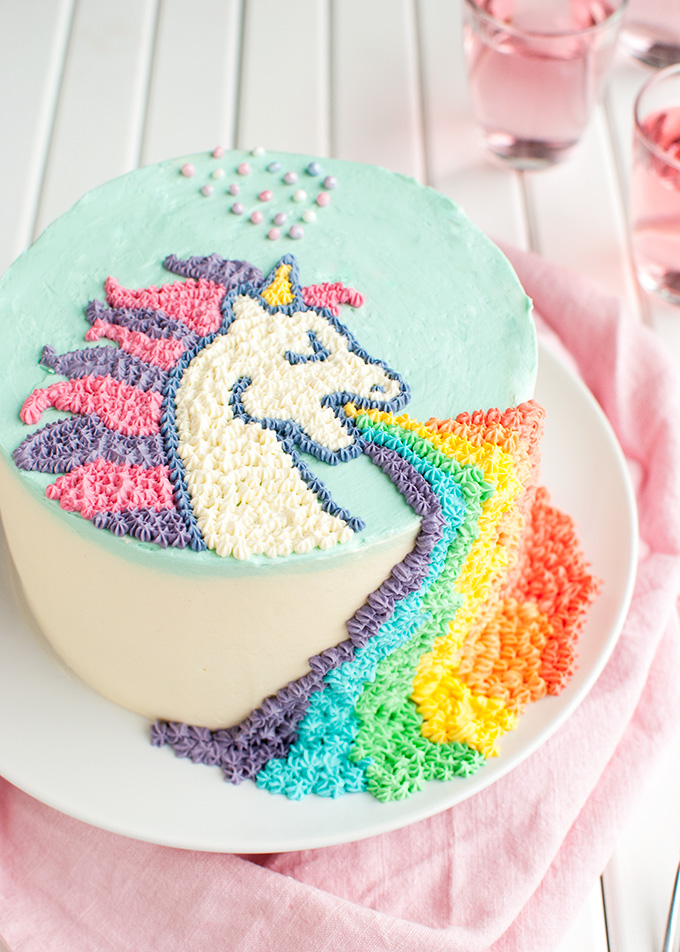 My niece and I first made the cake layers, which were basic vanilla cake layers tinted a psychedelic pink. Unfortunately I don’t have a photo of the inside of the cake, because I only cut this cake at my niece’s party. But take my word for it, the inside was beautiful. Is there a better excuse for making pink cake than a unicorn cake? I think not!
We also made an imbibing syrup. Just to give the cake a bit more moisture and flavor. You don’t have to make it, if you don’t want to. But making an imbibing syrup is super easy and I think it really improves the overall flavor of the cake.
The buttercream for this recipe is my trusted vanilla ermine buttercream recipe. I doubled the recipe, thinking that it would be enough to fill, frost and decorate this 18-cm/7-inch cake. And it was. But only just. Piping the rainbow puke actually was a bit difficult, because at that point I only had a few tablespoons of buttercream left for each color! Have you ever tried using a piping bag that was only filled with enough buttercream to fill the piping tip? Not an ideal situation…
So the recipe below makes a little more buttercream. Better to have a little leftover buttercream than to run out of it halfway through decorating the cake 😉
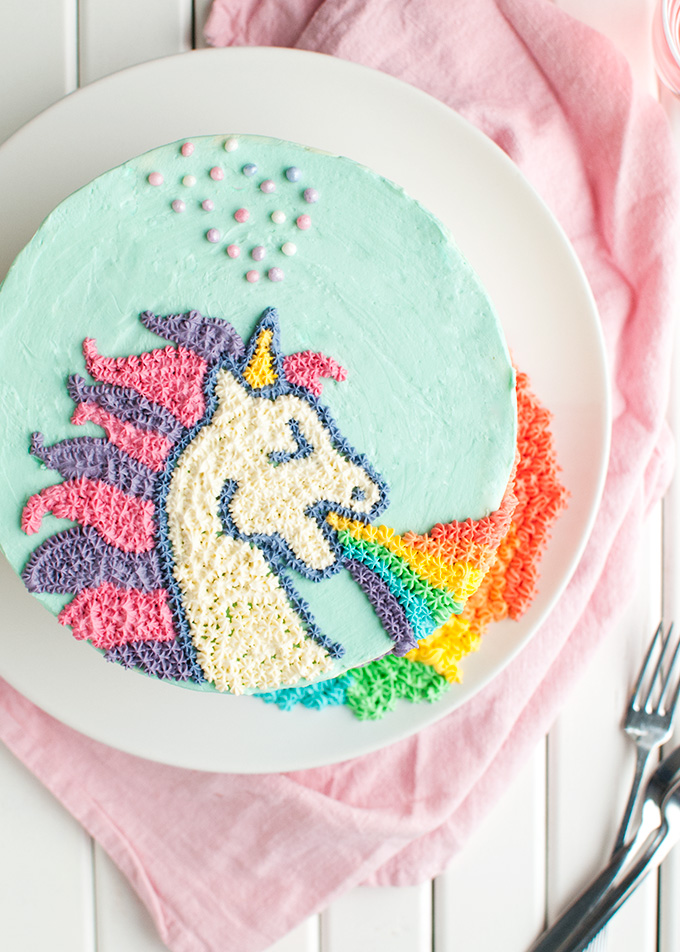 Making the unicorn and the rainbow was surprisingly easy!
I headed over to Pinterest to find a unicorn (this one! Which you can also find on Kandi Patterns and which was designed by Crazychick509), and I ended up with a pearler beads template which I thought would be great for the cake, as I was planning on decorating it with tiny buttercream dots. In the end, I didn’t stick to the template, though. I just printed the pattern to fit the cake, cut out the unicorn, placed my paper cut-out on the cake, and used a sharp knife to carve the unicorn’s outline into the buttercream on top of the cake. I then piped a line of purple buttercream dots right on top of it to make the unicorn!
I freehanded the rainbow, because I wanted it to flow from the top of the cake straight down to the cake plate. It was pretty easy, because all I had to do was make sure I didn’t put the wrong colors next to each other.
I think it took me about an hour to make the unicorn and the rainbow. And since I only have one tiny star tip, I had to wash the tip after each color. Here’s the order in which I piped:
- unicorn outline
- white
- pink
- purple (manes and rainbow)
- blue
- green
- yellow (horn and rainbow)
- orange
- red
Of course you don’t HAVE to use a piping tip. You could just snip the ends of the piping bags!
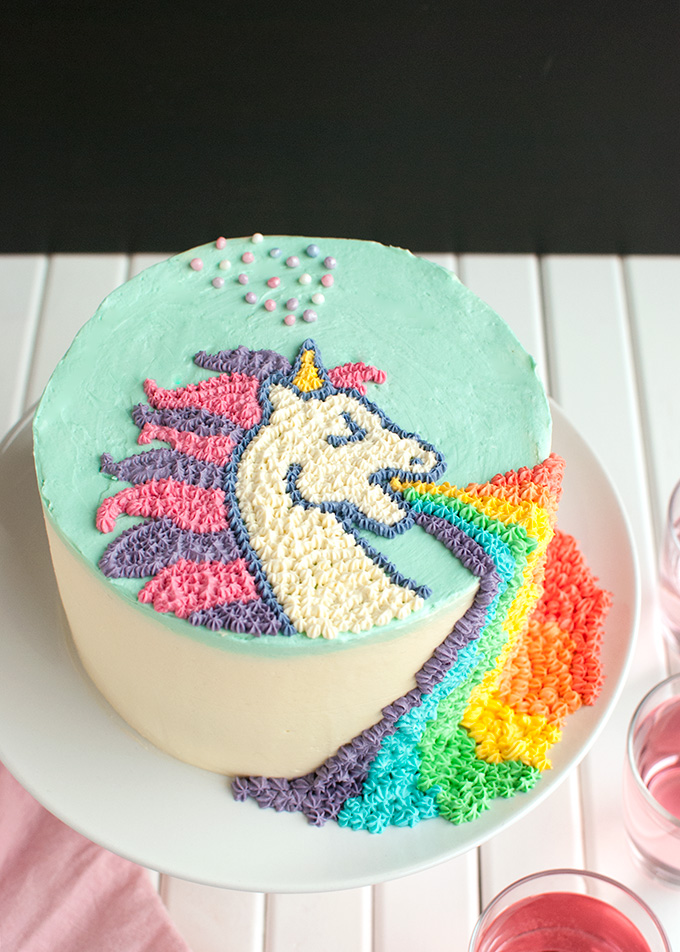 That’s it! If you like this recipe and would like more recipes likes this deliverd straight to your inbox, click here to sign up to my mailing list. Subscribers get a copy of my eCookbook ‘The Tough Cookie’s Five Favorite Frostings’ too, which features an AMAZING recipe for Nutella frosting that I haven’t even posted on the blog yet! So click that link 😉
And make this cake! It’s so much fun!
- 78g (or ½ cup + 2 tablespoons) all-purpose flour
- 400g (or 2 cups) granulated sugar
- pinch of salt
- 540ml (or 2 ¼ cup) milk
- 500g (or 2 cups + 3 tablespoons + 1 teaspoon) unsalted butter, softened at room temperature
- 1¼ teaspoon vanilla extract
- 300g (or 1⅓ cup) unsalted butter
- 400g (or 2 cups) granulated sugar
- 4 large eggs
- 1½ teaspoons vanilla extract
- 300g (or 2⅓ cup + 1 tablespoon) all-purpose flour
- 1½ teaspoons baking powder
- ¼ teaspoon table salt
- 200ml (or ¾ cup + 4 teaspoons) buttermilk
- food coloring
- 50g (or ¼ cup) granulated sugar
- 60ml (or ¼ cup) water
- 6 tablespoons of raspberry jam
- gel food coloring, I used Wilton Sky Blue, Rose, Kelly Green, Golden Yellow, and Red Red
- Combine flour, sugar and salt in a medium-sized saucepan. Whisk together. Add the milk and whisk until combined.
- Place saucepan over low heat and allow the mixture to come to a boil, whisking continuously. Once the mixture starts bubbling, cook for 1-2 minutes, then take the pan off the heat and whisk for a minute to beat some of the heat out of the pudding.
- Using a rubber spatula, scrape the pudding onto a clean plate and immediately cover it with plastic wrap, pressing the plastic wrap directly onto the pudding. This keeps a skin from forming. Allow the pudding to cool to room temperature. Once cool, place in the fridge to chill thoroughly.
- Preheat oven to 175°C/350°F (standard oven setting) and line the bottom of two 18-cm (or 7-inch) round cake pans with baking parchment. Butter the sides of the pans and dust lightly with flour.
- In a large bowl and using a mixer, beat butter until pale and fluffy, 2-3 minutes. Add the sugar and mix until well incorporated and fluffy, another 3 minutes. Using a rubber spatula, scrape the sides and bottom of the bowl as necessary.
- Add the eggs one at a time, beating well after each addition. Once all the eggs have been added, the batter should be thick, glossy and smooth.
- In a small bowl, combine flour, baking powder, and salt. Add to the batter and mix on low speed until just incorporated.
- (If you want to color the cake, add food coloring to the buttermilk!) Add the buttermilk and vanilla and mix for another minute on high speed or until the batter looks smooth. Again, scrape the sides and bottom of the bowl every now and then.
- Divide the batter evenly over the prepared pans and bake the cakes on a rack in the middle of the oven for about 45 minutes, or until a tester inserted into the center of the cakes comes out clean and the top of the cake springs back when lightly pressed with a finger. Remove from the oven and allow to cool to room temperature. Turn the cakes out of the pans, wrap them tightly in plastic wrap (individually) and place in the freezer for 20 minutes. This makes assembling the cake a lot easier.
- Combine sugar and water in a small saucepan. Heat over low heat, stirring with a metal spoon until the sugar has dissolved and the syrup looks clear. Transfer to a mug and allow to cool to room temperature.
- Once the pudding has cooled, beat the butter in a medium-sized bowl until smooth and fluffy and lightened in color, 5-7 minutes.
- Add the chilled pudding (which will look like glue at this point) one tablespoon at a time, mixing well after each addition. Once all the pudding has been added, mix for another few minutes, until the buttercream looks thick, smooth and creamy.
- Using a serrated knife and keeping it perfectly level, carefully dome the cakes and split them into two even layers. Using a smaller knife, trim the sides of the cakes to get the browned edges off. This step is optional, but it makes the cake a bit prettier when you cut into it.
- Place first cake layer onto a serving plate. Using a pastry brush, brush with an ample amount of syrup. Top with about a cup of buttercream, spreading it evenly over the cake layer using an offset spatula.
- Carefully scrape a very thin layer of buttercream from the center of the cake layer again. You want to end up with a completely frosted cake layer, with a thinner layer of frosting in the center and a thicker layer of frosting around the edge of the cake. This thicker edge will act as a dam to keep the jam in the cake.
- Spoon about two tablespoons of the jam into the 'pool' you've just created.
- Top with second cake layer, pressing it down a bit. Imbibe with syrup, frost with another cup of buttercream, and add the jam. Top with third cake layer, pressing it down, imbibe the cake with the syrup, frost, and add jam again. Finally, place the last cake layer on top, pressing it down.
- Crumb coat the entire cake with buttercream, then place in the fridge to allow the crumb coat to set, about 30 minutes.
- Frost the cake with a nice layer of buttercream. I used a bench scraper to get the smooth sides and top. I used plain buttercream for the sides, and blue buttercream for the top of the cake to make the unicorn stand out more. Chill the cake in the fridge for about two hours.
- I used a template to make the unicorn. I found it on pinterest and printed it out to fit the cake.
- Tint the remaining buttercream in your favorite colors. Fit piping bags with a very small star tip (I actually only have one small star tip, so I had to wash the piping tip after piping on each color of the unicorn) and fill the bags with the different colors of buttercream.
- Cut out your unicorn template and place it on the frosted cake. Using a small sharp knife, carve a line in the buttercream to make the outline of the unicorn.
- Pipe tiny buttercream dots on the unicorn outline. Cut out the manes, and, using your sharp knife again, carve the outline of the manes on the cake. Decorate away! Just make sure to make all the buttercream dots about the same size.
- Cake keeps for about 4 days, stored in an airtight container in the fridge. Allow to come to room temperature before serving. This may take up to four hours.



Nila, this cake is so funny and beautiful all at the same time. Only you could make puking look gorgeous! IYour niece is a lucky girl.
Thanks Cindy ???? Making this cake was a blast!
Wat ziet het er weer mooi en heerlijk uit. Wat ben je toch creatief. En wat zal je nichtje blij zijn met zo,n creatieve tante.
Thanks Hen 😉
Best. Aunt. Ever. I sometimes actually think it was adults who made puking unicorns popular and it brings me back to the Lisa Frank days. I love this and kind of want to throw a Lisa Frank party now! I would just have to ask for patience in the decorating department. Looks amazing!
AHHHH THIS IS SO COOL. and i feel like you did it super fast; if you’ve ever seen one of the “how to cake it” videos, she takes days (okay well usually 6-12 hours accompanied by lots of rulers and such).