When I first started my blog, I was probably the least tech-savvy person I knew. I didn’t have Facebook or a smartphone, I barely knew how to sign up to a mailing list, and I knew nothing about running a blog. I really needed all the help I could get! So, for all those other aspiring bloggers out there, I thought it would be helpful to create a resource page where wannabe bloggers (or established bloggers looking for tips!) can see the different products and services I use with my blog.
Disclaimer: please note that some of the links below are affiliate links, which means that I will earn a commission if you purchase through those links. I use the listed products and services because they have really helped me take my blog to the next level and because I think they are well worth the money. Please let me know if you have questions about anything listed below!
Setting up a blog
First thing you need to become a blogger is an actual blog. Obviously 😉
 Bluehost – Bluehost is the hosting company that I’ve used ever since I first started The Tough Cookie. The nummer one reason why I decided to go with Bluehost is that it’s very affordable. I only pay $7,99 per month, which is not even their cheapest plan. Plus, they offer free domain registration if you decide to host your blog with them. The second reason why I love working with Bluehost, is that they make it super easy to set up your blog. Once you’ve decided on a cool domain name and made sure it’s actually available, it just takes two simple steps before you can call yourself a blogger! It’s really easy, but if you’d still like a little help with setting things up, I’ve created a step-by-step tutorial on how to start your own blog using Bluehost.
 The Genesis Framework – Once you’ve set up your blog using Bluehost, you need to make it pretty. To do this, you install a theme. A theme determines the inner workings and look of your blog. The Genesis Framework is a parent theme, which means that it serves as a foundation onto which other themes (Genesis child themes) are build. While the child theme determines the look of your blog, the parent theme handles the inner workings. In other words, if you decide to purchase the Genesis Framework, you’re also going to need a Genesis child theme (prices vary). Because Genesis is so popular, there are numerous child themes (aka: blog looks) to choose from!
 Foodie Pro Theme – This is the Genesis child theme I’m currently running on my blog and it is especially designed for food bloggers. It not only makes the most of your photos, but it’s also really easy to work with and the support team is excellent! It allows you to customize the colors and typography of your blog and features strategic ad space, which is great if you’re thinking about monetizing your blog.
 Free Themes for WordPress – If you feel like you’re not quite ready to pay for a theme yet, you can always install a free theme. When I first started blogging, I used Contango, but there are thousands of free WordPress themes you can choose from. However, before you install a theme onto your blog, make sure to check the theme’s rating whether it’s any good! You’re looking for themes with at least a 4-star rating.
 MailChimp – Mailchimp is the email marketing software I use to send excerpts of my blog posts via email to my email subscribers to let them know I’ve published a new post. With Mailchimp it is very easy to design emails and manage different mailing lists. You can even tests different designs to see which one gives you the best click-through rate. Plus, it’s a free service as long as you have less than 2000 subscribers!
 Food Blogger Pro – Without Food Blogger Pro, my site wouldn’t be where it is today. It’s an online community where aspiring and established bloggers can learn everything about food blogging. From setting up your blog and creating a branded email address, to shooting beautiful food photos and monetizing. Members have access to over 300 easy-to-follow video lessons and a forum where you can get questions answered by other bloggers, including me 😀
Food Photography Tools
If you’re serious about your blog, and you’re just starting out, your main focus should be to improve your photography. If you have great photos, and post them to Pinterest or food sharing websites, people will find your blog, simply because people love great food photos. Place a few ads in your sidebar, and you may even earn a little money. When it comes to blogging and building a readership, great content, including awesome photos, is everything! This is what I use…
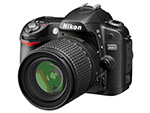 Nikon D80 Camera
 – This is the camera I have used ever since I started the blog. It’s ancient! The Rocking Rebel bought it in 2008, but it first came on the market in 2006. Unfortunately, it’s not even in production anymore, but if you’re looking for a great, used dSLR camera that’s reasonably priced (I’ve seen them on Amazon for $283!) I suggest you look for one of these.
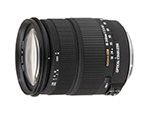 Sigma 18-200mm f/3.5-6.3 Lens
 – I used this lens when I first started out, and although it’s great for shooting pictures of family picnics or hikes, I don’t recommend using it for food photography, because it has a minimum focus distance of 0.45m. For food photography, you want a lens with a smaller minimum focus distance. If you look at some of my older food photos, such as these, and compare them to newer photos, like these, you’ll see that my food photography only got that I-need-to-eat-that-right-now quality when I upgraded to a different lens. Still, this is a reasonably priced and pretty decent lens for family photos.
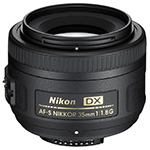 Nikon 35mm f/1.8G AF-S DX Lens
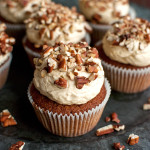
 – This is the lens I use for food photography and I absolutely love it! It was actually a Christmas present from the Rocking Rebel and it’s perfect for food photography. It has a minimum focus distance of 0.3m and a large maximum aperture of f/1.8. In food photography, having a lens with a large maximum aperture at your disposal makes all the difference, as it not only enables you to create depth-of-field in your photos (in this photo, only the cupcake in the front is in focus. This is called depth-of-field), it also lets in a lot of light. This is especially important if you, like me, don’t like working with a tripod. Another plus: it’s pretty well priced!
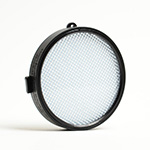 Expodisc
 – I used to have a hard time setting the white balance for my camera. For some reason, I could never get is quite right, and as a result my photos often had a blue haze even photoshop couldn’t remedy. After trying simply messing with the white balance setting on my camera and various grey cards, I finally heard about the Expodisc. It’s a small round filter which you use to set your camera’s manual white balance. It’s a super useful little tool and I use it all the time!
 Adobe Photoshop – I used to edit my food photos in Iphoto. And, um, I don’t like to look at those photos these days… Cringe! If you’re serious about blogging and photography, and you’ve just bought an awesome lens for food photography, do yourself a favor and get Photoshop, too. It’s not cheap, but it’s definitely worth it! I actually have a month-by-month subscription and use it for all my photos (make sure to set your camera to shoot in RAW).
![]() Plate to Pixel
Plate to Pixel – This book, written by Hélène Dujardin from Tartelette, another baking blog, covers everything food photography. Not only does Hénène explain about photography basics – like ISO, aperture and shutter speed – and shooting in natural light, she also explains how you can best shoot food in artificial light, and she even discusses food styling. What I also love about this book is that the camera settings for each photo (there are a lot of photos in this book!) are specified, so you can compare the different settings between photos. It’s thanks to Hélène that I now dare to push my ISO up to 640 when I have to work in low light conditions!
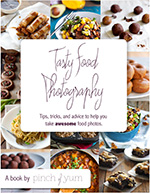 Tasty Food Photography – Even if you’ve already purchased ‘Plate to Pixel’, make sure you don’t miss out on Lindsay Ostrom’s ebook on food photography. It’s an excellent resource for everyone who wants to take their food photography to the next level and it actually costs less than ‘Plate to Pixel’. Lindsay explains all about how to use a dSLR camera, different camera settings, shooting in natural light, composition, props, taking beautiful photos with your phone, and creating movement and emotion in your photos. What’s more, the ebook comes with a password to several online video tutorials in which Lindsay shows how to edit photos in Photoshop. This is a must-have if you want to improve your food photography! Or if you’ve purchased Photoshop but don’t know how to use it 😉
Driving traffic to your blog
Once you’ve got your blog all set up and your photos look great, you can use those awesome food photos to build your readership. These are the websites I use to drive traffic to my blog.
Pinterest – Pinterest is awesome for food bloggers! It has the potential to drive a lot of traffic to your blog. So set up an account and start pinning!
Useful WordPress plugins
Easy Recipe – This is the WordPress plugin I use to enter in my recipes and I really like working with it. It’s very clean and simple and it allows you to create rich Pinterest pins. There’s a free option, too!
Akismet – This plugin is basically a spam filter for your comments section. Very useful!
Limit Login Attempts – This plugin limits the number of times someone can enter an invalid password when trying to gain access to your website. You may not think you need it right now, but it’s scary how many people try to hack into my humble little site every day! Limit Login Attempts is free and easy to use and may save you a lot of trouble.
Hope this list is helpful 🙂


