 Hey guys! I’m back from vacation! A few days early, in fact. The Rocking Rebel and I had originally planned to return from Luxembourg next Saturday, but after a few gorgeous sunny days on the best campsite ever, it started to rain. Apparently, according to the weather forecast, it’s still raining there at the moment. And even though the Rocking Rebel and I don’t mind a little rain (after all, as Dutchies we’re used to it), we don’t like a lot of rain. Especially not since the tent we borrowed from my brother-in-law isn’t as waterproof as we had hoped. And do you have any idea what it’s like to be in a small, damp tent with a wet puppy?
Sooo, we got back early! From an amazing trip, I might add. Like I said, the campsite was amazing! We camped right next to the river Sûre, which is full of trout and other kinds of fish, and we had a stunning view of the surrounding hills and the ruins of a medieval castle. We spent our days fly-fishing (the Rocking Rebel, mostly), reading gossip magazines (which I loooove!) and lolling around half-naked, working on our tans on the air mattress. Oh, and swimming with Lucy and eating ice cream, of course. Lots of ice cream!
So time well spent!
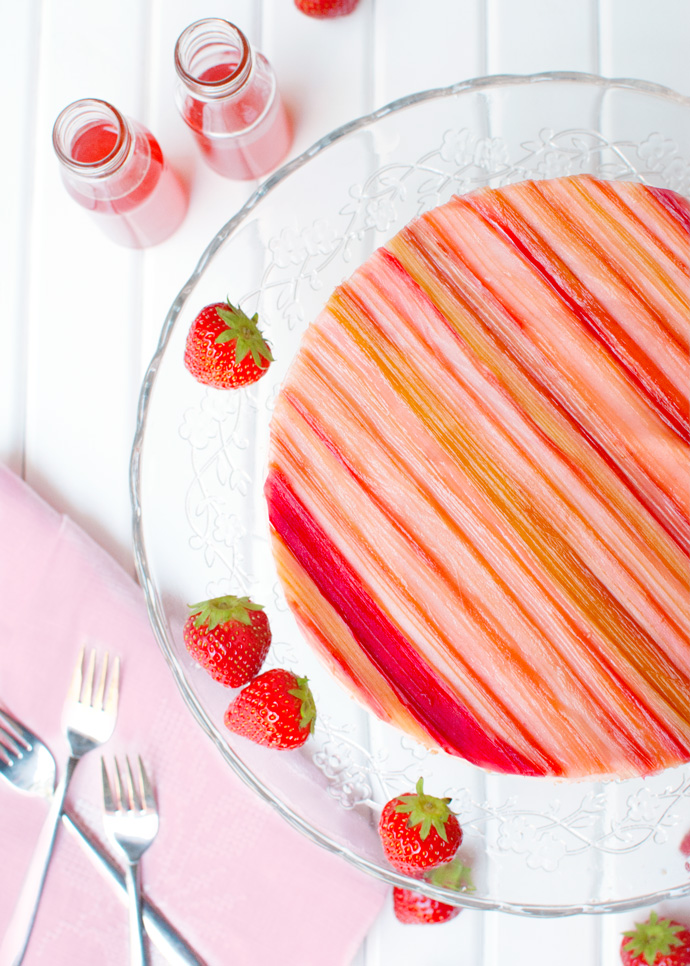
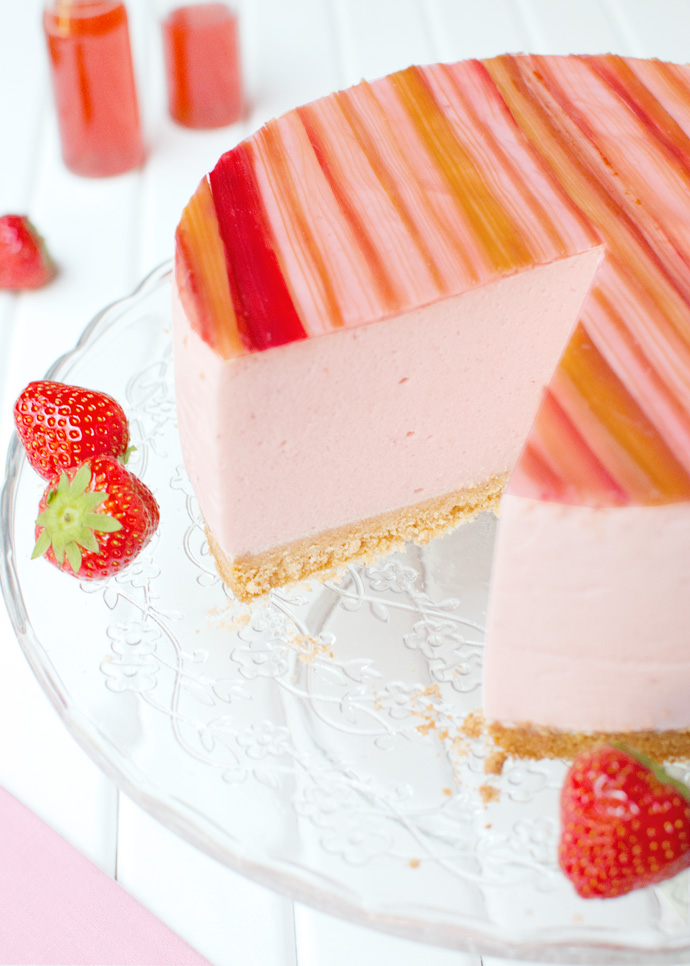
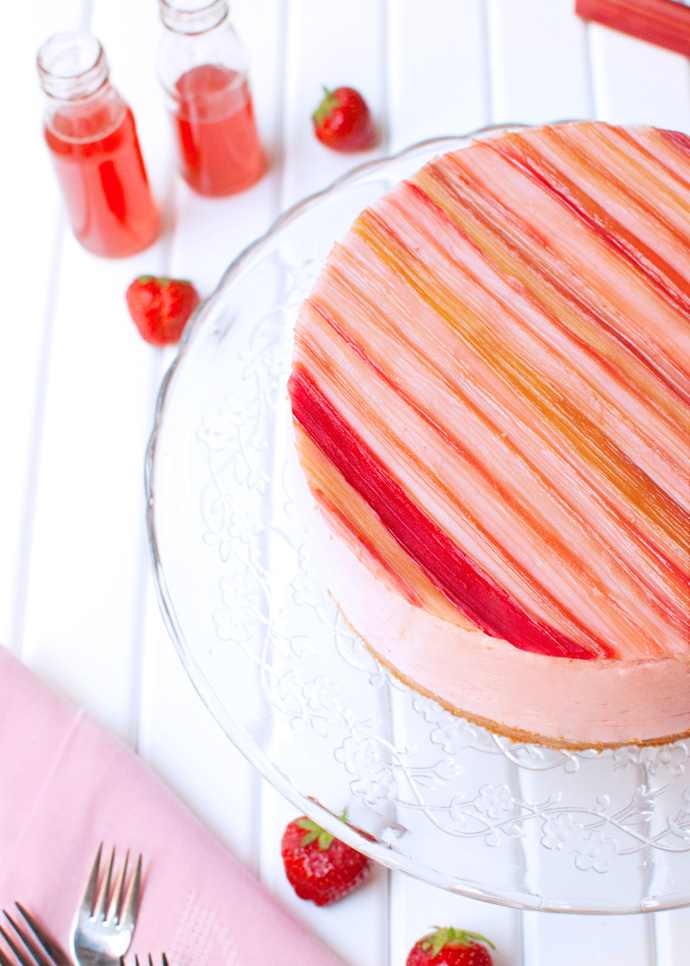
And Luxembourg was gorgeous! Almost as gorgeous as this cake. Yes, I’m proud of it. Can you tell? I made it with my little sister when the Rocking Rebel and I were staying at my (other) sister’s place. And my god, was it a tough nut to crack! Or, um, a tough cake to bake? Whatevs… It took us three times to get it right! Wait, was it four times? I can’t even remember… I only remember that when we finally got the recipe right, the cake was delicious!
 I got the idea for this cake reading another food blog: Sprinkle Bakes. It’s a great blog, full of artful cakes and cookies. The mastermind behind the blog, Heather, is actually a real artist too, so everything she makes looks absolutely amazing! When I read about a rhubarb-wrapped pineapple mousse cake she made, I knew I just had to try something similar.
My little sis loved to help me! She’s great with delicate, pretty things… And much better at it than me!
Anyway, we started out with a basic fruit mousse recipe made with fruit purée – in our case strawberry purée, because I’m not really into pineapple mousse – and whipped cream. You fold the two together and you should end up with a gorgeous, fluffy, dreamy mousse. Except we didn’t. No matter what we tried, the mousse mixture split every single time! I still don’t know what happened. The strawberry puree wasn’t warm when we added it to the whipped cream, so the cream didn’t melt. Instead, it just separated and curdled. We felt like we were making strawberry cheese, or something! It was really weird and really disgusting. Yuck…
And this happened two times! If you’re a fruit mousse expert, please let me know what went wrong, because I still have no idea…
 Not that my sister and I gave up, of course. No, no, no. When I mess something up and I don’t understand why, I usually do it again and again and again, until I succeed. Or really do go crazy, which – luckily – has not happened yet.
So I started browsing the web and did some research, until I stumbled upon a San Fransisco Baking Institute newsletter about fruit mousse. Here’s the link, if you’re interested. It’s great! I’m so glad I found it. Because yes! It helped me come up with the perfect, ultimate fruit mousse recipe!
I set to work again and this time I made a fruit purée, whipped up some cream AND… made an Italian meringue. Which means a meringue made with a hot sugar syrup. The sugar syrup is cooked to 113°C/235°F, or to soft-ball stage. This means that, as the sugar cooks, its chemical properties change and the sugar becomes kind of kneadable. I don’t really know the science behind it yet (I’ll look it up sometime), but once the sugar reaches this stage, you carefully drizzle it into foamy egg whites. As you do this, it’s important to keep mixing the mixture to keep the hot sugar from scrambling the egg whites. It sounds harder than it is, I promise. And the resulting meringue is incredibly stable and looks like a big, soft cloud. Perfect for mousse making!
The only thing is that you do need a sugar or candy thermometer for this recipe. But a multimeter will do just fine as well. I always use the Rocking Rebel’s multimeter, which was ridiculously inexpensive (less than 10 bucks) and is much more reliable than my old-fashioned sugar thermometer. It’s faster too! So, if you don’t have a sugar thermometer, get yourself one of those! You’ll also need it to make sure the meringue and fruit purée are not too hot before adding the whipped cream. If the meringue or the fruit purée are still warm, the cream might melt. So use a sugar thermometer or multimeter to temp the mixture before you start folding!
 Another thing to keep in mind is that working with gelatin, particularly writing recipes with gelatin, can be tricky. There a hundreds of different brands of gelatin out there. And several different strengths of gelatin. Some people like to use powdered gelatin, others prefer sheet or leaf gelatin. I’m in the sheet camp. I hate powdered gelatin. I can never get it to dissolve properly! Sheet gelatin is just so much easier! Seriously, if you don’t like using powdered gelatin, switch to sheet gelatin. It will make your life a lot easier…
But anyway, what I’m trying to say is: gelatin doesn’t translate well. There are different strengths (aka: different ‘blooms’) and not all kinds of gelatin are widely available. Because of this, my recipe’s ingredient list calls for an x amount of sheet gelatin, enough to firmly set 645ml of liquid. That’s right, my recipe doesn’t call for – say – 3 teaspoons of powdered gelatin or 5 sheets of gelatin. Like I said: gelatin comes in different strengths, which makes it difficult for me to tell you how much to use.
Instead, I advise you to use whatever kind of sheet gelatin is available to you and determine how much to use according to the manufacturer’s instructions. At the back of the packet, the manufacturer is likely to have put the amount of liquid the gelatin will set. If it’s not on the package, get another brand that does specify this. It’s important!! Mucho importante! Once you know the strength of your gelatin, you can easily calculate the amount of sheets you’ll need.
So, say that the packet says that you’ll need 6 sheets of gelatin to set 500ml (or 2 cups + 4 teaspoons) of liquid. My recipe calls for enough gelatin to set 645mls of liquid. If 6 sheets are enough to set 500ml, 7.74 sheets will firmly set 645ml.
6 x 645 / 500 = 7.74 <– use this formula! Just change the values according to the strength of your gelatin.
It’s easy, right? So no matter where you live and no matter what gelatin is available to you (come to think of it, you could even use agar-agar!) you can make this awesome strawberry mousse cake!
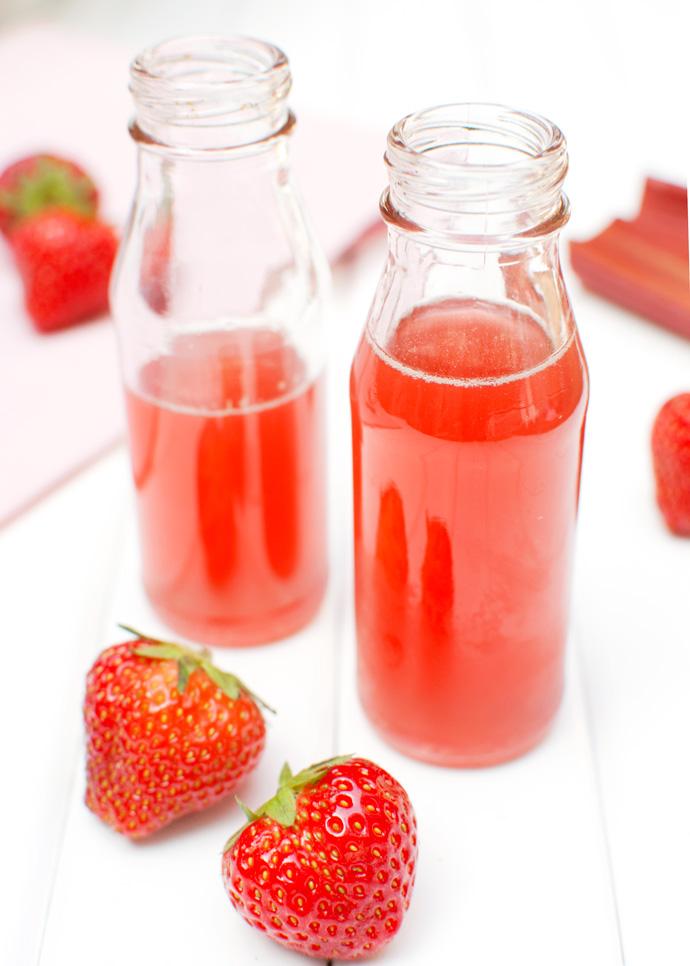
I wish I took more photos of it, so I could tall/type about it a bit more. Because the crust is just amazing! It’s a basic cookie crust with a touch of lemon, but instead of adding butter, I simply used deliciously buttery cookies. The butter in these cookies melts as you bake the crust, ensuring that the crust bakes up golden, crumbly and beautiful. You can add butter if you want to, but I prefer the clean taste of the cookies.
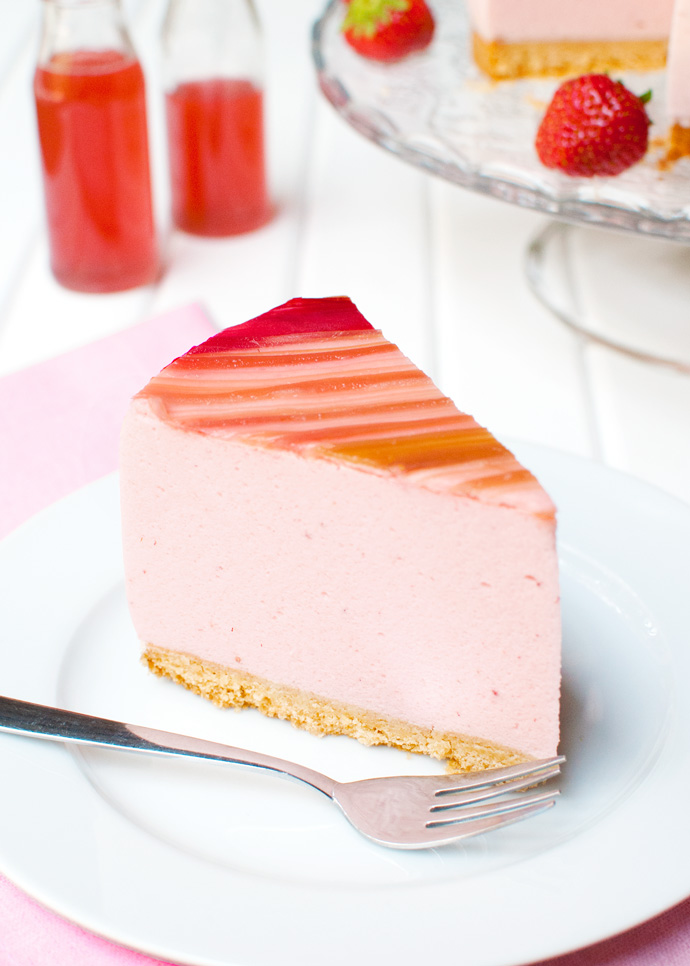
The mousse itself is dreamy and perfect in every way! It has an incredibly fresh strawberry flavor and it isn’t as sweet as other mousses. It’s light and summery and perfect. Especially paired with the sweet but tangy candied rhubarb strips. Cooking the rhubarb takes some time and you have to be a bit patient with it, but the result is spectacular. This is just such an incredibly beautiful cake! My sister and I were soooo proud of it!
Just one last piece of advise: don’t try to cut through the rhubarb with a knife. Even if you use a really sharp knife, you won’t be able to make a neat cut. The mousse is just too airy and spongy and fluffy, so you’ll just end up smushing the rhubarb into the mousse. Not pretty that… Instead, just cut through the rhubarb top with scissors before cutting the cake. Much easier. Much prettier.
You won’t regret making this!
Oh, and don’t be intimidated by this recipe. I know it’s long, but I added a lot of tips and additional information!
Please note: this recipe contains raw egg whites.
- 200g (or 7 ounces) buttery cookies, such as shortbread
- ¼ teaspoon lemon zest
- 400g (about 14 ounces) fresh strawberries, washed and hulled
- ½ tablespoon lemon juice
- 225ml (or ¾ cup + 3 tablespoons) heavy whipping cream (at least 35% fat)
- enough sheet gelatin to firmly set 645ml (or 2½ + 3 tablespoons) of liquid*
- 100g (or ½ cup) granulated sugar
- 3 tablespoons of water
- 2 large egg whites (about 65mls)
- pinch of salt
- 100g (or ½ cup) granulated sugar
- 240ml (or 1 cup) water
- 5 long stalks of rhubarb, preferably red stalks
- First, preheat your oven to 175°C/350°F (standard oven setting) and line the sides of a 20-cm/7-inch spring form pan with strips of baking parchment. Use a little butter to help stick the parchment to the sides of the pan.
- Next, place the cookies in a sturdy Ziploc bag and crush them with a rolling pin or the back of a spoon. The finer the crumbs, the better the crust will hold its shape.
- Pour the fine cookie crumbs into a small bowl and add the lemon zest. Rub the lemon into the crumbs using your fingers (should take about a minute).
- Press the lemony crumbs evenly into the prepared spring form pan and bake the crust for about 10 minutes, or until it has turned a light golden brown. Remove from the oven and allow the crust and the pan to cool to room temperature.
- Place the strawberries in a blender and blend until completely smooth. Add the lemon juice and pulse briefly to combine.
- Place a fine-meshed strainer over a measuring jug and pour the strawberry purée through the strainer into the jug. Discard the seeds left in the strainer (or stir into yogurt!).
- Measure off 325ml (or 1½ cup + 1 teaspoon) smooth strawberry purée. Eat the rest. Place in the fridge until needed.
- In a large bowl, whip the cream to very soft peaks by hand. You don’t want to use a mixer for this, as the use of a mixer can weaken the structure of the finished whipped cream. Because the whipped cream ensures that the mousse cake is light and fluffy, you want to make sure it’s strong enough to hold the weight of the other ingredients.
- Once the cream has been whipped to very soft peaks, place it in the fridge until use.
- Fill a medium-sized bowl or a large measuring jug with cold water and carefully submerge the gelatin sheets into the water, one at a time. Allow the gelatin to soak for 10-15 minutes (or soak according to the manufacturer’s instructions).
- In the meantime, combine the sugar and water in a small saucepan. Heat over low heat, stirring with a metal spoon until the sugar has dissolved.
- Once the sugar has dissolved, crank the heat up to medium-high and stop stirring. Clip a sugar thermometer onto the side of the pan.
- Once the sugar syrup is cooking, combine the egg whites and salt in a medium-sized, heatproof bowl. Using a mixer fitted with the whisk attachment, whip until the whites are frothy.
- Stop mixing and closely monitor the temperature of the sugar syrup. As soon as the syrup reaches a temperature of 113°C/235°F take the pan off the heat and start whipping the egg whites again. Carefully pour the hot sugar syrup into the bowl with the egg whites, mixing continuously to prevent the eggs from scrambling. Try not to pour the syrup onto the whisk; otherwise the hot syrup may splatter against the sides of the bowl (or into your face!).
- Once all the syrup has been added, keep mixing until the bottom of the bowl feels cool to the touch. This should take about 8 minutes and your meringue should cool down to about 26°C/78°F. Set aside.
- To a small saucepan, add about 120ml (or ½ cup) strawberry purée. Heat gently until hot, then take the pan off the heat.
- Squeeze the excess water out of the gelatin and add the gelatin sheets to the strawberry purée on at a time. Make sure to stir the mixture after each addition to make sure the gelatin melts properly. If the gelatin doesn’t melt properly anymore (this could happen, because the cool gelatin sheets bring the temperature of the mixture down), place the pan back on a very low heat, stirring continuously until the gelatin has melted. Make sure to never cook the gelatin, because it won’t set if you do!
- Once all the gelatin has been melted into the strawberry purée, add the gelatin mixture to the remaining strawberry purée. Stir to combine, then check the temperature of the mixture. If necessary, allow to cool to 26°C/78°F.
- Whisk one third of the meringue into the strawberry purée. I know this sounds weird, but folding it in doesn’t work. There will still be lumps of meringue
- Repeat with the remaining two thirds of meringue, but this time, fold the meringue into the strawberry purée with a rubber spatula. If you have trouble getting rid of all the lumps, whisk briefly.
- Take the very softly whipped cream out of the fridge and whip again, by hand, until the cream holds soft peaks. Gently fold the fruit mixture into the whipped cream, a few spoonfuls at a time.
- Once all of the fruit mixture has been added, the mixture should be smooth, light and fluffy.
- Check the temperature of the cookie crust and spring form pan, to make sure both have cooled completely. If so, pour the mousse mixture on top of the crust. Smooth the top of the mousse with a spatula, cover with plastic wrap and place in the fridge to set overnight.
- Remove the spring form collar from the cake and peel away the strips of baking parchment. Carefully transfer the cake to a serving platter.
- In a small saucepan, combine the water and sugar. Heat over low heat, stirring with a metal spoon until the sugar has dissolved. Once the sugar has dissolved, stop stirring and allow the syrup to continue heating over low heat. Lay out sheets of paper towels on your counter.
- Using a v-shaped vegetable peeler shave the rhubarb stalks into long strips. Make sure the strips aren’t too thin. I found that the thicker strips were easier to work with and held their shape much better than the thinner strips.
- Once the sugar syrup comes to a boil, add the rhubarb strips to the simmering syrup, one or two at a time. Cook the strips for about 20-30 seconds, then remove them from the pan with two forks (if one end of the strip touches the other end, the ends will stick together and you won’t be able to unstick them, so be careful!).
- Lay the cooked rhubarb strips flat onto the paper towels to drain.
- Once all the strips have been cooked, carefully arrange them on top of the mousse cake and, using a pair of scissors, trim away the excess. The strips will stick naturally. Place the cake in the refrigerator until ready to serve.
- Cake can be stored, covered, in the fridge for two days.
- To cut the cake, I first carefully cut through the candied rhubarb with scissors, before cutting the cake with a sharp knife.
Of course, if you prefer to use powdered gelatin and you know the strength of the powdered gelatin you want to use, you can use that too.
Check the comments section! Some readers have left me useful tips on how much gelatin worked for them!








wow this cake is so beautiful.. craving a slice! pinned!
Thanks Thalia! 🙂
Bonjour Nila ! This is making me hungry… can’t wait for the next post…
Thanks Helene 😉 How is France?
Sounds like you had a great camping trip! Beautiful cake!
I did, Laura! Thanks 😉
Yummy! This looks delicious!!!
Thanks Valya 😉
What a pretty cake.
Thanks Nikki!
Sounds like a great trip! Your pictures of this cake are STUNNING! My mouth is watering scrolling through your post. Keep them coming 🙂
Thank you so much Paula! It’s nice to know my food photography is improving 😉
Wow!! What a lovely presentation! I am totally loving your flavor combination! This is just fantastic!
Thanks Annie! Rhubarb and Strawberry (and thick crumbly cookie crusts) are amazing together, don’t you think?
What a gorgeous cake!!!
Thanks Cece 😉
Wow, this cake is so pretty! Love all that striping, just lovely!
Thanks Kelly! I couldn’t have done it without my sister, though! She’s good at cutesy things 😉
Great recipe Nila, and well done for putting all that effort in to get it spot on. It looks amazing and I’ve no doubt it taste amazing!
Thank you so much Nicky! And yes, it was totally worth messing things up a few times, because this cake is amazing 😉
This cake looks absolutely stunning! I love the simple look of the candied rhubarb topping! Clean, but colorful. Amazing work!
Thanks Lokness! I’m so glad you like it 🙂
I just made this for my son’s birthday, and it was delicious! Thank you!
A few quick notes:
– I used 5 leaves of silver gelatin and it was perfection – for my own future reference!
– if anyone has trouble with the meringue getting kind of dry in the mixer (which I did) whisk it by hand for a minute and it smooths right out
– the ingredient list is missing the water quantity for the meringue, I used 1/2 a cup and it worked out fine
Hi Martina! I’m so glad you liked the recipe! I hope your son had a great day 🙂
Thanks so much for the notes on the gelatin! Adding gelatin quantities to a recipe can be really difficult, because more often than not everyone who reads my recipe has a different brand of gelatin in the pantry. I bet your comment will really help out people who also plan to work with silver gelatin!
I’ve also updated the recipe so that it now includes how much water you should use. As it turns out, it’s not really that important (as the water evaporates) but using less water, such as 3 tablespoons, speeds things up a bit 😉
Your recipes are divine! So glad to have found your blog (and shared it on Facebook 🙂 Wondering what a multimeter is? googled it and found a tool designed to measure electrical current? Warmly Kate Stryker
Hi Kate, nice to meet you! Yeah, the Rocking Rebel makes his own guitar amps and things like that, so I often find weird (but very useful!) tools lying around the house. The multimeter was one of them… 🙂
Hello Nila, I stumbled across your blog after reading at few articles at Serious Eats. I do know why your strawberry puree curdled when you folded in the whipped cream, so I thought I’d share. It’s about the high water content in both the strawberry puree and the heavy cream. Strawberries have a large amount of water in them compared to many/most other fruits. If you cook down the puree to evaporate some of the water out of the puree it will be thicker and better able to mix into other items (or buy concentrated fruit purees). Heavy cream has butter fat and ideally that would thicken the puree, but it’s not quite enough fat and too much water so when they are combined it’s just too much water. BUT using a cooked/stabilized meringue (which doesn’t have any water content) in the mousse helps the fat and water to bind.
Also if you want to know more about gelatin Michael Laiskonis has written an extremely helpful article on it. He shares comparisons and conversion charts.
Hope that helped,
all my best,
Wendy
Hi Wendy, thank you so much! My sister and I just couldn’t figure out why the mousse kept splitting 🙂 I’ll make sure to check out Michael Laiskonis article too. Working with gelatin, well… writing about gelatin in recipes, can be difficult, because obviously there are different kinds of gelatin available.
Thanks again!
Hi Nila,
Thanks for all the tips regarding mousse cooking! I did a pineapple mousse yesterday and it was not too bad, just seen this morning there was a thin layer on the bottom I was wondering what it was and that’s how I came across your page! that’s great, I definitely have to try your recipe!
Thanks again
Have a nice day from Paris! 😉
Thanks Cynthia! Glad I could help 😉
The texture on this looks heavenly and the design on top?! To die for!
Thanks Eden! I really loved how this cake turned out! It was a LOT of work though 😉 Btw, LOVE your blog!