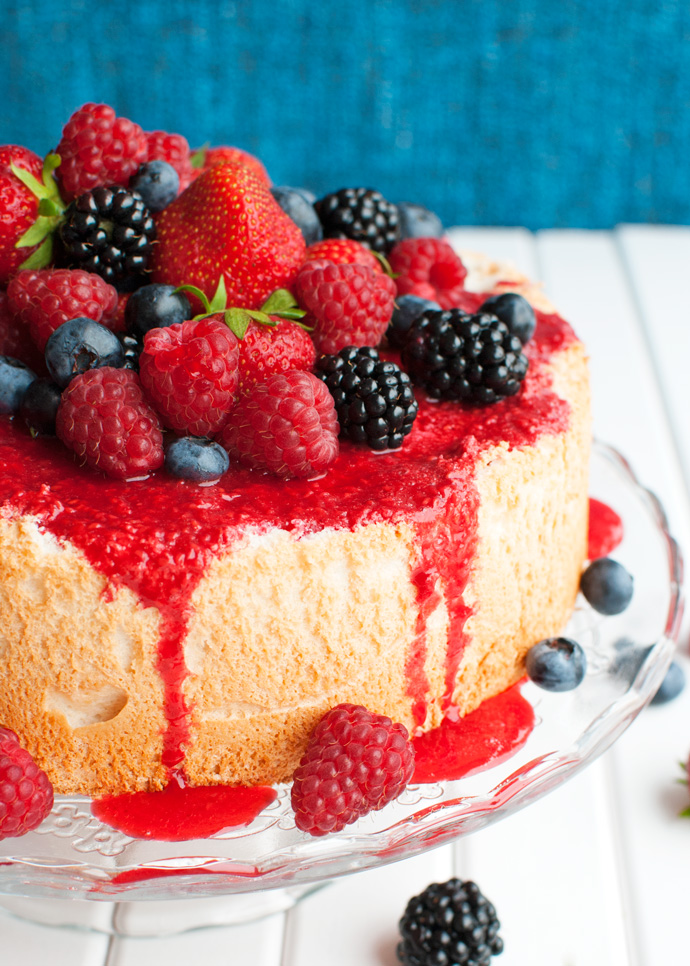
 Hey everyone! Look what I made!! The PERFECT angel food cake!!! Tatadadaaa!!!!
Okay. So maybe I went a little crazy with the exclamation points and the pink letters there, but I couldn’t think of another way to emphasize that this cake is the acme of perfection! If I could, I would have added sparkles and golden stars, too. This cake deserves it. It’s sooo fluffy. And dreamy. And look at it: it’s ridiculously beautiful. And most importantly: very, very yummy!
I made this cake for my oldest sister’s birthday two weeks ago, because I wanted to make her something special. She asked for a light, fruity cake, because we were having a massive birthday dinner party later, and what is lighter and fluffier than an angel food cake? Exactly! Instead of topping the cake with the traditional whipped cream, I decided to opt for a sweet and vibrant, homemade raspberry sauce, too. Just to keep it fresh and to balance out the sweetness of the cake a bit. Pile on a mountain of fresh summer berries, and you’ve got yourself the perfect summer birthday cake!
My entire family loved it! But that’s only because it was – like I said – perfect. There wasn’t a single crumb left of this beauty! And I’m positive that if I had made a second one, it would have been devoured just as quickly as this one! That’s just what happens when you make a perfect cake. Fact of life.
Oh, and what is this I hear about angel food cake being a tough cake to make? It’s soo easy! Take a few precautions, understand what you’re doing and the cake can be whipped up in under an hour! You don’t even have to grease the pan! Me like…
If you’ve been having trouble making the perfect angel food cake: don’t worry, I’ve included lots of tips and tricks in this post. And you don’t even need cream of tartar to make this baby!
 Okay, the first – obvious – thing you need to know about this cake, is that it’s baked in a specialized cake pan: a tube pan. A tube pan is a tall, round cake pan with a tube in its center. That’s why angel food cakes always (or, well, usually) have a hole in the middle. The idea is that, because the angel food cake is mostly beaten egg whites and contains no chemical leavening-agent, the tube enables the cake to rise evenly. As the cake bakes and rises, it will ‘climb’ up against the sides of the pan. If you were to bake this cake in a normal round cake pan, chances are that the center of the cake won’t rise, as it would lack a vertical surface to climb up against.
For this same reason, some people suggest that you shouldn’t use a tube pan with a non-stick layer. Theoretically, the non-stick layer may prevent the batter from clinging to the sides of the pan, which means that the cake won’t rise properly. So, it you want to play by the angel-food-cake-making rules, use an uncoated, metal 23-cm/9-inch tube pan (so without the non-stick-layer).
Having said this, my ‘angel food cake pan’ is from Ikea. It’s round, tubed, it has a removable bottom, and it most definitely has a non-stick layer. Say what?? Yes, my pan has a non-stick layer and, like I said, my cake turned out perfectly! It rose beautifully and it was light and spongy. My theory? Well, whenever I don’t grease a non-stick pan and use it for ordinary cake making, the cake always sticks. Always! In other words, I don’t think it’s that surprising that my cake turned out more than fine. And apparently, I’m not the only one who has managed to make a great angel food cake in a non-stick pan. A little Googling taught me that lots of home bakers use a non-stick tube pan. As long as you don’t grease it, the cake should have no trouble climbing up against the sides of the pan.
And there’s more! According to some home bakers, you don’t even need a specialized tube pan! You can even bake an angel food cake in a loaf pan! I must say that I haven’t tried this yet, but it sounds promising… So, if you don’t have a tube pan, bake the cake in one or two loaf pans! Just bear in mind that you may need to adjust the baking time; when the top of the cake is golden and a tester inserted into the center of the cake comes out clean, the cake is done.
Just one final word of advice: if you do decide to use a tube pan, use a pan with a removable bottom. Because this cake sticks to the sides of the pan, getting it out of the pan involves a knife and a little bit of luck. If the bottom is removable, getting the cake out of the pan in one (beautiful) piece shouldn’t be too difficult. If the bottom isn’t removable, you’ll need all the luck you can muster. So make life a little easier and use a pan with a removable bottom. And no, don’t even think about using a bundt pan!
So, just to sum it all up:
- Use a 23-cm/9-inch tube pan OR one or two loaf pans.
- Don’t use a round cake pan without a tube.
- Stick or non-stick; it doesn’t really matter…
- A removable bottom makes getting the cake out of the pan a LOT easier (and the cake will be prettier).
 Okay. Now let’s take a look at the cake’s ingredients.
To make a perfect angel food cake, you’ll only need cake flour, sugar, salt, lots of egg whites, lemon juice and vanilla. That’s it. Only six ingredients.
Cake flour is basically very finely milled flour with a low protein (or gluten) content that is bleached to make it more absorbent. Whereas most all-purpose flours have a protein level of about 11-12%, cake flour contains only about 8-9% protein. The low protein-level ensures that the finished product has a delicate, fine crumb. On top of that, the fact that the flour is finely milled and more absorbent ensures that it more readily absorbs the moisture from the egg whites, which means that it’s easier to lightly fold this flour into the beaten egg whites. Finally, the bleached cake flour gives the angel food cake a gorgeous white interior.
Buuuuut…. If you can’t get your hands on cake flour, no biggie. You can use all-purpose flour instead. Cake flour helps in getting a light and airy texture, but if you can fold like a pro with a rubber spatula, you can get great results with regular all-purpose flour. And just so you know, I don’t believe in making your own cake flour (by combining all-purpose flour with a little cornstarch) for this recipe. You want to use cake flour because its finely milled, bleached and low in protein, and you can mix all-purpose flour with cornstarch all you want, but the individual particles of all-purpose flour will never absorb moisture as readily as cake flour.
Oh, and if you like to bake with cups: make sure to properly measure the flour! It’s really important for this cake. To properly measure flour, spoon the flour into a measuring cup, then level the surface with a knife. If you pack the flour into the cup, or use the cup to scoop out the flour, your measurements will likely be way off! If you have a scale – like yours truly – use it!
When it comes to the sugar, I can keep it short. Use superfine granulated sugar (baker’s sugar or caster sugar) if you can find it. It dissolves into the egg whites a lot faster and makes for a better meringue! If you can’t find superfine granulated sugar in stores, just use the regular stuff or make your own by pulsing granulated sugar in a food processor (or a blender, even) until the crystals are a bit smaller.
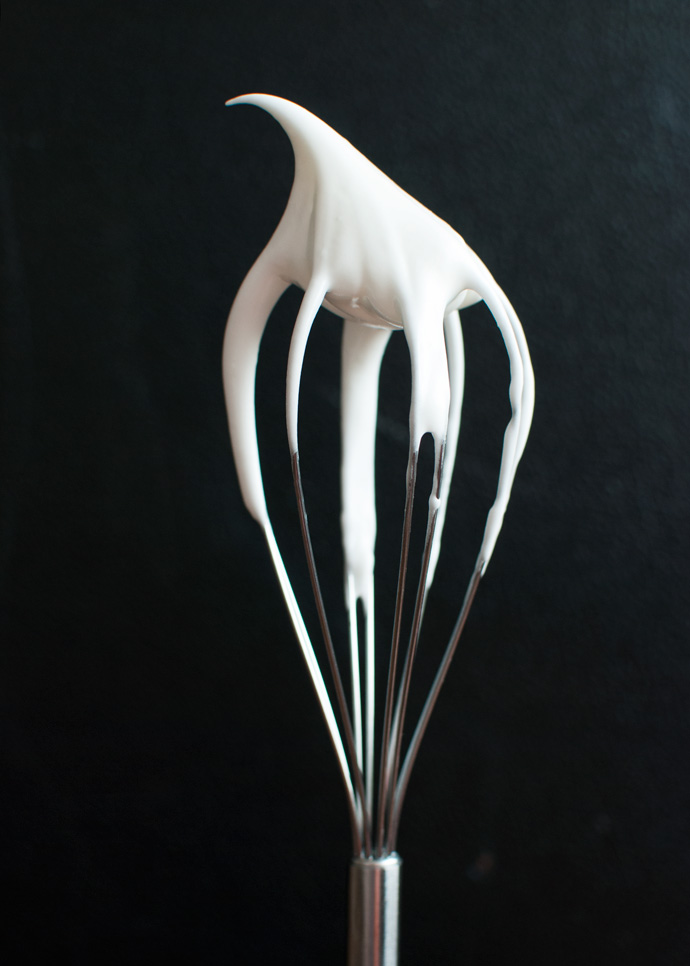
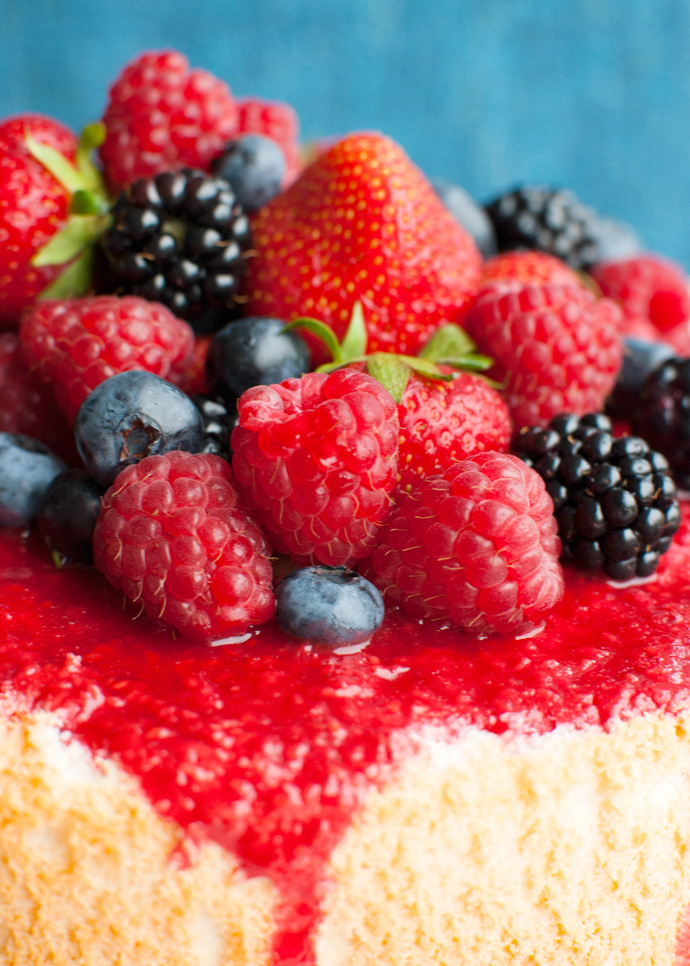
Anyway, moving on to the egg whites. You’ll need a lot of egg whites for this cake. No less than 300ml (or 1¼ cup), which is about 10 large egg whites. Because eggs come in all kinds of shapes and sizes, I strongly advise you to measure the whites by volume before you start mixing. Cakes can be temperamental when you mess with the amount of ingredients… Once you’ve measured the egg whites, you need to whip them up with some sugar and lemon juice, until the meringue can hold medium peaks. If you’re not sure what that is supposed to look like, take a good hard look at that photo up there. The French call this stage bec d’oiseau, which means bird’s beak. Yes, you want the peak of meringue to look like a bird’s beak. It shouldn’t be completely stiff yet. You don’t want it to look like hard ice crystals, or something. You want the peaks to kind of curve a little, because as the cake bakes, the meringue needs to be able to expand in order for the cake to rise. If the meringue is too stiff to begin with, the cake won’t rise as beautifully.
Oh, and please be gentle when you’re folding the flour mixture into the meringue. It’s easy to deflate meringue, even a stabilized meringue, so make sure not to overmix!
Finally, a note on cream of tartar. A lot of recipes for angel food cake also call for cream of tartar, because it stabilizes the beaten egg whites. But what is cream of tartar? As I explained in my post on the difference between baking soda and baking powder, cream of tartar is an acid salt. In a meringue, the acidity of the cream of tartar (or vinegar) strengthens the egg white proteins that trap the air into the meringue (thus stabilizing the meringue). Because it is the acidity of the cream of tartar that ensures a stable meringue, other acids may also be used, such as vinegar or lemon juice. Most recipes call for cream of tartar, because it has no flavor (even though it’s a salt). Vinegar and lemon juice, on the other hand, will add a little bit of flavor to the finished product.
Because I don’t like vinegar in my baked goods and there’s no way I’m spending a ridiculous amount of money on a measly jar of cream of tartar, my recipe calls for lemon juice only. It both stabilizes the egg whites and gives the cake a hint of extra fruitiness. So no cream of tartar needed!
Tips:
- If you can find it: use cake flour.
- Make sure to properly measure the flour if you’re using measuring cups.
- Measure the egg whites by volume.
- Beat the meringue to the bird’s beak stage (as shown in the picture above).
- Use lemon juice to stabilize the meringue. It’s cheap and readily available.
 Once you whipped up a gorgeous batter, it’s ready to bake the cake. Temperature is important. Duh… Too hot and the cake won’t rise properly. Too low and the cake won’t rise properly either. So make sure your oven is at the right temperature before you put the cake in (175°C/350°F). Once the cake is in the oven, make sure not to open the oven door too soon. If you open the oven door before the batter has had time to bake and solidify, the cake may collapse.
Just be patient and allow the cake to slowly turn a gorgeous golden brown. Once the cake has been in the oven for 35 minutes, check whether it is done by inserting a tester into the center of the cake. It should come out clean.
Remove the cake from the oven and immediately invert the cake pan (yes, turn it upside down. The cake won’t fall out). It’s important to allow the cake to cool to room temperature upside down, as this ensures that the cake won’t deflate. Some tube pans have little feet at the top to make turning them upside down a little easier, but most pans don’t. Many home bakers opt to invert the pan on a wine bottle, but this never worked for me. Instead I invert the pan onto three or four water glasses, so that the edge of the pan rests on the glasses. However, as long as your cake hasn’t risen over the sides of the pan, I don’t see why you couldn’t simply place the cake upside down on a wire rack.
So, in short:
- Make sure you’re oven is preheated to the right temperature before you start baking.
- Test the cake for doneness by inserting a tester into the center of the cake.
- Allow the cake to cool upside down.
 That’s it! That’s all I have for you today. Sorry about the lengthy post, but armed with these tips and tricks, I’m sure your angel food cake will turn out gorgeous! And perfect!
Click here to sign up to my mailing list.
Click here to follow me on Instagram.
- 125g (or 1 cup + 4 teaspoons) cake flour
- 100g (or ½ cup) superfine granulated sugar
- ¼ teaspoon table salt
- 300ml (or 1¼ cup) egg whites (about 10 large eggs)
- pinch of table salt
- 200g (or 1 cup) superfine granulated sugar
- 3 teaspoons freshly squeezed lemon juice
- ¾ teaspoon vanilla extract
- 200g (or 7 ounces) frozen raspberries
- 20g (or 5 teaspoon) granulated sugar
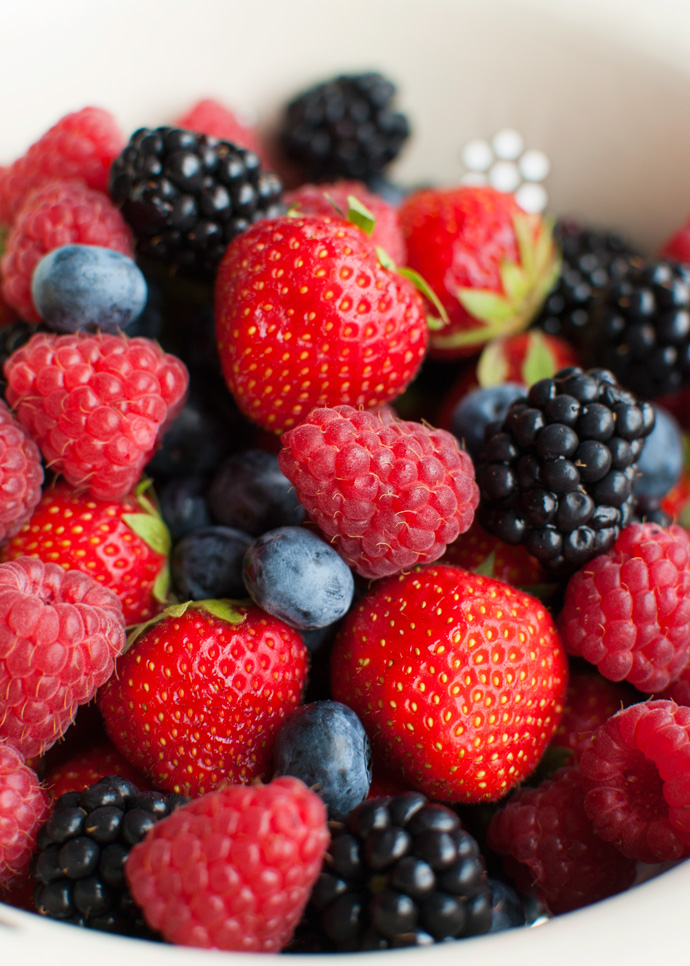
- 750g (or about 1½ pounds) mixed berries, I used strawberries, blackberries, blueberries and raspberries
- sweetened whipped cream (optional)
- Start by prepping a 23-cm/9-inch angel food cake pan (tube pan). Make sure you're using a pan with a removable bottom.
- Wash both the cake pan and a large bowl by hand, using dish soap. Rinse with hot water and dry with a clean tea towel. This step ensures that there are no traces of fat in the pan or bowl. Don't grease the pan!
- Preheat your oven to 175°C/350°F (standard oven setting).
- In a small bowl, stir together the flour, 100g of granulated sugar and ¼ teaspoon of salt. Sift and set aside.
- In the large bowl you just cleaned, combine the egg whites with the pinch of salt. Using a mixer fitted with a whisk attachment, mix until foamy. Mix in the lemon juice and start to gradually add the 200g of sugar. Beat until the meringue can hold soft peaks (bird's beak stage). Add the vanilla and mix briefly until incorporated.
- Using a rubber spatula, carefully fold one third of the flour mixture into the meringue until just incorporated. Repeat with the remaining two third of flour mixture. Be careful not to overmix; once all of the flour mixture is incorporated, stop folding. It's okay if there are still a few lumps in the batter.
- Spoon the batter into the cake pan and smooth the top with a rubber spatula. Gently shake the pan to remove any large air bubbles (don't rap the pan on the counter). Use a tissue or some paper towel to wipe the sides of the pan clean; this ensures the cake rises evenly.
- Bake for 35 minutes, or until a tester inserted into the center of the cake comes out clean.
- Once the cake is done, remove from the oven and immediately invert the cake pan onto three water glasses (so that the edge of the cake pan is resting on top of the glasses). Allow to cool to room temperature.
- In the bowl of a double boiler (or in a heatproof bowl set over a pan of simmering water) combine the raspberries with the sugar. Heat, stirring occasionally, until the sugar has dissolved and the raspberries have softened.
- Take off the heat and, using a stick blender, blitz to a puree. Pass the puree through a fine-meshed strainer to get rid of the raspberry seeds.
- Once the cake has cooled, use a small, sharp knife to loosen the cake from the sides of the pan. Remove the sides of the pan, then use the knife to cut underneath the cake and loosen the cake from the bottom of the pan.
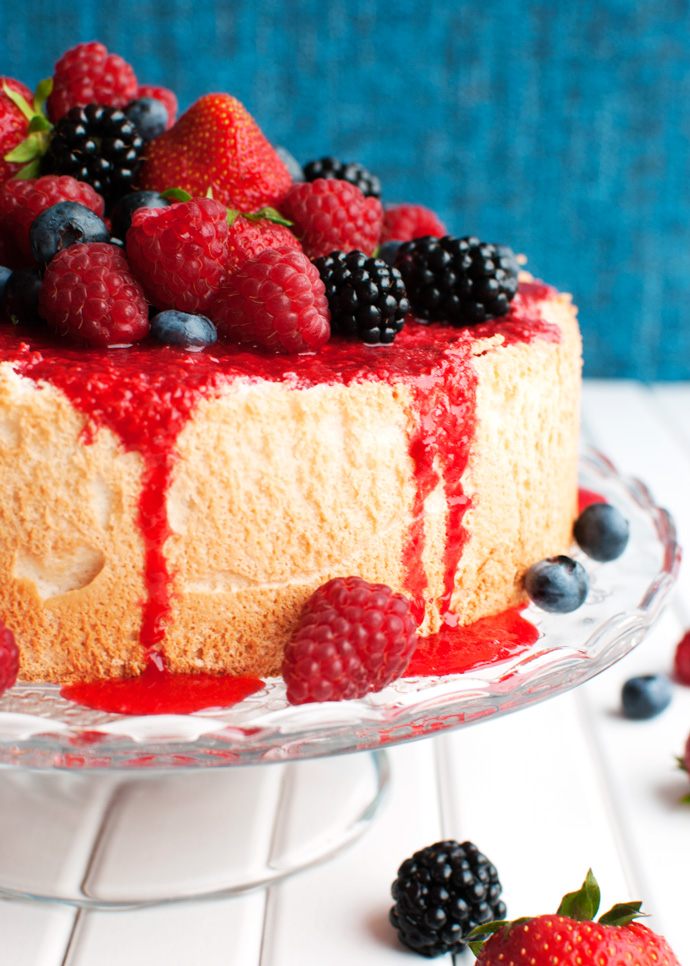
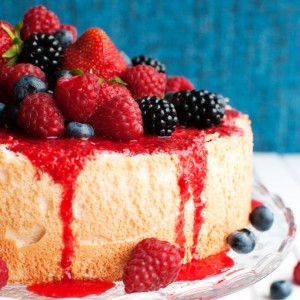
- Place the cake upside down on a serving plate, drizzle with the raspberry sauce and decorate with the mixed berries. Serve immediately, with or without whipped cream.




I must say….your photography is AMAZING! Your recipes are beautiful too. What lenses are you using?
Wow, thank you so much Christina! That makes me so happy 🙂 I always use a Nikon d80 camera body with a 35mm/1.8 lens. The lens was an early Christmas gift last year and I loved it! It’s perfect for food photography!
Your cake looks gorgeous!
Thanks Carrie! 🙂
Personally, I prefer regular flour. I don’t like the super softness (which falls apart) quality of cake flour.
Anyway, I left you a comment about 10 minute “dulce de leche” – I think a week or two ago? I noticed you said you’re impossible to get by email, so perhaps you’ve just been busy. And it is your website, you certainly don’t have to post every comment or reply if you don’t want to.
I made the 10 min recipe in a frying pan, (I was at my cousin’s kitchen, no stove, few pans – I found a hot plate & pan at a yard sale) and despite me stirring furiously, it still took on a slightly burned flavor. I was using medium heat. Perhaps I needed a thicker pan – this was 1950’s aluminum – maybe 3/16th of an inch thick or less, not the super thin cheapie stuff…. Anyway, I was reading other recipes on how to carmelize sugar and one recommended starting with 2 Tbsp of water and one drop fresh lemon juice. I think water would help the sugar melt much faster and more evenly. Anyway, it came out quite thick, I was very pleased and while the sliightly burned taste didn’t go over well, with my cousin and her roommate, I thought it was delish. It was slightly darker than your photo.
Hi Rik! I’m indeed impossible to reach by email, but luckily your comment didn’t escape my attention! You commented under a different name, right? The first part of your email address? Anyway, I replied to your comment on the 23th of August and I had actually been wondering whether you had had the time to make the cheat sauce already 🙂 I’m so glad you liked it!
Whenever you make caramel you need to be careful not to burn it, or the caramel will take on a bitter taste. It is true that it’s easier to make caramel in a thick-bottomed pan, so the quality of the pan you used may have had something to do with the caramel burning slightly. However, the color of the pan you use is equally important! I always make caramel in a light-colored pan, because this makes it easier to monitor the color of the caramel as it cooks. You don’t want it to become too dark!
If you add a bit of water to the sugar when you’re making caramel, you’re actually making a ‘wet’ caramel. If you were to just use sugar, the caramel would be ‘dry’. The finished product would be the same (because the water evaporates), but the method is different. Making a wet caramel can be easier, because the sugar indeed caramelizes more evenly. So next time you make the cheat sauce, please feel free to add a few teaspoons of water to the sugar! The lemon juice prevents the sugar-and-water mixture from crystallizing as it heats, but if you don’t have some, you don’t have to add it. For more tips on making a wet caramel, check out the Basics and Tips section!
Anyway, thanks for sharing Rik 🙂
The cake looks perfect, but that bright red sauce is killing me. I can only imagine how good this tastes!
Thanks Oana! I’m glad you like the look of it 🙂
Ps. it tastes even better 😉
I m about to make this today for our Christmas dessert and I had a question, which I know probably won’t get answered in time so I am going to wing it 🙂
But above you mentioned the superfine sugar being better for the meringue but in the recipe below you say to use the regular granulated sugar with the egg whites and then the superfine with the flour. Is this correct or did I misunderstand the explanation of the benefit of the superfine sugar?
Looking forward to giving this a try tonight! Angel Food cake is my very favorite!
Hi Emily, you’re absolutely right! My bad! I guess I was a bit distracted when I was proofreading the recipe… For best results, use superfine granulated sugar to make the meringue and to fold into the meringue with the flour 🙂
Thanks again for pointing it out to me! How did the cake turn out?
I didn’t read through the recipe in advance, mixed the sugar with the flour based on the instructions, and didn’t realize some of the sugar was supposed to be added to the egg whites. When I realized the mistake, midway through the instructions, I didn’t want to waste the ingredients & start over. Compound mistake upon compound mistake. So, long story short, I ended up with a cake thats about an inch & a half thick. Inedible. Heres to reading through ALL the instructions in advance and not just trying to read & follow a step at a time. 🙁
Hi Donya, I hear you! That’s happened to me sooooo many times when making other people’s recipes! I’ll see if I can clear up the recipe a bit, though. For all those other impatient bakers out there 😉
Thank You for this fantastic recipe. I made it with gluten free flour , and it turned out marvellous. The cake’s texture is soft and moist. Telling the truth, it took about one and a half hour to bake the cake in order to achieve a good result. I believe that it happened because of the gluten free flour.
Regards from Hungary
Hi Ildiko, I’ve never tried making this cake with gluten free flour, so I honestly don’t know if that’s why the cake took an hour and a half in the oven. I’m so glad you like the recipe though! 🙂
I literally have never written a comment about anything on the web before but I have to say this cake was incredibly easy to make and a lot of fun too. I was forced (due to oven failure) to use a toaster oven, but it still came out absolutely perfect. I cannot thank you enough for spelling out the intricacies of how to get it right and taking the intimidation of such a delicate cake out of things- it was truly nice to know why (or why not) I was doing what I was doing. Not only was the cake wonderful but I feel I learnt a thing or two!!
You rock
I’m so glad you liked the cake so much Wonnita! And I think it’s awesome that it turned out so well, even though you had to bake it in a toaster oven 😀