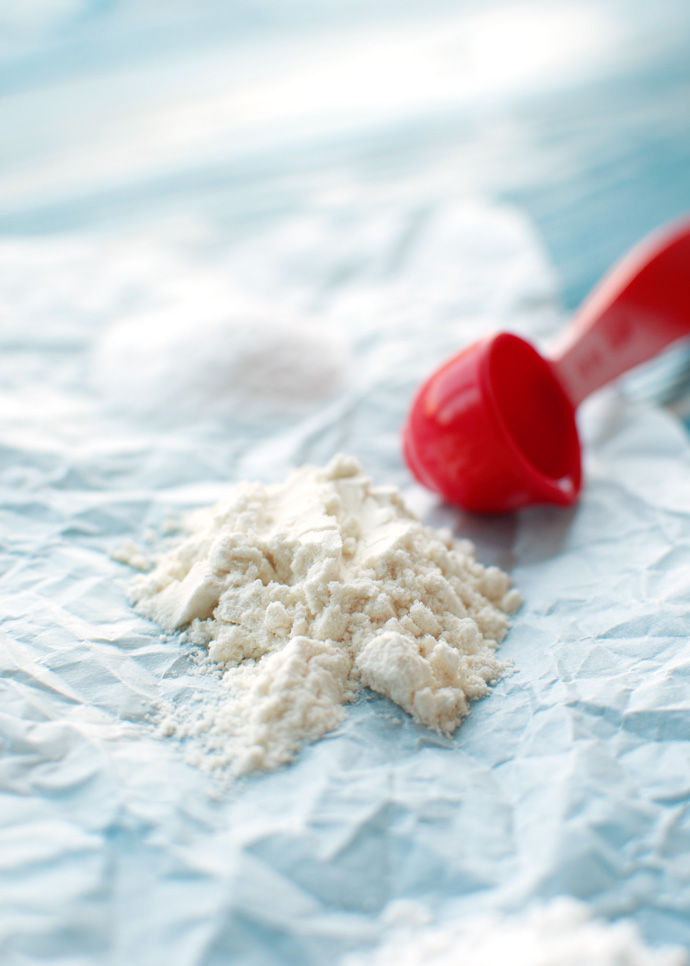
 Hey everyone! Long time no see!? Can I say see? Wait, can I type see? Or should I say – um, type – that I haven’t blogged for some time? You know what? Let’s not be one of those obnoxious people who try to be correct and right all the time. I mean, I know I’ve never met most of you face-to-face, but let’s not make this whole blogging-thing too difficult for me, okay? Right now, my life is difficult enough as it is: I’ve been sick. In fact, I’m still a little sick!
And I hate being sick!
The past week, I’ve been in and out of bed with a major head cold! One of those sneaky head colds that lure you into thinking you may not really get sick from it… Those head colds that somehow manage to convince you that if you just kill your head ache (and throat ache and neck ache and all other aches you may have) with some aspirin and go to bed early, you’ll be fine the next day… The stupid, irritating kind of head cold that makes you feel like you’re all better when you wake up, only to knock you down after breakfast again…
Aaaanyway, that kind of head cold. It got me! Which means that I’ve spent the last week (with the exception of one or two days on which I actually – and naively – thought that my body had banished the bug) on the couch, wearing the Rocking Rebel’s worn-out sweat pants (because they’re way more comfortable than my tight, semi-fashionable ones), watching episodes of Mad Men on Netflix.
I know that sounds like I had a good week. I mean, what’s wrong with wearing sweats and chilling on the couch watching Mad Men? Nothing, right? But trust me, it’s not that much fun when you’re sick…
Worst part of my head cold? I can’t taste anything! Nothing at all! I keep looking for strong flavors that I might actually be able to taste, like tiramisu or peanut butter, but it seems that my head cold has kidnapped my tastebuds and hidden them somewhere in a dark basement. If you happen to find them, please contact me asap! Because – just in case you’re missing the obvious here – trying to come up with new and exciting recipes for your food blog is pretty hard when you cannot taste anything!
But don’t worry, I’m kind of creative. In fact, I should be in Mr. Draper’s team of creative geniuses/weirdo’s/Peggy’s! Anyway, not being able to taste anything isn’t the end of the world for my blog. I just came up with this post instead! To keep me from thinking too much about chocolate, cake and other things that are of no use to me right now and to learn more about baking soda, self-raising flour and baking powder!
You know, for when I’m better…
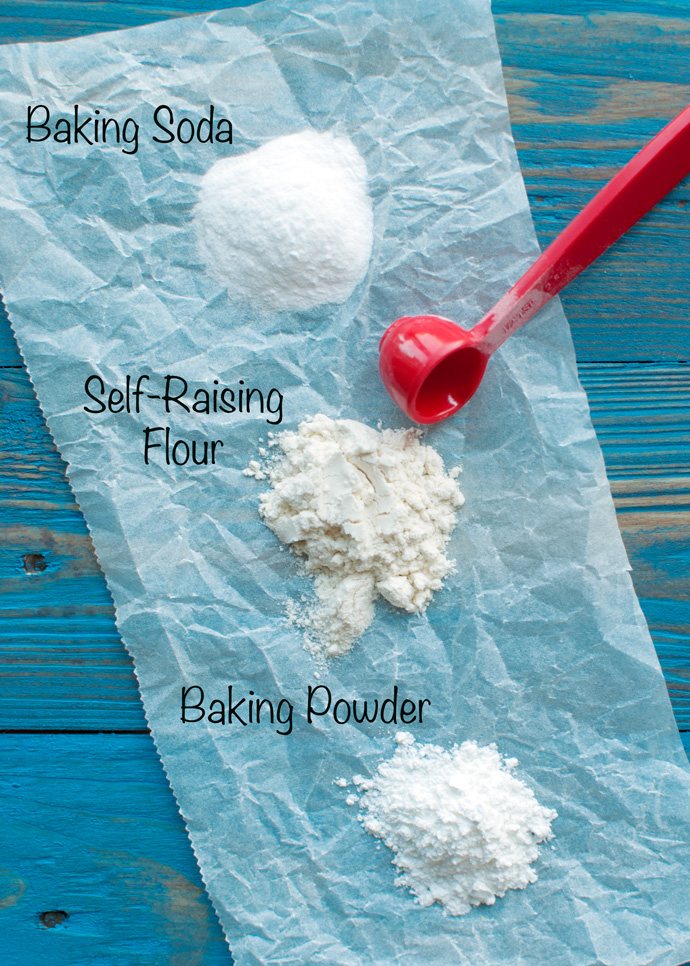 Oh, and let’s just say you want to make a cake today. Just now that baking powder, baking soda and self-raising flour react in the same way in all kinds of batters and doughs. So whether you’re making a cake, cookies, quick bread, muffins or pancakes, these rules can be applied to the mixing and baking process. I’m only going to talk about cake from now on, because I don’t want to have to say, um, type out the long list of different baked goods these rules apply to all the time. It makes for much easier reading (and typing). Trust me…
What is the difference between baking soda and baking powder?
As any home-baker knows, baking soda and baking powder are both leavening agents, which means that you can use them to make cake batter (cause you want to make a cake today, remember?) rise during baking. Once in the oven, both baking soda and baking powder produces bubbles of carbon dioxide that expand in a hot oven, lightening the texture of your cake and making it fluffy and delicious.
Baking soda, also known as bicarbonate of soda, is basically pure sodium bicarbonate: a chemical compound with a slightly salty, soapy taste. It is usually sold as a fine powder and it kind of looks like ordinary table salt with a finer texture. Combined with a liquid and an acidic ingredient in your batter or dough (such as buttermilk or cocoa powder) it releases carbon dioxide. In order for this reaction to occur, the batter needs to reach a temperature of about 80°C/175°F.
In other words, in order for baking soda to function properly, you need to make sure:
- that your batter contains a liquid ingredient (such as water or milk)
- that your batter contains an acidic ingredient (such as yogurt, buttermilk or lemon juice)
- that you heat the batter to a temperature of 80°C/175°F
Baking powder is a mixture of a carbonate or bicarbonate, usually sodium bicarbonate (or baking soda), and an acid salt, usually cream of tartar or a combination of two different acid salts. On top of that, it usually contains a neutral starch such as cornstarch to absorb moisture (and thus prolong shelf-life by preventing the chemicals from reacting together before the reaction is required) and to make accurate measuring possible for home users. The cornstarch does not affect the leavening chemicals, though. In other words, baking powder is basically baking soda with an added acidifying ingredient that causes the baking soda to react even if your batter lacks an acidic ingredient like buttermilk or natural cocoa powder (say what?).
But what about single acting versus double acting baking powder?
There are two kinds of baking powder: single-acting baking powder and double-acting baking powder. Single acting baking powder only contains one kind of acid salt, usually cream of tartar. The cream of tartar in single acting baking powder reacts with the sodium bicarbonate as soon as the baking powder comes into contact with water or another liquid. In other words, it reacts upon hydration and it does not need to be heated in order for the chemical reaction to occur. In the real world, this means that if you’re using single acting baking powder, you need to get the batter into the oven as soon as you’ve mixed it or you risk ending up with a deflated cake.
Here’s how that works: once you mix single acting baking powder with a wet ingredient, the baking powder is activated and starts to release bubbles of carbon dioxide gas. In order for your cake to rise properly, the carbon dioxide bubbles need to get trapped inside the cake and expand. The bubbles get trapped when the liquid batter bakes (aka: solidifies) in the oven. However, if the carbon dioxide gas escapes before the batter turns into cake (which happens in the oven), the cake won’t rise.
So single acting baking powder = get that cake in the oven!
Double acting baking powder contains two acid salts, cream of tartar and another one, which react with the sodium bicarbonate at different temperatures. The cream of tartar in the baking powder reacts with the baking soda at room temperature, causing an initial rise, but the bulk of the leavening action occurs at a higher temperature, when the cake (or muffins, or cookies or whatevs…) is in the oven. Thus, double acting baking powder ensures that, even if you leave the batter on the counter for a couple of hours, the cake will rise.
So double acting baking powder = no need to rush…
Luckily for us home bakers who don’t like heavy, dense cakes, most baking powders sold in stores today are double acting. Phew…
So when do I use baking soda?
You only want to use baking soda if it’s going to be mixed with an acidic ingredient. Here’s a list of a few acidic ingredients commonly used in baking:
- buttermilk
- yogurt
- lemon juice or any other kind of citrus juice
- vinegar
- honey (yes, honey! Who knew?)
- some kinds of chocolate
- molasses
- sour cream
- brown sugar (because of the molasses!)
- cream of tartar
- cola
- natural cocoa powder (so not the Dutch-processed kind)
If you’re recipe calls for any of these ingredients, you can use baking soda.
And when do I use baking powder?
Use baking powder whenever your recipe doesn’t call for an ingredient from the list of acidic ingredients. Just remember to only use single acting baking powder if you know you can get the batter into the oven seconds after you’ve mixed it up, otherwise you’re cake won’t rise!
Personally, I only use double acting baking powder, because – honestly – that’s all I can buy around here. But hey, I don’t like stressing in the kitchen and I want to be able to take that hypothetical long-distance phone call even when I’m in the middle of making a cake, so I guess that’s a good thing…
Why should I use a combination of baking soda and baking powder?
Like I said, baking soda is used whenever an acidic ingredient is used in the batter, such as natural cocoa powder or orange juice. The acidic ingredient not only activates the baking soda, causing the cake to rise, it also neutralizes its unpleasant, soapy flavor. However, sometimes the amount of baking soda needed to properly rise baked goods is more than the acidic ingredient in the batter can neutralize, flavor-wise.
In this case, should you insist on using only baking soda, you either end up with a soapy cake or a flat, dense cake. So should you use baking powder instead? Well, as you know, baking powder is baking soda with an added acid, which makes it neutral in taste. Aka: if you’re using baking powder, you should be in no danger of ending up with a soapy cake, right? Wrong! Not only does the acidic ingredient neutralize the soapy flavor of the baking soda, the baking soda also mellows the acidic taste of whatever acidic ingredient you’re using. In other words, if you were to use just baking powder in a recipe that calls for an acidic ingredient, the resulting cake (’cause that’s what we’re making today) may taste too acidic.
Dilemma, dilemma…
The solution to this problem? Use just the amount of baking soda the acidic ingredient in your batter can neutralize (to prevent a soapy taste) and add a little baking powder to ensure that the cake rises properly. The baking powder is neutral, so it doesn’t add an unpleasant flavor, and the baking soda mellows the acidic taste of the ingredient it reacts with.
Problem solved!
Can I use baking powder instead of baking soda?
Baking powder not only contains baking soda, it also contains an acid salt and cornstarch, whereas baking soda is a pure, chemical leavener. In other words, if you want to use baking powder instead of baking soda…
- you probably need to use more. Up to three times as much! Remember, baking powder contains starch, which is not a leavening agent, it is just a filler.
- the taste of the resulting product will not be the same. Be aware of the fact that the taste of the acidic ingredient your recipe likely calls for will not be neutralized by the baking powder. Baking powder does not neutralize the flavor of acidic ingredients because it it neutral in flavor.
- you add cornstarch, which may affect the texture of your baked goods.
So, no. Ideally you don’t want to use baking powder instead of baking soda… But if you must, use two to three times as much baking powder as baking soda.
So can I use baking soda instead of baking powder?
No, baking soda needs an acidic ingredient in order to work properly. Baking powder already contains this acidic ingredient, so it doesn’t need one, but without it, baking soda won’t be able to release the carbon dioxide gas that will make your cake light and fluffy. So, if you’re recipe doesn’t call for an acidic ingredient, you cannot use baking soda.
However, you could try to change the recipe a little, so that it does contain an acidic ingredient. For example, try using buttermilk in a recipe, instead of regular milk. The acidic buttermilk will react with the baking soda, causing your cake to rise.
However, you can also make your own baking powder, but you will need cream of tartar for this (which is something I’ve never been able to get my hands on).
How to make baking powder at home?
First, determine how much baking soda you need by dividing the amount of baking powder the recipe calls for with three. For example, when your recipe calls for 1½ teaspoons of baking powder, you’ll need ½ teaspoon of baking soda. Now that you know how much baking soda you’ll need, take twice as much cream of tartar and mix well. So for ½ teaspoon of baking soda, you’ll need 1 teaspoon of cream of tartar, resulting in 1½ teaspoons of homemade baking powder.
You get the same result if you mix together 1 part of baking soda with 2 parts of cream of tartar and use the amount of baking powder called for in your recipe. So if the recipe calls for 1 teaspoon baking powder, use exactly 1 teaspoon of homemade baking powder.
Okay, so what about self-raising flour?
Self-raising flour, also known as self-rising flour, is basically all-purpose flour with baking powder and salt added to it. Because the flour already contains salt and rising agents, recipes that call for self-raising flour usually don’t call for additional salt or rising chemicals.
Some people prefer to use self-raising flour over all-purpose flour and leavening agents, because in self-raising flour, the leavening chemicals are evenly distributed throughout the flour, which means that it will give your cake the same lift every time you use it. However, the leavening agents in self-raising flour can expire over time, causing the self-raising flour to lose its ability to lift your baked goods.
Can I make homemade self-raising flour?
Sure you can! If you don’t have self-raising flour and a recipe calls for it, just combine 375g (or 3 cups) of all-purpose flour with 4½ teaspoons of baking powder and ¾ teaspoon of salt. Mix well, then simply use your homemade self-raising flour instead of store bought self-raising flour. For example, if the recipe calls for 2 cups of self-raising flour, use 2 cups of the homemade stuff!
Can I use self-raising flour instead of all-purpose flour?
It’s a bit tricky and it depends on the recipe, but it can be done!
Just keep in mind that, whenever you want to use self-raising flour instead of all-purpose flour, you’re not only substituting the all-purpose flour, you’re also substituting the salt and baking powder, so be sure to scratch those from your ingredient list! For example, if a recipe calls for 2 cups (so 250g) of all-purpose flour, 3 teaspoons of baking powder and ½ teaspoon of salt, you could just use just 2 cups of self-raising flour, but if you really want to be exact, you should use 2 cups + 3½ teaspoons of self-rising flour, because you also need to substitute 3 teaspoons of baking powder and ½ teaspoon of salt.
Makes sense, right?
But what do you do when a recipe calls for 2 cups of all-purpose flour, 4 teaspoons of baking powder and 1 teaspoon of salt? Just adding self-raising flour won’t do! Remember, 2 cups of self-rising flour contains about ½ teaspoon of salt and 3 teaspoons of baking powder. In other words, the ratio’s used are completely off! In this case, you’ll need to determine how much baking powder and salt you need to add after you’ve substituted the all-purpose flour for self-raising flour:
1 teaspoon of salt – ½ teaspoon of salt = ½ teaspoon of salt
4 teaspoons of baking powder – 3 teaspoons of baking powder = 1 teaspoon of baking powder
In other words, if you want to substitute 2 cups of all-purpose flour, 4 teaspoons of baking powder and 1 teaspoon of salt for self-raising flour, you’ll need:
2 cups + 3½ teaspoons of self-rising flour
½ teaspoon of salt
1 teaspoon of baking powder
Like I said, using self-raising flour instead of all-purpose flour can be a bit tricky, depending on the recipe. Just keep in mind that…
- 1 cup of self-raising flour is not the same as 1 cup of all-purpose flour. A cup of self-raising flour actually contains less flour than a cup of all-purpose flour, because the self-raising flour also contains salt and leavening agents.
- substituting the all-purpose flour for self-raising flour means omitting (or at least changing the amount of) salt and baking powder in a recipe, because the self-raising flour already contains this.
- for every 1 cup of all-purpose flour that you substitute with self-raising flour, ¼ teaspoon of salt and 1½ teaspoons of baking powder need to be scratched from the recipe’s ingredient list, which means that for every 1 cup of all-purpose flour you substitute with self-raising flour, 1 cup + 1¾ teaspoons of self-raising flour needs to be added.
Hope this is helpful! Peace out!
Click here to sign up to my mailing list.
Click here to follow me on Instagram.
- 3 cups of all-purpose flour
- 4½ teaspoons of baking powder, preferably double-acting
- ¾ teaspoons of table salt
- Combine all ingredients in a large bowl.
- Mix well.
- Store in an airtight container for up to six months.
Some sources:
- The Kitchn
- chemistry.about.com
- foodreference.about.com
- Wikipedia – Baking Soda
- Wikipedia – Baking Powder
- Wikipedia – Self-Rising Flour








Wow this is so interesting!
I’m studying to become a Chef and i don’t get this kind of nfo at school!
I love yor blog BTW!
Have a great day!
Thanks Alejandra! 🙂
I was actually debating about the subject with my mom a couple of days ago! Will send her the link to your great post!
I’m glad you like the post Sharon! Thanks 🙂
Thanks a lot for your page on Baking Powder and Baking Soda. Very clarifying of elements I had not idea of.
You certainly know a lot and I appreciated reading the technical part. And I will come back to your page.
I could do without your long story about being sick, though… Keep the cold in and private and bring your genius out and public!!! Happy New Year…
Happy new year to you too 🙂
i really love how you made it so detailed and scientific. I’ve been looking at recipes for red velvet cake that doesn’t include red dye at all, and they all have these acidic stuff: buttermilk, vinegar, lemon juice, and the non dutch cocoa powder in it to make the cake look naturally red, and i was wondering wouldn’t the cake turn out really acidic? Those recipes do call for baking soda though. But then, there’s one other recipe that stated that using baking soda would make the red color dull and thus use the baking powder instead. So i was thinking because i want a vibrant red colored red velvet cake without a single drop of red dye from a bottle maybe i should do that instead. I guess that wouldn’t work. Though looking at her recipe the only acidic ingredient in it is the natural non dutch processed cocoa powder. And so, now i know why. Thank you.
Very helpful. I have a carrot & walnut cake recipe that required 250g plain flour,2tsp baking soda, 2 tsp baking powder and 1/2 salt. I substituted the above with 250g self raising flour and 2tsp baking soda and 1/2 salt.
I loved the fluffy cake I got but the soda taste was so overpowering that it ruined the entire cake. please help with what I can change as i would still prefer to use self raising flour.
Hi Sunga, I’d first try using baking powder instead of soda. Let me know if it helps with the flavor of the cake!
Good Blog! It helped me a lot.
Thanks Suzie! 😀