What I like about this time of year is that you can eat as much soup as you want without ever feeling a little weird about it. You just can’t do that in spring. Or summer, for that matter. Soup means lit fire places, rain or snow and cold hands and feet. So now is the time for soup! And I like soup, so eating soup is what I do.
Hi, my name is Nila. I’m a soup lover…
But, when I say that I love soup, I mean soup with bread. Sure, I enjoy a plain, boring bowl of soup every now and then, but if you really want to make me a happy soup eater, it needs to be served with bread. Lots of it!
Hi, my name is Nila. I’m a bread lover…
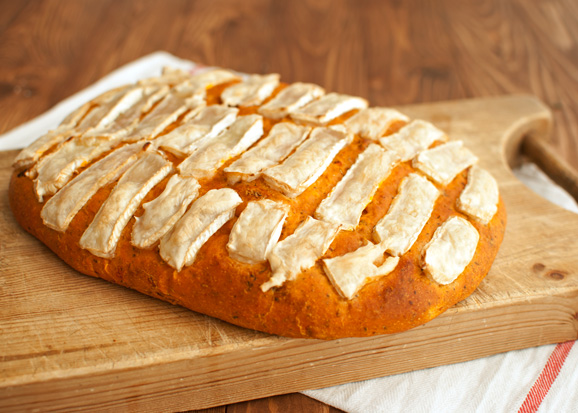
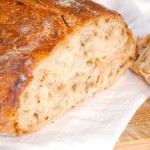
And this particular little loaf is my new lover!
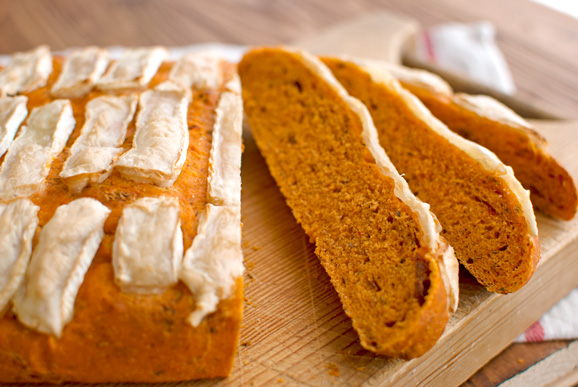
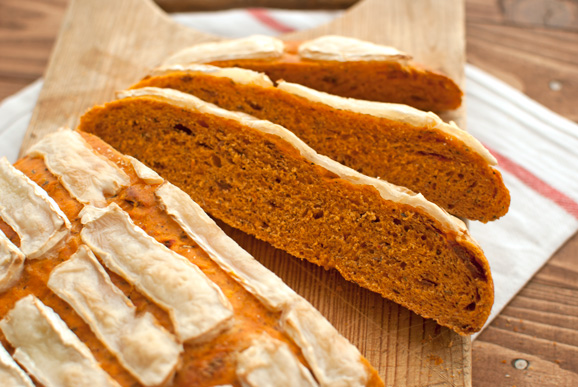
As the title of this post suggests, this is my Mediterranean Tomato Bread with Goat’s Milk Camembert. Quite a mouthful, i know! But I wanted its name to be descriptive. And since this bread contains a mix of Mediterranean herbs, tomato and – you guessed it! – goat’s milk Camembert, I thought the name was quite fitting…
Plus, this bread’s name alone is reason enough to give it a go!
Seriously, if you love pizza, lasagna, pasta or tomato sauce flavored Jelly Beans, you will absolutely love this bread!
I, for one, enjoy making bread, but I know that there are people out there who feel intimidated by the whole kneading, rising and baking process.
So here are some handy tips and pointers: first, you want to make sure that the yeast you’re using is actually alive. Sounds creepy, right? A bit like you’re making a Frankenstein monster or something…
Truth of the matter is, that yeast is a live organism which needs to survive your kitchen cupboards in order to make your bread nice and puffy. If the yeast gets too cold (or too hot) it can perish and it will be completely useless. On the other hand, if you treat your yeast right, it will reward you with gorgeous bread!
So, here’s how I use yeast. First of all, I always use active-dry yeast. There are other types of dry yeast – including instant-dry yeast, which contains smaller granules of yeast causing the bread dough to rise faster – but I have never been able to get my hands on those types, so I’ve never experimented with them (aka: I’ve never bothered to go out of my way to get some).
Dry yeast should normally be activated in liquid, usually water. For this bread, tomato juice – the stuff you make Bloody Mary’s with – is used to activate the yeast. The thing that is important though, is that the liquid (in this case the tomato juice) should be lukewarm to warm (but certainly not hot!) in order to properly activate the yeast. If the yeast is alive, it will also activate in cold water, but like I said: yeast is a live organism and you need to keep it happy if you want your bread to be perfect.
In short, this is what I did to make my yeast happy: I gently warmed the tomato juice in a small saucepan until it felt about as warm as my finger. Aka: I heated it to body temperature, which is perfect for yeast. After I added the now warm tomato juice to a small bowl, I sprinkled the yeast onto the surface, allowed it to bloom for a minute, and then stirred it in. Next, I set a kitchen timer to 10 minutes and allowed the yeast mixture to rest on the countertop. Ten minutes later, it looked like this…

Looks a bit like brains, right? (Frankenstein’s brains?)
Anyway, this is what your yeast mixture should look like after it has rested. If it doesn’t, the yeast you used is probably dead… Time to throw it out!
The next difficult thing is the kneading. I always knead by hand, mainly because the most fancy piece of equipment I got in my kitchen is the hand held mixer my father-in-law just returned to me after it almost exploded (no joke…), which means that I don’t have a fancy knead-thingy… Oh, and I also have a food processor, but I can’t use it to knead dough, so that doesn’t count.
Aaaanyway, I knead by hand. And believe me, if you want to do it right, you need a lot of elbow grease as well! Kneading dough is hard work. 15 minutes of hard work! Yes, 15 minutes! It’s quite a workout… Whenever I’m done kneading a batch of dough, I’m always expecting my biceps to have grown an inch or so…The reason why kneading takes so long, is that you’re creating a network of gluten in your dough, and this takes time and muscles. In fact, you want you dough to become a little elastic.
To check whether you’ve properly kneaded bread dough, you can do a couple of tests. First, shape the dough into a ball and press you index finger in it. The little dent you’ve just created should shrink back a little, as the elasticity of the dough pulls it together again. Another way to test whether you’re dough is ready to rest, is stretching it as thin as possible. Properly worked dough should be able to stretch thin enough for light to pass through without tearing apart.
Like so…

Once you’re happy with your dough, it’s time to let it rise.
When I just started baking bread, I was often fooled by the times given in the recipes I used. Most recipes will tell you to rest the bread for an x amount of time, but depending on the temperature of your house/kitchen/electric blanket, the dough may need more or less time to rise properly.
Rule of thumb: the first time you leave your dough to rise, you should leave it until it has doubled in size. If you leave it to rise in the fridge, this may take up to 12 hours. If you leave it to rise on an electric blanket under a thick duvet (like yours truly) this may take 1 or 2 hours…
What I’m really trying to say is this: there’s no way of telling you how long you should leave your dough to rise. It’s one of those things you need to decide for yourself. Luckily, most people have no trouble determining whether their bread dough has doubled, tripled or quadrupled in size!
Just place the dough in a warm spot and give it time! Allowing the bread to rise is exactly what gives it its fluffy, gorgeous structure.
The second rise is equally important. After the first rise, you shape the bread and allow it to rise once more. Again until it has doubled in size.
Easy peasy, right? All that’s left to do is cutting up some glorious Goat’s Milk Camembert (or normal Camembert. Or goat cheese. Or whatever…) and bake the bread for 15 minutes! Truth be told, the hardest part is yet to come: leaving it to cool to room temperature before cutting into it!
It’s actually very important to allow bread (not just this bread!) to cool. Otherwise it may be a bit gummy. And who want to knead for 15 minutes and wait for hours for dough to rise only to end up with some gummy piece of bread?
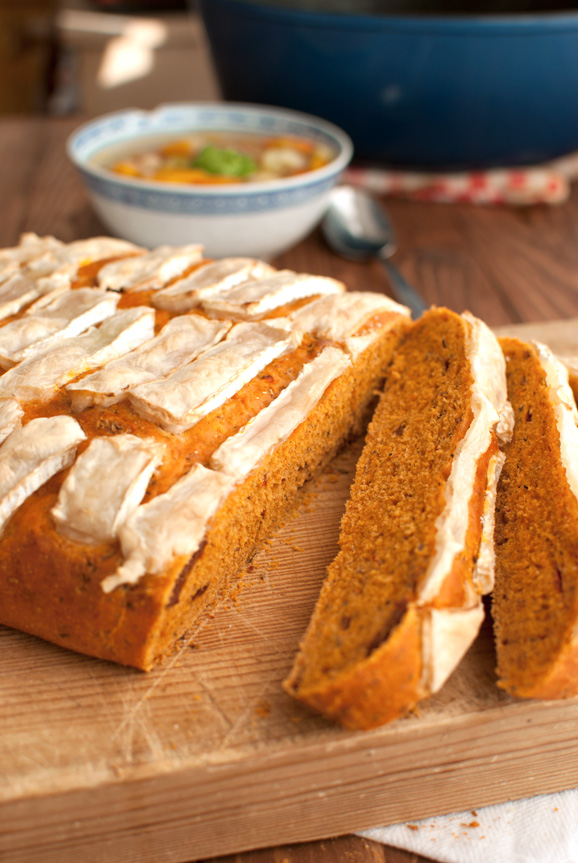
Anyway, time for soup!
Enjoy!
- 300ml (or 1¼ cup) tomato juice
- 7 grams (or 2½ teaspoons) active-dry yeast
- 500g (or 4 cups) all-purpose flour
- 5g (or 4 teaspoons) mixed dried italian herbs
- 60g (or 2 ounces) sundried tomatoes, chopped
- 1 teaspoon of table salt
- 5 tbsp olive oil
- 200g ( or 7 ounces) goat’s milk camembert (or regular camembert if you can’t get your hands on the goat’s milk version)
- In a small saucepan, gently heat the tomato juice over low heat to body temperature. Yeast loves body temperature. Take the juice off the heat and pour it in a small bowl. Sprinkle over the yeast. Leave the yeats to bloom for 1 minute, then stir to combine. Leave to sit undisturbed for 15 minutes. After 15 minutes, the mixture should look bubbly and ‘yeasty’. I fit doesn’t, discard it, because the yeast will be dead and of no more use.
- In the meantime, combine the flour, Italian herbs, sundried tomatoes and salt in a medium-sized bowl. Be sure to squeeze the excess oil out of the tomatoes before you add them to the flour mixture. Make a well in the center of the flour mixture. Add 3 tbsp of the olive oil and the yeast-tomato mixture to the well and start mixing the dough with the fingers of one hand. Don’t add any more liquid. Work the dough long enough and it will come together into a sticky ball.
- Once the dough as come together, start kneading it on your undusted (clean!) countertop. Knead the dough by holding it with one hand and stretching it across the countertop with the palm of the other hand. Roll the dough into a ball again and repeat. Don’t be too neat about it. This movement should be really fast. Knead for 15 minutes or until the dough is elastic (yes, this is quite a workout).
- To test whether the dough has been worked enough, push your index finger into it. The little dent you’ve just created should spring back a little. Another way of testing the dough for doneness, is stretching a small part of it until it’s very thin. If the dough has been properly kneaded, you should be able to stretch it thin enough for light to pass through without breaking.
- Add the remaining 2 tablespoons of olive oil to to a medium-sized bowl, plop in the dough, turn it around so that it’s covered in oil, cover with plastic wrap and leave to rise in a warm place until doubled in size. Mine took about 2 hours. Once the dough has risen, preheat your oven to 225°C/440°F (standard oven setting) and place a baking sheet in the oven to heat up as well.
- In the meantime, plop the dough onto a sheet of baking parchment, press it down with your hands (flattening it), then fold it over onto itself a couple of times and shape it into a ball. Place the dough ball on another (clean) sheet of baking parchment and press it down into a rough rectangle of about 1,5-cm thick. Slide the parchment (with the dough on it) onto another baking sheet (so you’ve got one in the preheating oven and another to rest your dough on), cover with plastic wrap and allow to rise in a warm place again, for about half an hour or until doubled in size.
- Meanwhile, cut the goat’s milk camembert into thin slices. I cut mine about 3-mm (about one tenth of an inch) thick. Arrange the slices on top of the risen bread, completely covering the top.
- Then slide the dough (with the parchment) from the cool baking sheet onto the hot baking sheet that had been preheating in your oven. Bake for 15-20 minutes. The dough should rise a bit more, the cheese should melt and after you’ve taken the bread out of the oven and tap the bottom of it with a wooden spoon you should hear a hollow sound.
- Leave to cool completely on a wire rack. Cut into thick slices and serve with soup or on it’s own!








This bread looks amazing! I love making bread, the whole kneading scares people, but I think the whole process really makes you feel connected to the dish. Thank you so much for sharing – I’ll be bookmarking this 😉
Thanks Kenton, I really love the kneading too! Sure, I also make a lot of no-knead bread, but like you said, kneading makes me feel connected to my bread 😉