Welcome to the second post of my brand new series: ‘Making Dulce de Leche’! Up today: the oven method.
Glad you could make it!
Just a heads up: as I’m typing out this post, I’m enjoying – as in: ENJOYING! ENJOYING! ENJOYING!- a dulce de leche brownie, which is so ridiculously good that I find it really hard to concentrate right now. Regardless of the fact that the topic under discussion today is the magical stuff that makes the said brownie – man, it’s good! – so ridiculously delicious. Oh, and it’s a huge brownie too, so this post may be a bit off topic at times.
Just so you know…
But aaaanyway, in the first post of this series, I explained all about making dulce de leche using the closed can method. You remember me blabbing about explosions and thermal energy absorption? You know, just before you most likely dozed of, dreaming about dulce de leche?
Don’t worry, I won’t go all nerdy on you today.
I first read about this method of making dulce the leche in the oven on David Lebovitz‘s – yes, the ice cream king – blog a few years ago.
You’ll need the same ingredients (aka: 1 can of sweetened, condensed milk, which still isn’t the same as evaporated milk) and the process is almost as easy! Sure, not quite as easy as plopping a can of sweetened, condensed milk in a pan of boiling water and practically forgetting about it, but it sure ain’t rocket science either!
There is a can opener involved though, which can be a bit tricky. I had to call in the Rocking Rebel. He’s the muscles in our relationship, you see…
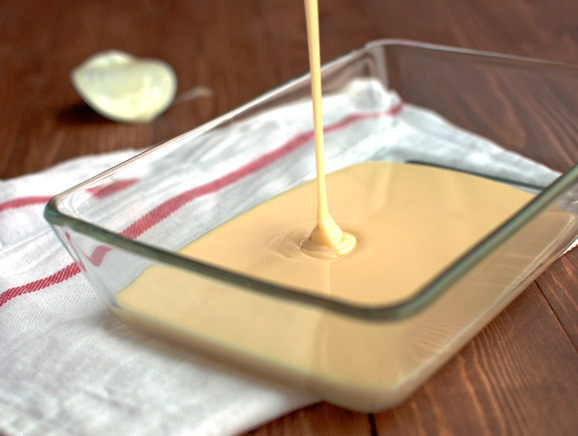
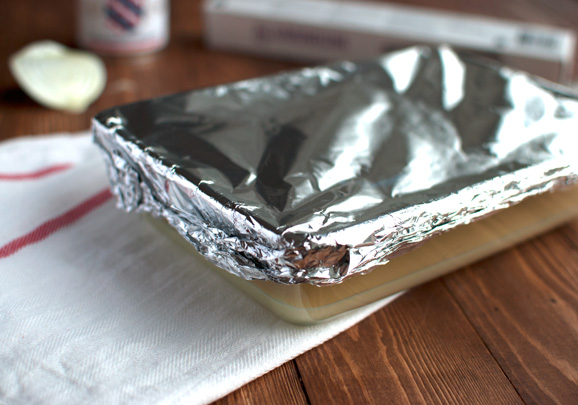
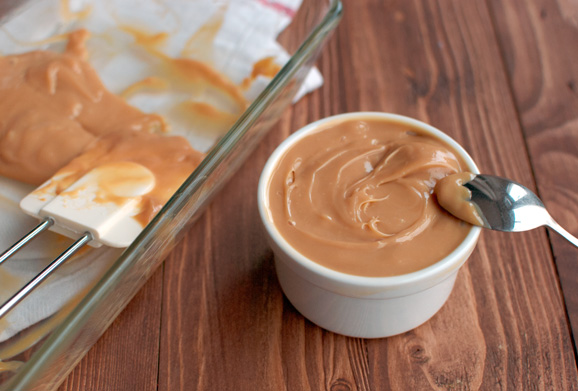
Anyway, after the can has been opened with or without the use of brute strength, the sweetened, condensed milk (I’m getting a bit tired of typing that out…) is poured into a shallow baking dish (or a pie plate) and the dish is tightly covered with aluminum foil.
Like so.
Next, you need to place the covered baking dish in a larger baking dish or a roasting pan. And now it gets tricky again. The roasting pan needs to be filled with boiling water, halfway up to the sides of the covered baking dish. That’s right, this dulce de leche is cooked in a water bath!
And like I struggle with can openers sometimes, I also occasionally struggle with hot water baths. Not the kind I like to take myself – obviously! – but the kind that requires placing a heavy oven rack with 2 baking dishes, of which one is filled with boiling water, into the oven, while a little pup is jumping around my feet, having first pretended to be asleep to prevent me from putting her in her crate while I perform daunting kitchen tasks.
Like I said: tricky…
Try not to get yourself into situations like that and just place the oven rack, with the two baking dishes, into the oven before pouring in the water. Saves you a lot of stress…
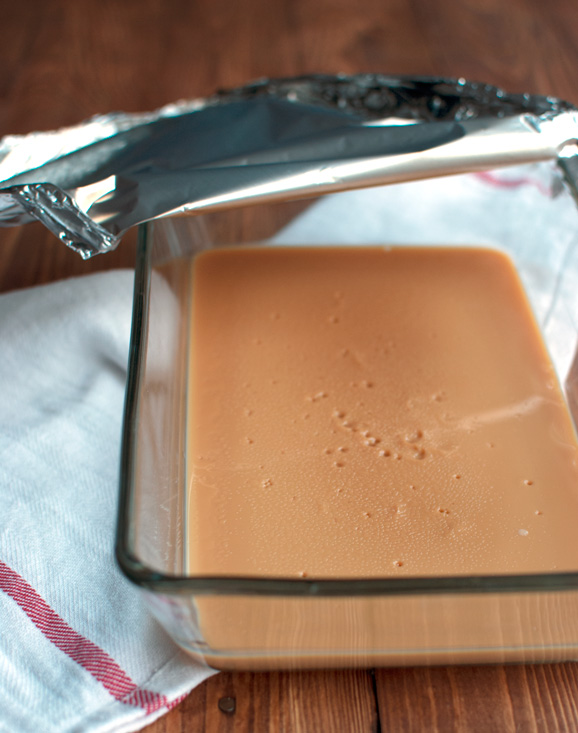
Anyway, the sweetened, condensed milk is baked for 2 to 3 hours and then allowed to cool completely before the aluminum foil is removed. This ensures that the dulce de leche does not become too dry.
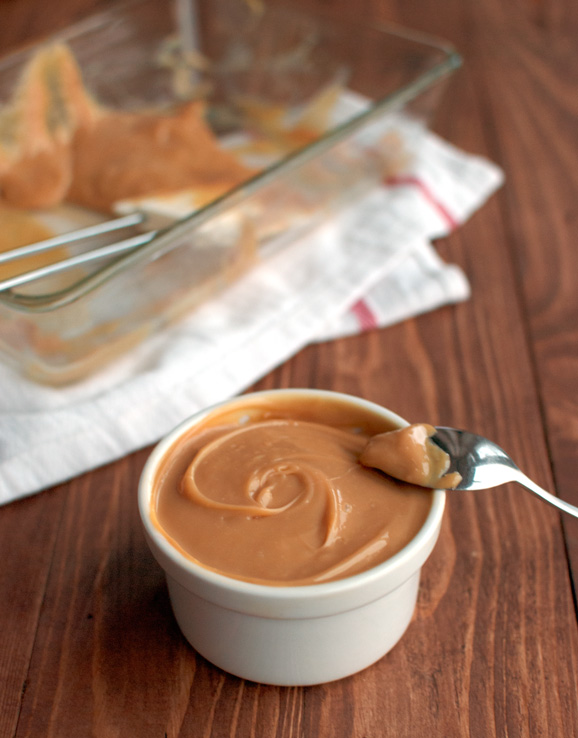
Once the dulce the leche has cooled, it should look like this. Pudding like.
In fact, it comes out so pudding like, that it needs to be stirred smooth before use.
It already tastes incredible, though!
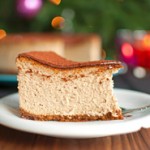
Speaking of incredible tasting things, I really need to elaborate on this brownie a bit. It is to die for! First of all, the brownie itself is absolutely the best brownie I have ever had! It’s moist, super chocolatey and deliciously fudgy! But right before I baked it, I topped it with dulce de leche to make a gorgeous golden caramel swirl on top!
Just TOO good!
But back to the dulce de leche…
The taste of this dulce the leche is the same as the dulce de leche made in a closed can, but there are obviously a lot of differences in preparation.
– and boohoo, my brownie is gone… –
For one, the oven method takes less time. I cook the cans for 3 hours, but when I make dulce the leche in the oven, I only bake it for 2 hours (the oven made dulce de leche was a little lighter though). Plus, boiling the cans in a pan can leave a weird residue in the pan, probably caused by glue from the label that sticks to the can. It washes off, put this requires some elbow grease.
However, the same goes for the oven method. At least, for me it did. I used two glass baking dishes, and after baking the larger one had some chalky stains in it, caused by minerals in the water. This also washes off.
As far as the negatives go, I don’t like carrying boiling water around too much. Like I said, you can avoid having to carry a heavy oven rack with two baking dishes of which one is filled with boiling water by placing the oven rack and dishes into the oven before filling the larger one with boiling water, but at some point, the dulce de leche needs to be taken out of the oven. This means that you either have to somehow pluck the smaller baking dish out of the boiling water, or that you have to take the oven rack – baking dishes and boiling water and all – out of the oven to place it on your countertop.
Not my favorite thing in the world…
But all in all, a very easy way to make dulce de leche! Especially if I haven’t been able to convince you about that whole cans-submerged-in-water-can’t-possibly-explode thing…

Anyway, eat this stuff with a spoon, slatter it on toast or use it as a filling or a frosting. Or make dulce de leche brownies. Glorious, delicious, perfect dulce de leche brownies… Gorgeously dark with a swirl of golden dulce de leche…
That’s it! I’m having another brownie!
Enjoy!
Oh and don’t worry. I’ll post the brownie recipe tomorrow!
Click here to sign up to my mailing list.
Click here to follow me on Instagram.
- 1 can of sweetened, condensed milk
- Preheat your oven to 225°C/440°F (standard oven setting) and bring a large kettle of water to a boil.
- Pour the contents of the can of sweetened, condensed milk into a shallow baking dish or a pie plate. Mine was 27x18-cm (or 10,5x7-inches). Cover tightly with aluminum foil and place the baking dish or pie plate in a large roasting pan.
- Place the roasting pan on an oven rack and pour boiling water into it, until the water reaches halfway up to the sides of the baking dish.
- Bake in the middle of the oven for 2 hours for a dulce de leche that is as dark as mine was. If you like dulce de leche a little lighter, only bake for 1 hour. If you like your dulce de leche darker, bake for another 30-60 minutes.
- Take the dulce de leche out of the oven (be careful of the hot water!) and leave the dulce de leche to cool to room temperature before removing the aluminum foil.
- Once it has cooled, stir until smooth.
- Can be stored tightly covered in the refrigerator for up to 3 weeks.


I pressure cook a can covered in water at 15 lbs for 13-17 minutes.
Mmmmmm!
Oh yeah 😉
I crocked a can for 8 hours and it was fabulous with no nasty residue in the crock pot.
Hi Jacoba, thanks for stopping by! You’re so lucky that you didn’t have to scrub the pan clean after you made the dulce de leche! Whether the can will leave a residue in your pan or pot apparently depends on the brand of sweetened, condensed milk, or something 😉
i want to make this. it looks great!
Thanks Dina! It tastes great too 😉
I like what you are doing here -really testing the best way:-)
But have you tried mixing the methods?
An “opened” can in waterbath in the oven, then you place a clothe under the cans in the waterbath to avoid moving around, maybe place a piece of folie on top?
You made me think…
Thanks MayK! I’m so glad you’re thinking with me! 😉
As a matter of fact, I have thought about placing an opened can in a water bath in the oven! However, so far all of my testing has given me the idea that it wouldn’t really matter much. Dulce de leche just takes a long time to cook. Whether you make it from scratch or from a can of sweetened, condensed milk, there is not really a method that is particularly convenient. I’m sure that your idea of putting an ‘opened’ can in a waterbath in the oven would work, but I think it would take just as long as boiling a closed or open can on the stove, or pouring the milk into a baking dish and baking it in the oven.
By the way, have you read my post on the open can method? Your idea of placing the can on a piece of cloth might solve that annoying clanking problem! 😉
I’ve seen different sized cans..how many ounces was the can you use in this recipe?
I used a 14 oz. can 🙂
Any idea what would happen if after 1 1/2 hr or so the oven was turned off, door cracked open with light off and rack pulled out a bit and it was allowed to cool down that way IN the oven? I’m not looking forward to pulling a hot dish containing mix with a hot sugar sauce out of a larger dish of boiling water either (but your instructions about getting it on the oven make sense)
I haven’t tried this Liz, but I think the dulce de leech would still be fine! Maybe turn the oven off 15 minutes before cooking time is over.