 This recipe has been featured on Serious Eats.
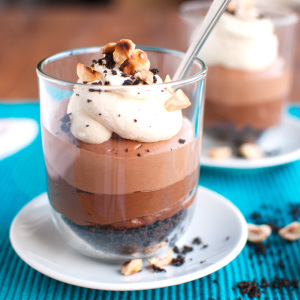
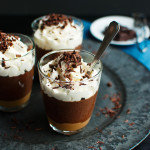
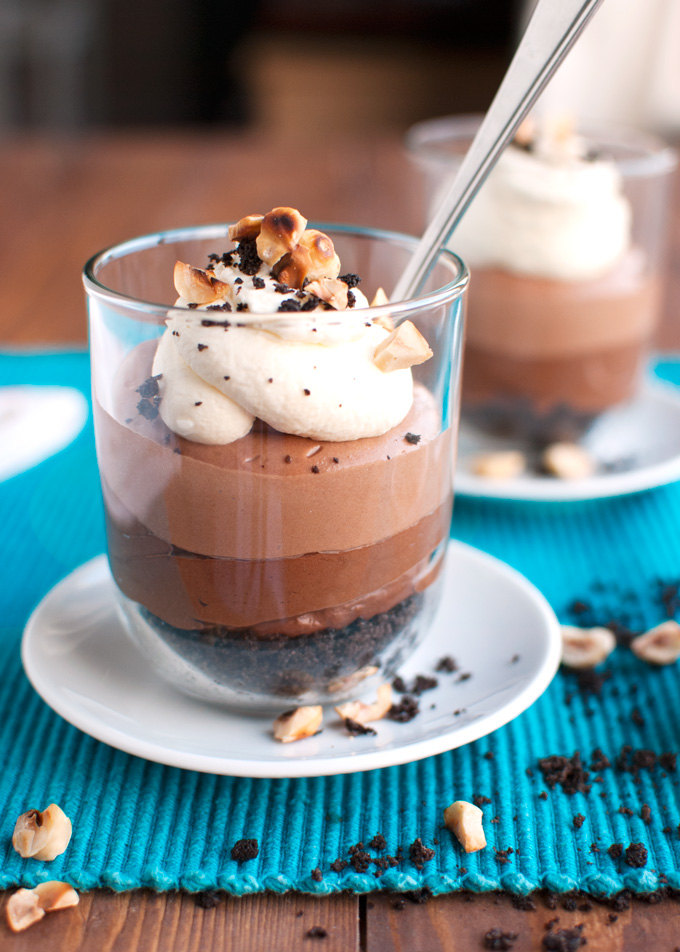
No-bake cheesecake. Yes! These beautiful no-bake chocolate and Nutella cheesecakes are a chocoholic’s dream come true! An intense dark chocolate filling is spooned on top of a crumbly Oreo crust and topped with a creamy, rich Nutella filling.
Now that’s just dangerous…
I made these beauties for Serious Eats‘ Cheese Week. My very cool – and very eloquent! – editors gave them a fancy new name: verrines. I had personally never heard of that term, but hey – you live, you learn, right? However, here, on The Tough Cookie, these verrines are just called no-bake chocolate nutella cheesecakes. Because I at least know how to pronounce that!
Anyway, these delicious no-bake cheesecakes are really easy to make, but you will need about five mixing bowls! You also can’t get around the fact that you will have to wash your mixer’s beaters every now and then. As for me, I’m more than willing to do so if the reward is something as delicious as this!
Before I explain a bit more about the method, let’s talk a bit about the cheese.
First of all, make sure to get the cream cheese out of the fridge a few hours before you want to make the cheesecake filling. It’s crucial that the cheese has time to soften at room temperature before you start mixing, as this makes incorporating the cream cheese into the other ingredients a lot easier and ensures that the different fillings turn out velvety smooth!
Also, make sure the package of the cream cheese you use doesn’t say ‘whipped’ or ‘spreadable’. I always use the bricks because they’re cheaper, but you can also use a tub of regular/original cream cheese. Just make sure an 8-ounce tub contains 226g of cream cheese. That means it hasn’t been lightened or whipped or anything…
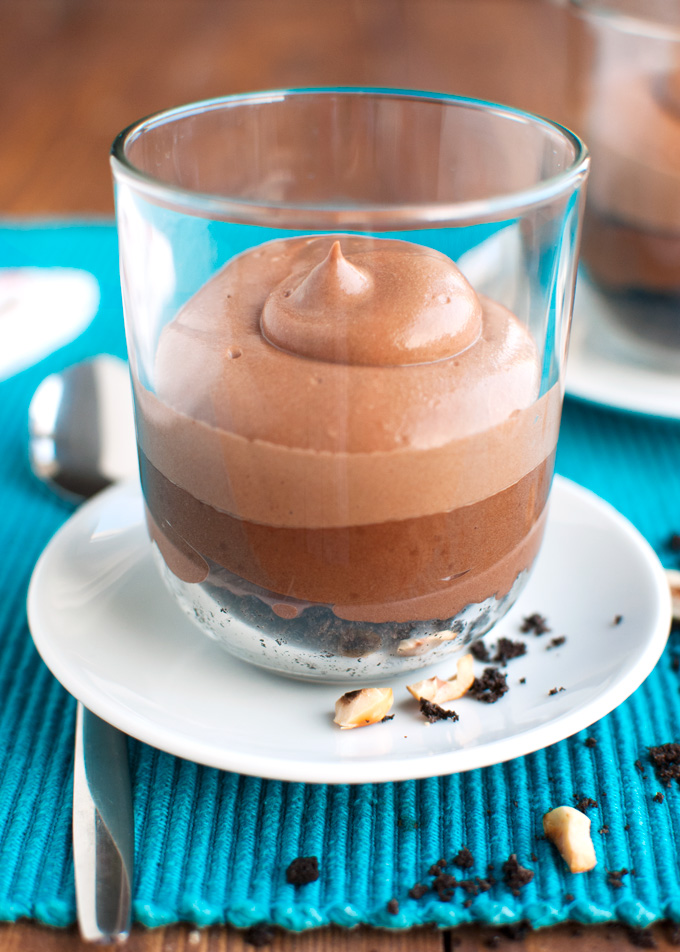 Once the cream cheese has come to room temperature, start by melting some good quality semisweet chocolate in the bowl of a double boiler or in the microwave. Make this the first thing you do after taking the cream cheese out of the fridge!
Once the chocolate has melted, proceed with the cheesecakes’ crust. I made a simple crust of crushed up Oreo’s mixed with a little unsalted butter. Divide the crust over 4-6 serving cups. The cups I used were pretty big; they actually used to be 7-ounce Nutella jars. Which, of course, were the perfect containers for these Nutella flavored cheesecakes…
Once the crusts are done, proceed with the Nutella filling. That’s right: leave the chocolate to cool a little longer. Making the Nutella filling is a breeze. First, whip up some heavy cream with sugar. That way, you can avoid having to wash the beaters of your mixer this time. Set the whipped cream aside, then beat half the softened cream cheese until fluffy in another bowl with the beaters you just used to whip up the cream. It won’t hurt the cheese at all. Add a generous amount of Nutella, mix until smooth and fold in the whipped cream with a rubber spatula. That’s the Nutella filling done!
Next up, the chocolate filling. Wash the beaters of your mixer first this time, then whip up some more cream with sugar. And yes, you really do need to whip cream twice. You can’t combine the cream and sugar for the different fillings into one bowl and whip it together; the chocolate filling not only needs more whipped cream, it’s also sweetened with more sugar because of the bitterness of the chocolate, so dividing one bowl of cream over the different fillings would affect the flavor and texture of both fillings.
 After you’ve made whipped cream for the second time, beat the remaining cream cheese in another bowl (using the creamy beaters) until fluffy. Add the cooled melted chocolate and the cocoa powder (to really give that chocolate flavor a boost!) and mix. Next, add two third of the whipped cream and mix again until smooth.
Now here’s the thing. The chocolate filling tends to become a bit lumpy, because of the chocolate. You can get rid of these lumps by passing the chocolate filling through a fine-meshed sieve at this point. Once smooth, fold in the remaining whipped cream with a rubber spatula.
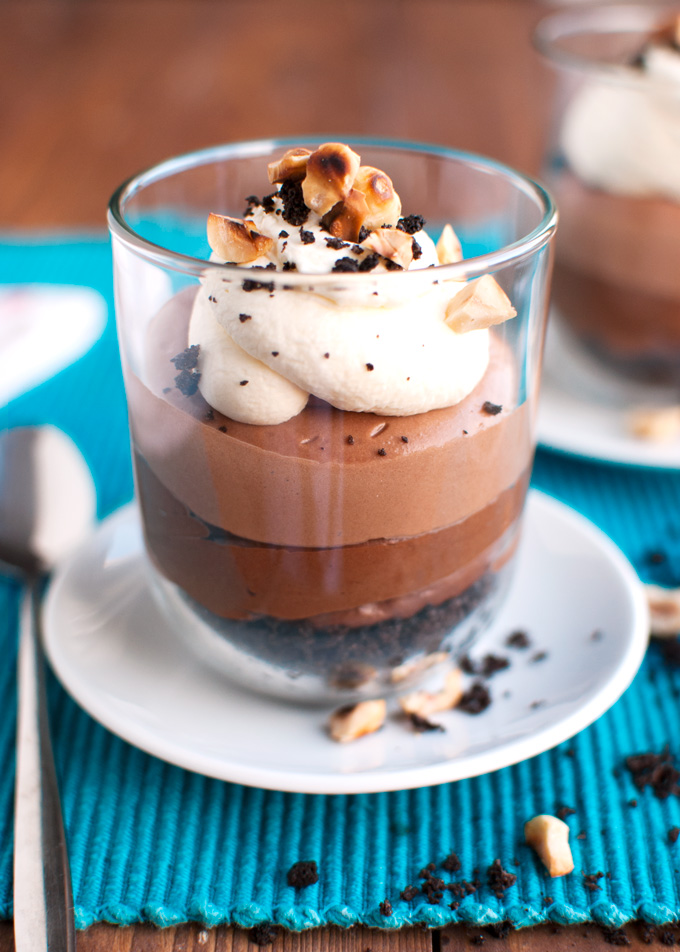
Spoon or pipe the different fillings into your serving cups, cover with plastic wrap, and place in the fridge for at least two hours or overnight. Top with some whipped cream and toasted hazelnut pieces just before serving.
No-bake cheesecakes don’t get better than this! Don’t forget to pin!
- 14g (or 1 tablespoon) unsalted butter, melted
- 8 regular Oreo Cookies
- 90ml (or ⅓ cup + 2 teaspoons) heavy cream
- 2 teaspoons granulated sugar
- 140g (or 5 ounces) cream cheese, softened at room temperature
- 113g (or ⅓ cup + 2 teaspoons, or 4 ounces) Nutella
- 130ml (or ½ cup + 2 teaspoons) heavy cream
- 4 teaspoons granulated sugar
- 140g (or 5 ounces) cream cheese, softened at room temperature
- 85g (or 3 ounces) semisweet chocolate
- 5 teaspoons Dutch-processed cocoa powder
- Whipped cream
- Toasted hazelnut pieces
- Crushed Oreos
- Start by melting the chocolate for the chocolate filling in the bowl of a double boiler or in the microwave. Set aside to cool slightly.
- In a food processor, pulse Oreos until finely ground. Add the melted butter and pulse for another few seconds until evenly coated. Alternatively, put the cookies in a Ziploc bag and crush with a rolling pin before adding the melted butter. Divide the Oreo mixture over 4 to 6 serving cups and level. Set aside.
- Prepare the Nutella filling: in a small bowl, whip cream with sugar until it holds soft peaks. Set aside. In a medium-sized mixing bowl using an electric hand mixer, whip cream cheese until smooth and fluffy. Add Nutella and mix until smooth, about 2 minutes. Using a rubber spatula, fold in whipped cream until no streaks remain.
- Prepare the chocolate filling: in a small bowl, whip cream with sugar until it holds soft peaks. Set aside. In a medium-sized mixing bowl using an electric hand mixer, whip cream cheese until smooth and fluffy. Add cooled chocolate and cocoa powder and mix until smooth, about 2 minutes. Mix in two thirds of the whipped cream. If the mixture looks lumpy after 3 minutes of mixing, pass through a sieve. Fold in the remaining whipped cream with a rubber spatula.
- Spoon or pipe filling into serving cups. I started with the chocolate filling and topped it with the Nutella filling. Chill in the refrigerator for at least 2 hours. Garnish with whipped cream, crushed Oreo’s or toasted hazelnut pieces before serving.
