Last Sunday, I found an early Christmas gift under our Christmas tree! I immediately felt guilty, because evidently the Rocking Rebel had already got me a Christmas gift while I had barely wrapped my head around the fact that it was December already! But man, I got to get him something very pretty soon, because he got me one of the best gifts ever!
The past few months I have been experimenting with different camera lenses to improve my food photography. When I started this blog, the Rocking Rebel and I already had a nice DSLR camera with a proper lens, but as I started to learn more about aperture, depth of field and shutter speed, I came to the realization that the lens that came with our camera perhaps isn’t ideal for food photography. Luckily, my unofficial father-in-law used to be an amateur photographer in the 70s and 80s, and he has a box full of old Nikon and Canon lenses I could use. There was one in particular that I’ve used quite often, but it’s depth of field was usually too shallow to capture the subjects of my photo’s.
In other words, none of the lenses I tried really fitted my photography needs.
Apparently, the Rocking Rebel got tired of me complaining about the lenses that I had at my disposal, because right there, underneath our tiny-but-ever-so-cute Christmas Tree was a small square box wrapped in pink paper, containing a brand new lens! My very first!
I’m so happy!
And I’m so glad the Rocking Rebel didn’t hide it until Christmas, because I had a beautiful little dessert in the fridge just waiting to be photographed!
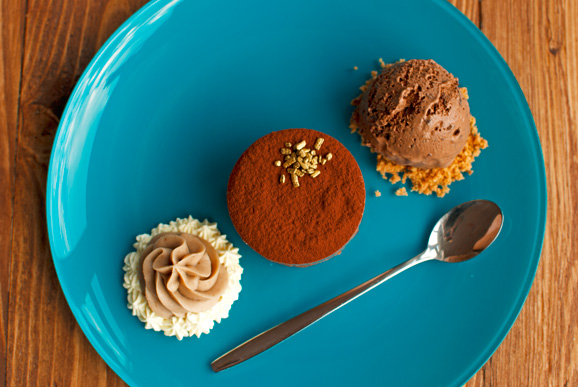
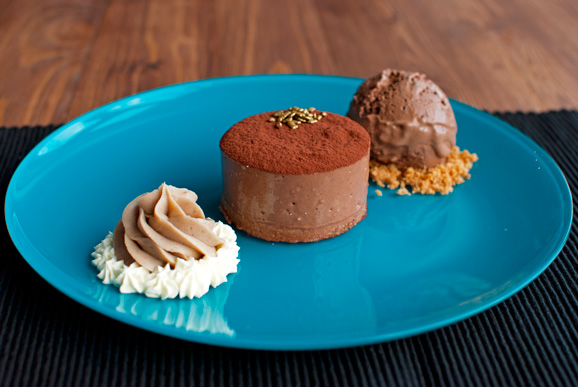
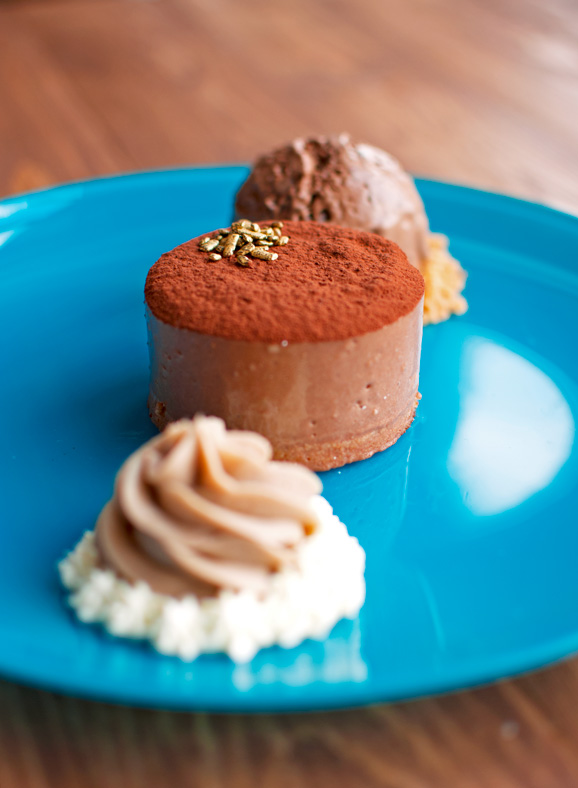
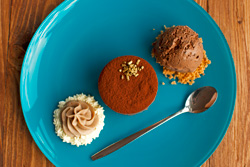
Like I told you in my post on the Dark Double Chocolate Ice Cream, I spent last Friday making 5 recipes for one single post. This is said post. And this is how those recipes ended up on one plate. On one tasting plate, I should say. Because this is my Chocolate Chestnut Tasting Plate.
Tadaa!
I know I shouldn’t be saying this, but I’m actually really proud of this dessert! It’s just incredible! The flavors are just spot on! And it looks incredibly beautiful too!
I’m a genius…
(I already knew that, of course…)
Aaaanyway…..
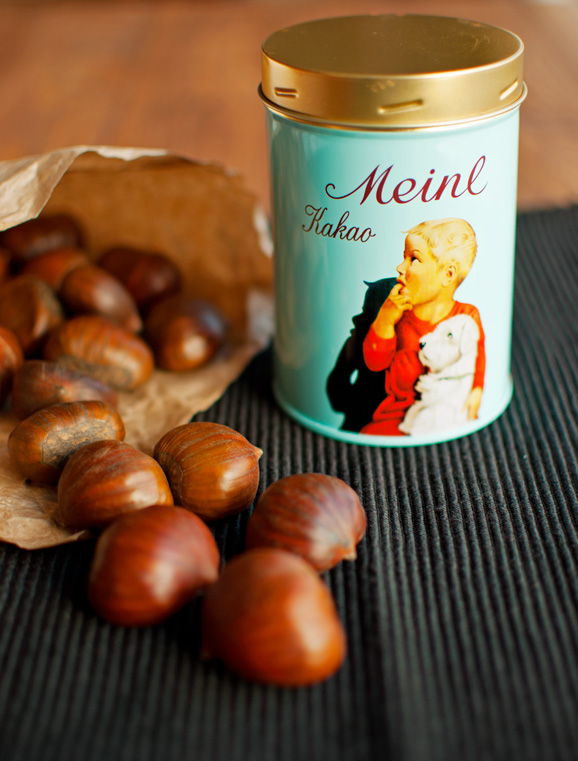
I came up with this dessert a few weeks ago, when my mom brought me a cute red paper gift bag with a few Austrian specialties: a paper bag full of huge, gorgeous chestnuts, a jar of chestnut blossom honey and the cutest jar of cocoa I have ever seen in my life!
I mean, just look at that cute little boy!
He’s adorable! He looks like a 2-year-old Rocking Rebel!
Anyway, my mom had been given these Austrian specialties as a gift, but since she is usually way to busy to spend much time on desserts, she gave them to me, hoping that I would be able to make something delicious out of them. In fact, when she and my siblings came over for dinner a few weeks ago, she even suggested that I should make some crème de marrons, or chestnut cream! At the time, I still didn’t have a clue what I was going to do with the chestnuts, but as it turned out, that little suggestion inspired me to come up with this dessert plate!
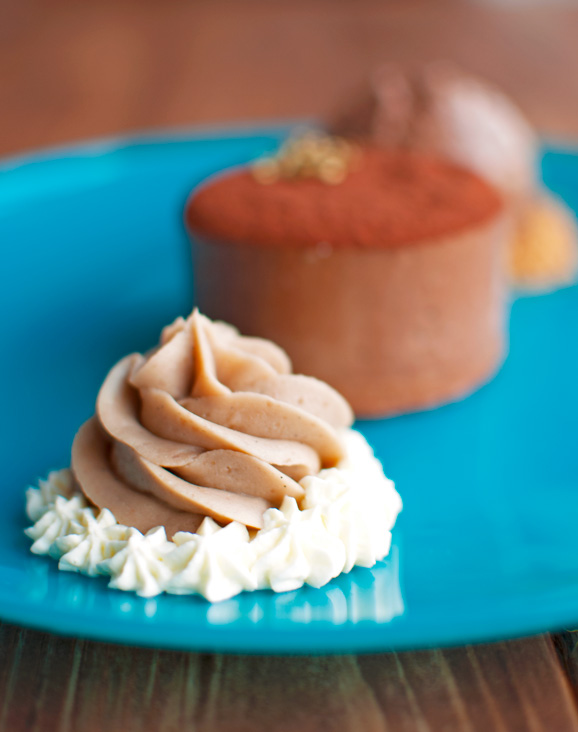
You see, this is a chocolate and chestnut dessert plate. On one side of the plate, there is the chocolate. The Dark Double Chocolate Ice Cream on a bed of crushed Toasted Almond Paté Sucré Biscuits. On the other side of the plate, there is the chestnut. A smooth, earthy crème de marrons, or chestnut cream.
This stuff is delicious! Especially paired with those softly whipped cream roses!
Remember how I whined about chestnuts in my post on Lemony Chestnut Cake? For those of you who don’t: I had never tried chestnuts before and really wanted to know more about them, so I had spent weeks trying out different methods to cook, peel and skin chestnuts with little to no success. In the end – frustrated and disillusioned – I finally settled on using pre-cooked, vacuum-packed chestnuts and whipped up an Italian chestnut cake with lemon. I couldn’t wait to try it, but it turned out to be way too lemony…
Like: WAY too lemony!
It might have been the best lemon cake I ever had, but I couldn’t for the life of me taste the chestnuts in there…
Hence my Chocolate Chestnut Tasting Plate.
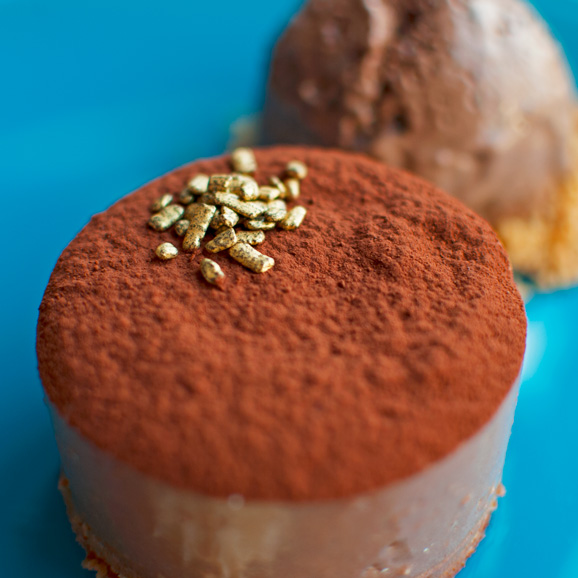
In between the chestnut cream rose – which has an earthy, mature flavor – and a generous scoop of the chocolate ice cream sits a delicate, smooth Chocolate Chestnut Mousse Cake. If you look closely, you can just make out the shortcrust base below the mousse, which not only makes these cakes a lot easier to plate, it also adds a delicious, crumbly crunch to the cakes. I’ve used Toasted Almond Paté Sucré Biscuits and the toasted ground almonds in there really complements the earthy flavors of the chestnuts and the dark chocolate. Just before plating, I dusted the tops of the cakes with a generous layer of Austrian cocoa powder and topped the mousse cakes with a few gold nugget sprinkles.
Aren’t they cute? I think they look so festive and decadent!
I made the mousse cakes in small cake rings and I have to say that I really love how they turned out! I just love the contrast between the soft layer of cocoa on top and the smooth, silky edges of the mousse cake.
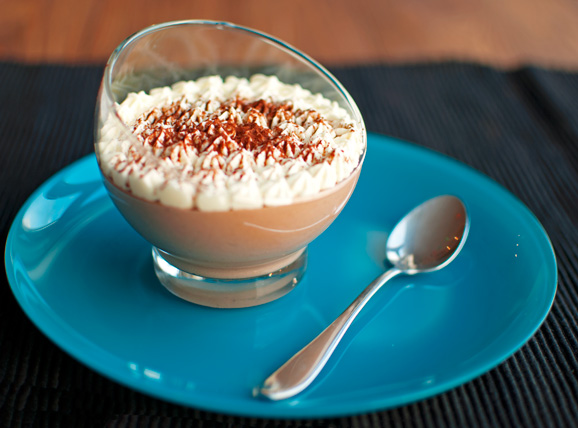
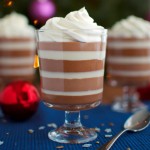
However, you can also pour the mousse into pretty glasses and top it with small whipped cream roses, like this:
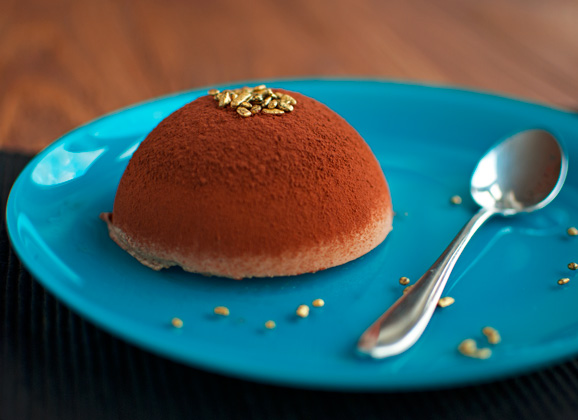
Or, if you have a silicon mousse mold or a silicon cupcake mold, you can use that instead to make the mousse cakes. The silicon molds are just perfect for this! Just pour the mousse in the molds or cupcake cups, lightly press in a cookie base and place the silicon mold into the freezer so the mousse can set and freeze. Once the mousse has frozen you can easily push the mousse cakes out of the mold and place them on a cutting board or serving plate to thaw in the fridge.
The options are endless!
So, if you’re still looking for a show-stopping Christmas dessert, you can stop looking! Make this and you will definitely wow your friends and family. You might even wow yourself!
I know I did!
If you’re confident in the kitchen and you’re willing to spend a few hours – say: 5 – in the kitchen, I’m sure you can make this dessert in one morning. However, if you have any sense at all, make some of the elements a few days or even a week ahead of time. It’s just a lot more zen this way.
After all, Christmas is all about being with your loved ones, not slaving for them in the kitchen!
In fact, I would suggest the following:
- 1 week before you plan on serving this, make the Dark Double Chocolate Ice Cream.
- 3 to 4 days before serving, make the Toasted Almond Paté Sucré Biscuits.
- 2 or 3 days before serving, make the Plain Pastry Cream. You’ll need this to make the Chocolate Chestnut Mousse.
- Then 1 or 2 days before serving, or on the morning before dinner, proceed with the Chocolate Chestnut Mousse Cakes by following the recipe at the bottom of this post.
- The dessert is best eaten at room temperature, so plate the mousse cakes and the chestnut cream 3 hours before serving, or just before your guests arrive. That way, the only thing you need to do after the main course is scooping out some ice cream!
I know that this dessert seems like quite a lot of work, but don’t worry about the individual recipes. They are all easy and straightforward. There’s really not a lot that can go wrong… Just make sure the ice cream is frozen and the mousse cakes have set and you should be fine!
Enjoy!
Oh, by the way, I’ve got a Christmas Giveaway coming up! I’m so excited!
- 250g precooked, prepeeled chestnuts (I used vacuum packed)
- 120ml whipping cream
- 1 tbsp cane sugar
- ½ vanilla bean (about 7,5 cm or 3 inches)
- 75ml additional whipping cream
- 1 tbsp honey
- ¼ tsp cognac or brandy
- 3 more tbsp whipping cream
- cocoa powder for dusting
- Enough sheet gelatin to set 266ml of liquid
- 140g (or a little over 4½ oz.) pastry cream
- 140ml milk
- 15g (or 2 tbsp) cocoa powder
- 40g (or 1⅓ oz.) dark chocolate
- 100g of homemade chestnut paste
- 333ml whipping cream
- 70g (or ¼C) granulated sugar
- 4 to 6 small cake rings (I used 7-cm/3,5-inch rings)
- or 4 to 6 silicon cupcake molds
- or 4 to 6 pretty glasses
- 4 to 6 of the cooled toasted almond cookies (recipe under 'Building Blocks')
- 1 batch of Dark Double Chocolate Ice Cream
- the remaining Toasted Almond Paté Sucré Biscuits
- cocoa for dusting
- gold sprinkles
- 240ml whipping cream
- 3 tbsp granulated sugar
- 4 to 6 large plates
- I would advise you to make the chestnut cream right before you make the mousse.
- To a small saucepan, add the chestnuts, the 120ml of whipping cream and the cane sugar. Split the vanilla bean in half lengthwise with a sharp knife, scrape out the seeds and add these to the pan. Add the scraped bean as well. Heat over low heat, stirring to dissolve the sugar, then crank up the heat and allow to come to a boil. Cover and simmer for 10 minutes.
- After 10 minutes, fish out the vanilla bean and transfer the chestnut mixture to the bowl of a food processor. Blitz to a dry paste, gradually adding the 75ml of cream.
- Press the paste through a sieve with the back of a spoon. This takes some elbow grease, but you’ll want a smooth paste for this recipe. Discard the chestnut pieces that remain in the sieve.
- Set 100g of the chestnut paste aside to use in the chocolate chestnut mousse. Add the remaining chestnut paste (you should have about 185g) to a small bowl. Stir in the remaining 3 tablespoons of cream, the honey and the cognac. Fit a piping bag with a large star tip. Dust a plate with cocoa powder, fill the piping bag with the chestnut cream and pipe 4 to 6 large roses onto the cocoa. Place in the fridge until use.
- NOTE: this mousse can be made 2 days before you intend to serve the dessert. However, if you intend to use it to make a mousse cake, make sure that the other element of the cakes (such as the biscuit base) are ready for assembly before you start making the mousse, as the mousse needs to be poured into molds immediately after you made it.
- Soak the gelatin in cold water. To a medium-sized bowl, add the pastry cream. Cover the bottom of a small saucepan with milk. Add the rest of the milk to the pastry cream. Make sure to drizzle it in slowly, whisking continuously to make sure that the pastry cream dissolves evenly into the milk. Whisk in the cocoa.
- Add the chocolate to the bowl of a double boiler and allow to melt. In the meantime, heat the milk in the saucepan (that little splash) but don’t let it come to a boil. Squeeze the excess water out of the gelatin and stir it into the warm milk. It should dissolve completely. If it doesn’t, heat the milk over low heat, stirring continuously until the gelatin has dissolved. Whisk the gelatin mixture into the milk mixture.
- Once the chocolate has completely melted, add the chestnut paste and stir until smooth. Gradually add the milk mixture while whisking continuously.
- In a large bowl, whip the cream with the sugar until soft peaks form. Fold in the chocolate chestnut mixture with a rubber spatula.
- The mousse is now ready to be poured into the molds. If you want to make the mousse cakes in cake rings: place the cake rings onto a cutting board small enough to be put in the fridge. Place one almond cookie in each cake ring and fill each ring with mousse. If you want to make the mousse cakes in silicon cupcake molds, fill each cupcake cup almost up to the rim with mousse, then gently press the cookies into the mousse, so that the mousse is pushed up (but not over) the sides of the cookies (one cookie per cupcake cup). If you plan on serving the mousse in pretty glasses: place one cookie in the bottom of each glass. Divide the mousse over the glasses.
- If you serve the mousse in glasses, place in the fridge to set (at least 3 hours bu preferably overnight). If you've assemble the mousse cakes in cake rings or silicon cupcake molds, place in the freezer for 2 hours, then take the cakes out of the molds/rings by either pushing the frozen mousse cakes out of the silicon cupcake molds or by briefly heating the cake rings with a blow torch or a hot, damp tea towel. Place in the fridge for at least 3 hours or until almost ready to plate.
- Allow the chocolate chestnut mousse cakes and the chestnut cream roses to come to room temperature before plating (this takes about 3 hours). Take the ice cream out of the freezer 20 minutes before plating to soften a little.
- To plate, dust the tops of the Chocolate Chestnut Mousse Cakes with sieved cocoa and place a cake in the center of each plate. Top with a few gold sprinkles.
- Whip the cream with the sugar until stiff peaks form. Place a dollop of whipped cream next to each mousse cake on the plates and, using an offset spatula, place a Chestnut Cream Rose on top of each dollop. Fit a piping bag with a small star tip and fill it with the remaining whipping cream. Pipe small roses around the Chestnut Cream Roses.
- Crumble the remaining Almond Paté Sucré Biscuits with your fingers and place a spoonful of crumbles on the plates next to each mousse cake. Place a large scoop of ice cream on top of each pile of crumbles. Serve immediately.


i love chestnuts. these desserts look amazing!
Thanks Dina! They tasted amazing too 😉