 I have the cutest three-year-old nephew. And he is a TOTAL chocoholic! About two weeks ago, he came up to me and asked me – ever so seriously – if I could make him a bat cake.
I have made him a huge dinosaur cake before, and, as I bake for my family on a very regular basis, he apparently thought it was about time I expanded my cake repertoire with a bat cake.
I have to say, cake carving is definitely not one of my specialties, but how can you possibly refuse a beautiful, little three-year-old if he asks you to make him a bat cake so nicely?
You can’t!
I wasn’t surprised that he asked me for a bat cake. After all, we had been pretending to be bats and vampires (with him being Dracula) for weeks, and ever since he was a baby he has loved all sorts of monsters, robots, super villains and creepy creatures (he literally knows the name of every single super villain out there!). On top of that, he has loved cake from the moment mys sister first fed him his first mouthful.
And one and one makes two!
So I got to work…
First I needed to figure out how I was going to turn a glorious, dark chocolate cake (his favorite!) into a bat. So, while my nephew was trying to decide on whether he would eat the head or the wings, I sketched up a template:
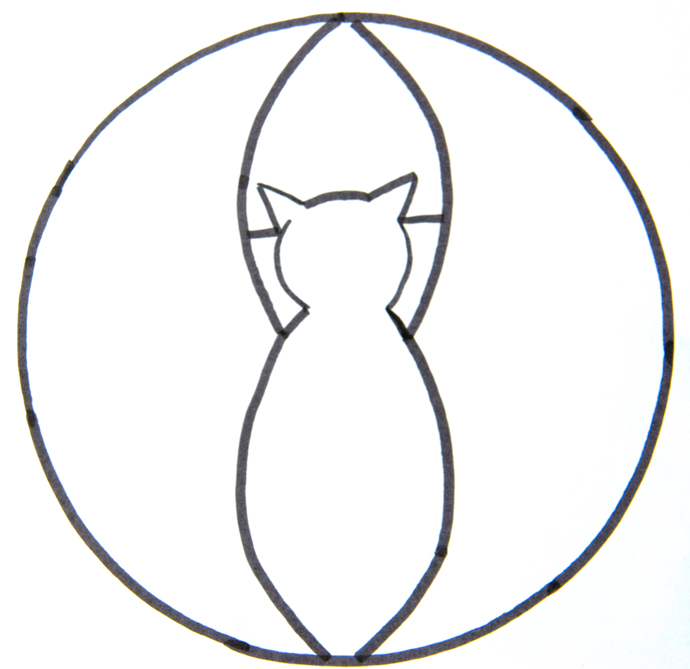 I know I could have just cut a bat out of marzipan and put it on the cake, but that’s just not how I roll. If I make something for my nieces and nephews, I want it to be spectacular. Wings and wonky legs and all!
First, I baked up the cake. I adapted this recipe from one of my favorite cookbooks: ‘Miette’ by Meg Ray, owner of “San Francisco’s most charming pastry shop”.
This cake is anything you ever wished for in a chocolate cake: it’s rich, bittersweet, incredibly moist and it is my ‘go to’ recipe whenever I need a chocolate cake. Before I discovered this recipe, I had already baked up at least hundreds of different chocolate cakes. And while most of these tasted perfectly fine, I knew there had to be a recipe out that that would knock my socks off. They just never were as good as I envisioned them. However, ever since I first baked up this black beauty, I haven’t made a chocolate cake that didn’t live up to my expectations!
I’ll admit that I did try another chocolate cake recipe after the aforementioned Great Discovery. After all, I was so used to testing different recipes that it felt weird to stop exploring other possibilities. But when my first promising ‘exploration’ after The Great Discovery turned out to be a miserable excuse for a chocolate cake I decided to see it as a sign! Miette’s Double Chocolate Cake recipe and I have been blissfully happy together ever since.
And can you really blame me for settling on this recipe?
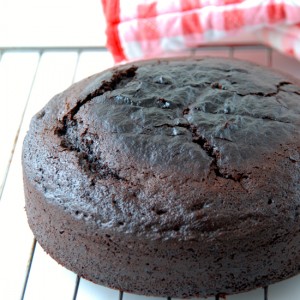
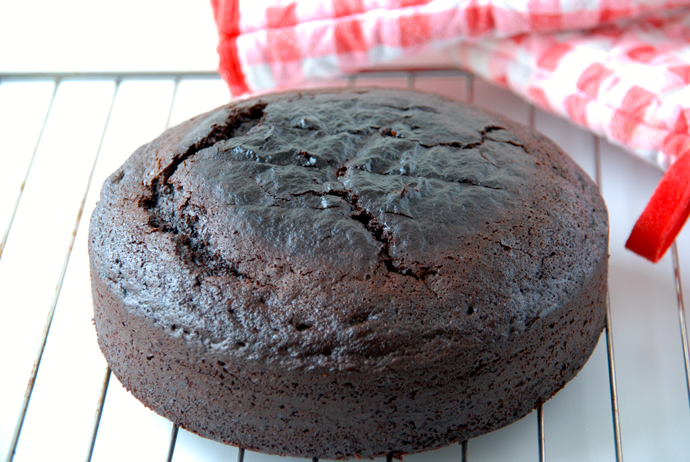 Just look at all that chocolatey goodness.
However, with the cake baked, I wasn’t there yet. Even though this cake is so ridiculously good you could eat it just as it is with a nice cup of tea, I needed it to become a bat.
Time for some trimming.
First, I leveled the top of the cake by cutting off the dome with a serrated knife, which resulted in a nice chef’s snack for me. The cake was quite crumbly when I cut it. Ideally you would want to refrigerate the cake for an hour or so as a cool cake will be far less crumbly. Unfortunately, patience has never really been one of my strongest points.
Anyway, after I had enjoyed my chef’s treat, I grabbed my template and started carving. Why is carving a cake always harder than it looks? I almost took my bat’s ear off! Luckily you can’t tell from the pictures… Besides, a layer of gorgeous, velvety ganache smooths out most carving accidents… AND makes a three-year-old chocoholic very happy!
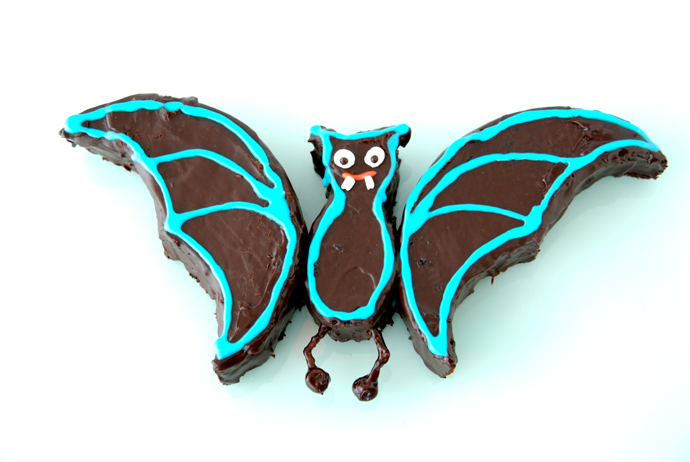
After I smoothed out the ganache with a spatula I pressed the wings firmly to the body and popped the cake in the fridge to cool overnight. The next morning, I mixed up a simple blue glaze and decorated the bat with fancy piping, mini-marshmallow eyes and fangs and – wonky – little skewer legs.
O, and don’t do what I did:
In order to place the cake in the fridge I had put it on a simple cutting board. However, for presentation’s sake, I wanted to transfer it to a nice serving tray the next day. In the case of a round or square cake, that shouldn’t pose too many problems. The bat, however, had fragile wings and a tiny body that needed to stay intact. So I took another cutting board, placed it on top of the bat (on the ganache!) and flipped the boards, so that the bat was now face-down on the second board. I still hadn’t spotted my mistake at this point, so I did the flipping thing again with the serving tray…
… at which point the bat stuck to the cutting board. Duh! The ganache was just too sticky and as I was desperately trying to free my beautiful bat from the board, I accidentally ripped of an entire wing tip.
Like I said, don’t do what I did!
Luckily, I had some leftover ganache which I used to patch the bat up. And all was well in the world again! But still… save yourself the trouble…
By the way, don’t worry too much about making the bat look perfect. Being a bit of a perfectionist myself, I have frequently suffered from that annoying feeling you get when a cake (or a drawing, or a painting, or whatever…) just doesn’t look the way you pictured it. At some point, you just have to stop worrying about it.
My bat may have been far from perfect, it still looked ridiculously cute. Plus, my nephew absolutely loved it! And that’s really all that matters!
Enjoy!
- 30g (or 1 ounce) dark chocolate, chopped
- 120ml (or ½ cup) boiling water
- 140g (or ½ cup + 2 tablespoons) all-purpose flour
- 70g (or ½ cup + 4 teaspoons) cocoa powder
- ¾ teaspoons baking soda
- ¼ teaspoon baking powder
- a pinch of salt
- 1 large egg at room temperature
- 60ml (or ¼ cup) sunflower oil
- 120ml (or ½ cup) milk
- ¼ teaspoon vanilla extract
- 240g (or 1 cup + 3 tablespoons) granulated sugar
- 100ml (or ⅓ cup + 4 teaspoons) whipping cream
- 50g (or ⅓ cup + 1 tablespoon) powdered sugar
- 150g (or 5 ounces) dark chocolate, chopped
- To decorate:
- 100g (or ⅔ cup + 2 tablespoons) powdered sugar
- a few drops of water
- blue and red food coloring
- mini-marshmallows
- skewers
- Start by preheating the oven to 175°C/350°F (standard oven setting). Liberally butter a 18-cm (7-inch) round cake pan with butter and dust it with cocoa. Pour the water over the chocolate in a heatproof bowl and stir to dissolve. Set aside.
- Combine the flour, cocoa, baking soda, baking powder and salt in a small bowl and stir to combine.
- In a large bowl, beat the egg with a mixer fitted with the whisk attachment until foamy. Keep mixing and slowly drizzle in the oil. Once the oil is fully incorporated, add the milk and vanilla to the chocolate-water mixture. Pour the now cooled chocolate mixture into the egg mixture. Add the sugar and mix until the sugar is completely dissolved. To check whether the sugar has dissolved, rub the batter between your fingers. You'll know the sugar is dissolved if you cannot feel any sugar grains anymore.
- Stop the mixer. Add the flour mixture and, using a rubber spatula, gently fold the dry ingredients into the wet ingredients. Once the flour mixture has been absorbed, give the batter a quick whiz with the mixer to get rid of any lumps. Pour the batter into the prepared cake pan and bake the cake until a tester inserted in the center of the cake comes out clean, about 50 minutes. Transfer the cake to a wire rack and leave to cool for twenty minutes in the pan before turning the cake out. Let the cake cool to room temperature, wrap it with plastic wrap and leave to chill in the fridge for one hour.
- Using the cake pan, draw a circle on on a regular piece of paper and cut it out. Quarter it by folding it in half twice. Open the folded circle up again and, using the folds as guidelines, draw on the shape of the body. Cut out the different shapes.
- ransfer the cake to a cutting board. If your cake has a dome on top, carefully remove it with a serrated knife, holding the knife perfectly horizontal. Place the cut out templates on the cake and carefully cut around the shapes with a sharp, serrated knife. Place the different cake pieces on a wire rack and place a baking sheet underneath to catch any ganache drips.
- Put the chopped chocolate in a heatproof bowl. Combine the powdered sugar and the whipping cream in a small saucepan and let it come to a simmer as you stir to dissolve the sugar. Pour the hot cream mixture over the chocolate and stir to a smooth ganache. You want the ganache to be quite liquid.
- NOTE: if the chocolate doesn't completely dissolve or the ganache is too thick, gently heat the ganache in a double boiler (check the 'Basics' section for more details).
- Pour the warm ganache over the cake pieces and use a rubber spatula to smooth the ganache evenly over the top and sides of the cake. Scrape up the ganache drippings from the baking sheet, reheat the ganache in a double boiler and pour it over the cake again if the first pour didn't completely cover your cake.
- Transfer the coated cake pieces to a cutting board lined with baking parchment, pressing them together to form the bat. Refrigerate overnight or until set. Scrape the ganache drippings from the baking sheet into a small bowl and refrigerate for later use.
- Once the ganache has set, carefully (!) transfer the bat onto a serving platter or serving tray. Reheat the reserved ganache in a double boiler. Bend the skewers to form two little, crooked legs. Push the end of each leg halfway into a mini-marshmallow (the bat's feet) and coat with the ganache. Stick the legs into the cake.
- Make a thick glaze by mixing the powdered sugar with a few drops of water. Put one-third of the glaze in a different bowl and stir in a drop of red food coloring. Tint the other two-third of the glaze a bright blue. Using either a paper cone or a toothpick, draw or pipe a little mouth on the bat's face. Cut up a white mini-marshmallow to make the fangs and the eyes (with ganache pupils) and pipe or draw a line of blue glaze to accentuate its body. Allow the ganache and glaze to set. Enjoy!
