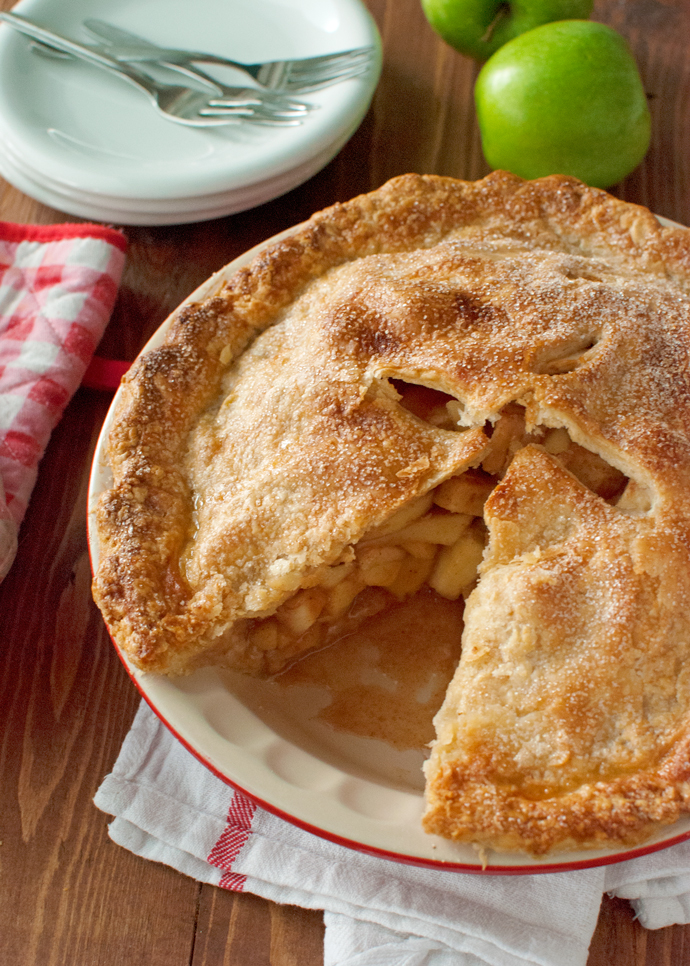
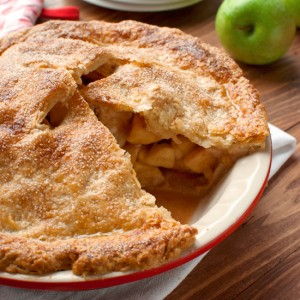
 I found a pie dish! A gorgeous red, ceramic pie dish. It was a little expensive, but I couldn’t find another and I just had to make an American apple pie! So I did. And… my first ever American apple pie didn’t turn out quite as well as I had hoped.
It looked kind of perfect actually, but it was not really a success. In fact, it was a bit of a disappointment. To all those Americans-who-are scared-of-making-apple-pie-even-though-they’ve-spent-their-entire-childhood-watching-their-moms-make-pie-after-pie-after-pie, I’m sorry to have mocked you in my last post. It totally get you now! Making a perfect pie is really difficult! I now know just how frustrating it is to pull a gorgeous, golden, sugary, fragrant pie out of the oven, only to find a soupy, soggy mess under the top crust.
I mean, I’m pouting right now. And not in a Keira Knightley kind of way..
Normally, I would have just extensively cursed a kitchen disaster like this. I would have thrown it in the bin (or shared it with not very particular friends) and made myself a cup of tea to enjoy on the balcony in the sunshine. But not this time. I’m on a quest remember? I’m looking for the Holy Grail of pie crusts! I can’t turn away every time I come across a carnivorous bunny!
Please know what I’m talking about. I’m not crazy, I’m an airplane!
Sorry about that…
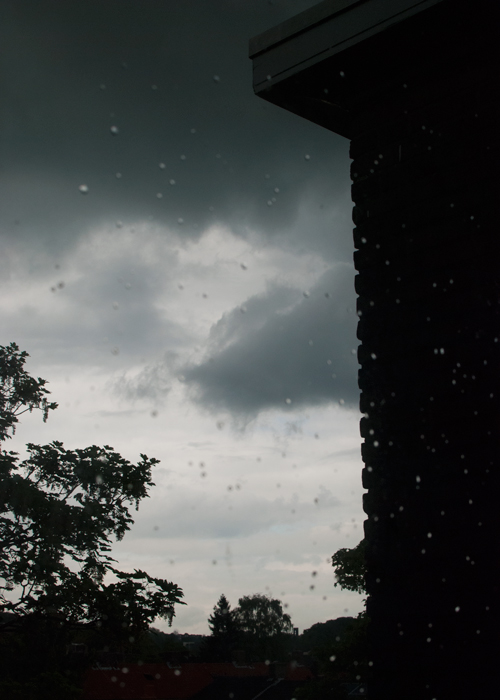
Aaaaaaanyway, because of the quest, I couldn’t just rid myself of the not-so-perfect pie and go outside to bath in the sun, daydreaming about the day on which I would finally submit my Master’s thesis and working on my tan. The sun always makes me feel so much better! This time, however, the – *cough cough* – ‘gorgeous’ Dutch weather didn’t really do a good job at making me feel better about my soupy pie either, especially not since I still had to take pictures of said disappointing pie…
This is what today’s weather looked like. Please mind that this photo is not even edited…
Luckily the Rocking Rebel got home early today, so he helped me hold all kinds of white boards and sheets of paper to reflect what little light there was onto the food. He also did a great job at eating half the pie.
And then there is Photoshop of course. Oh and maybe – just maybe – I have gotten a little better at food photography over the past year. At least I now know how to properly set my camera’s ISO, aperture and shutter speed settings…
So yeah, the pie looks great, but it wasn’t anything to write home about.
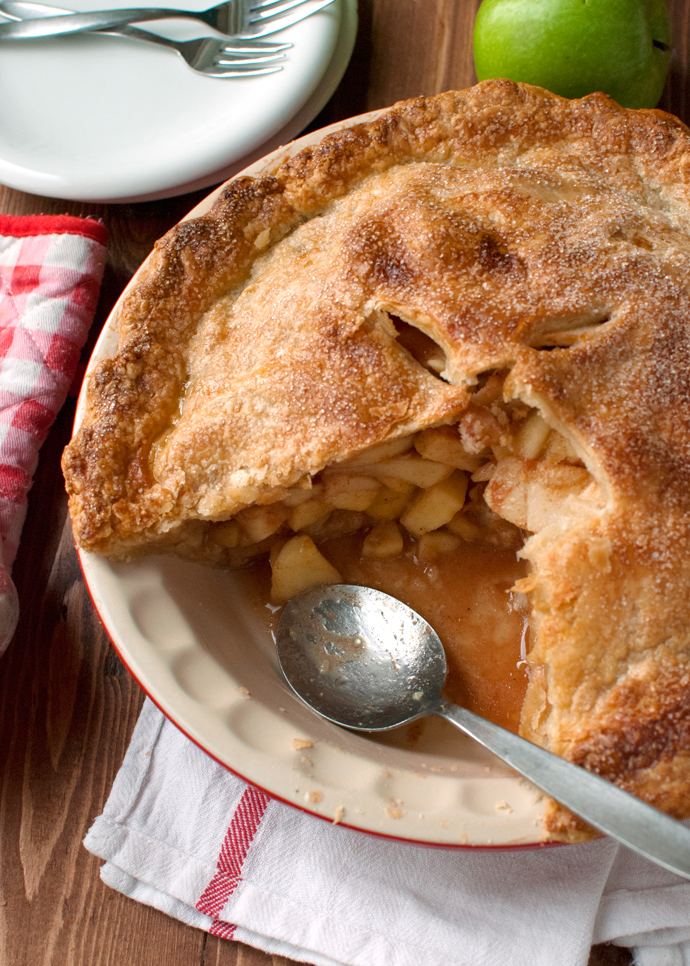 Yet I am blogging about it… Life can be funny sometimes.
Anyway, here’s a list of everything I personally thought was wrong about this beautiful pie:
- The filling was way too soupy.
- The bottom of the pie was incredibly soggy, as in: almost completely disintegrated.
- Unless you enjoy serving your family and friends a spoonful of pie juices and doughy bits, the pie was totally unservable.
- I forgot to dot the filling with butter before placing the dough for the top crust on top of the apples. I’m not sure how this affected the final result, but I know most Americans don’t do this.
- The crimped edges ‘uncrimped’ as the pie baked.
So what did I like?
- It looked GORGEOUS!
- The top crust was deliciously flaky and buttery!
- The apples were cooked to perfection, aka: they weren’t mushy but tender enough to eat with a spoon.
- The soupy, doughy mess underneath the perfect top crust was tasty too.
See what happened here? I like everything from the top crust up. Which means that I liked the top crust! This is a series about pie crusts, dear readers, and I just so happen to think that the part of the crust that browned and baked and everything, was delicious! If I can only get the bottom crust to brown and bake too, the crust will be perfect!
By the way, if you’re from the U.S., please tell me this: am I too critical when it comes to pies? Or would those things I summed up have bothered you too? I’m trying to get as close as I can to the real deal here…
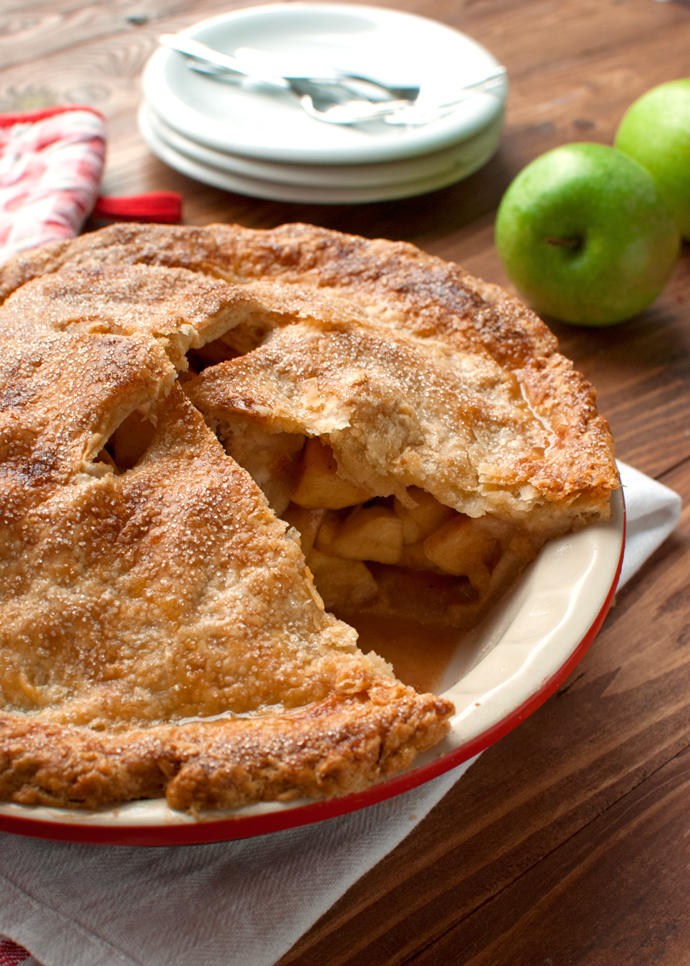 Luckily, there are tons of pie-making tips to be found on the world wide web, so I’ll be back with another apple pie! One that is perfect!
But wish me luck! I’ll probably need it…
I’ve included the recipe so people with actual pie-making skills can tell me where I went wrong. If you’re one of those pie geniuses out there, please leave me a message in the comment section!
- 310g (or 2½ cups) all-purpose flour
- ½ teaspoon table salt
- 2 tablespoons powdered sugar
- 226g (or 1 cup) cold unsalted butter, cubed
- 5-7 tablespoons ice cold water
- 1400g (or 3 pounds) apples, I used a mix of Jonagold and Granny Smith
- 1 tablespoon lemon juice
- ½ teaspoon lemon zest
- 150g (or ¾ cup) granulated sugar
- 2 tablespoons all-purpose flour
- 1½ teaspoons ground cinnamon
- ¼ teaspoon table salt
- ¼ teaspoon ground nutmeg
- 1 egg, beaten with ½ tablespoon of water (egg wash)
- course granulated sugar for sprinkling
- In a medium-sized bowl, I stirred together flour, salt and powdered sugar. I added the cold, cubed butter to the bowl and blended the butter into the flour mixture with a pastry cutter until the mixture looked crumbly, with pea to hazelnut sized pieces of butter. I then added the cold water and stirred with a rubber spatula until the dough came together.
- Using my hands, I quickly shaped the dough into two flat discs. I then wrapped the disc in plastic wrap and placed them in the fridge to chill for one hour.
- After the dough had chilled, I took one of the disc out of the fridge and placed it between two pieces of lightly floured baking parchment. Using a rolling pin, I rolled it to a thickness of about 5-mm (or one fifth of an inch) and lined a 22-cmm/9-inch, ceramic pie dish with it. I then placed the dish in the freezer to allow the dough to firm up again (MISTAKE NO. 1).
- I first peeled and cored all the apples. I then cut half the apples into eight wedges, after which I cut the wedges into quarters. The other half of the apples I thinly sliced (might be MISTAKE NO. 2).
- I added all the apples to a medium-sized bowl and tossed them with the lemon juice and the zest. At this point, I had to run to the store to get more apples, because I didn't have enough (organized much?).
- I peeled, cored and sliced some more apples. I threw the 'new' apples into the bowl with the apples I sliced earlier.
- I then took the second dough disc out of the fridge and rolled it out to a thickness of about 5-mm (or one fifth of an inch) between two sheets of lightly floured baking parchment. I set this piece of dough aside while I finished the apple filling.
- In a small bowl, I combined sugar, flour, cinnamon, salt and nutmeg. I stirred it together and added the mixture to the bowl with the apples. I tossed the apples to coat them with the cinnamon-sugar mixture. Next, I took the lined pie dish out of the freezer and added the apple mixture (MISTAKE NO. 3).
- I then placed the dough for the top crust on top of the apple mound, tried my best to tuck it underneath the frozen bottom crust, crimped the edges and used a sharp knife to cut steam vents in the top crust. After the edges were crimped, I placed the pie in the freezer to firm up. In the meantime, I preheated the oven to 200°C/400°F and placed my oven rack in the lower third of the oven.
- I brushed it with egg wash and sprinkled it with lots of coarse sugar. Then I placed it on the rack in the oven and baked it for 20 minutes. I then cranked the oven temperature down to 175°C/350°F and baked the pie for another 35 minutes (MISTAKE NO. 4).
- After I had taken the pie out of the oven, I allowed it to cool for two hours (MISTAKE NO. 5).





Hi! Here’s what I usually do for the filling:
– I use just about 2 pounds of apples (but I guess it depends on the pie dish size you use)
– I cut my apples in about 5 mm thickness slices
– I stir the apple slices with lemon, 1/2 sugar and spices and let it rest for about 1/2 hour at room temperature. In this way the apples get to lose some juice
– I drain the apples, keeping the juice. Then, I pour the juice in a pan with the other half of the sugar and bring it to a boil. I usually let it boil for a few minutes to make it thicker.
– I put the sauce, the apple slices and the cornstarch into a bowl and stir.
When you ready with your pie crust, just pour the whole thing into it.
If you’d like, come to visit me at One Fool Pie. I haven’t posted the apple pie yet (I will soon), but I have a berry pie there!
Hope you can achieve your pie-goals next time 😉 Bye!!
Hi Erika, nice to meet you! Thank you so much for those tips! I can’t wait to try them. I really like your idea of cooking and thickening the apple juices. I’m planning on making apple pie next week. First up: French Silk Pie in an all-shortening crust. I hope it turns out well! I tried reading your blog, but unfortunately, I don’t speak Italian! I ended up Google Translating your recipe 😉
Nice to meet you too! So sorry! I linked the Italian page by mistake! Ooops!
If you want to read the English section, it’s here One Fool Pie!
Anyway, I don’t like soupy like pies, but throwing away all those juices seems such a waste! Plus, in this way, the filling has a caramel like flavour! 😉
Cant’t wait to read your next post then! Love your blog! 🙂
Thanks Erika! By the way, that English version of your blog really makes things easier. I didn’t even know you could do that with a blog 😉
Anyway, the caramel flavored filling sounds delicious! Can’t wait to give your recipe a go!
I’m no pie expert. But I’ve heard that blind baking helps with soggy bottoms. I don’t think chilling was bad. I’ve seen that. You just blind bake after.
Thanks Kelster 🙂 I’ve thought about blind baking before adding the filling, but because I wanted to make a closed apple pie, I decided against it, as blind baking would make it impossible to seal the top and bottom crust together. I’ve also heard that brushing the bottom crust with egg white should help. Do you know anything about this?
When I baked an apple pie, I followed this recipe: http://allrecipes.com/recipe/apple-pie-by-grandma-ople/
I didn’t soak the apples in the sugar syrup, but when I poured the sugar syrup into the pie pan (with the apples arranged inside) and baked it, I worked.
I’m no pie expert either, but I blind baked my all-butter crust. I didn’t seal the pie completely; I made a lattice pattern with the pie dough (using this recipe: http://www.simplyrecipes.com/recipes/perfect_pie_crust/). I think freezing the pie crust is fine too: if you didn’t, the pie crust would recede when you baked it.
Thank you for your post; I really like that you are honest and you blogged about what really happened when you baked. I love baking, but I have had mishaps in the kitchen which can be discouraging, especially when it seems like all these food blogs make it look easy! I’ve found pies quite challenging (am trying to master the lemon tart..) and am probably quite critical of my own baking, but sometimes taste alone is what matters to most people. (but of course, the journey to getting better at baking is tiresome and long but worth it!)
Sorry: I meant to say *it worked, not I worked 😛
Hi PK, nice to meet you! The apple pie recipe is totally different that most I’ve seen online. I have to give it a go soon 🙂 Although I’ll probably add some cinnamon! I love cinnamon in apple pie 🙂
Thanks for the kind words on being honest, by the way. It frustrates me as well, seeing all those food bloggers whip up perfect dishes and desserts all the time, without ever seeming to fail. But one of the reasons I started this blog is to challenge myself to get better and to learn more about certain recipes or techniques. The lemon tart is actually still on my to-bake list 😉 Honest, I mess up in the kitchen all the time! Right now, I’m struggling with a brown butter pound cake recipe I’m trying to develop. I’ve already baked a couple of (small) versions, but I haven’t had great results yet.
But practice makes perfect, right 🙂 Good luck with the lemon tart!
I thought your pie looked very close to perfect. Some people like runny pies and others don’t. Those who don’t use some kind of starch like flour, cornstarch or instant tapioca or tapioca starch. I like using instant tapioca- the smaller type because the little nuggets absorb the juice and just explode with fruit flavor when you eat them. But you can just use flour just as well. Dotting it with butter does make the pie tastier. There are many ways to make an All American Apple pie and many ways to make the crust but to me the thing that makes a simple pie so delicious is the contrast between the piquant crust and the sweeten- syrupy fruit. The way to get such a crust requires only three ingredients -flour, salt, fat and water. Okay- that is four if you count the water. There is a time and a place for a crust with sugar but not for an American Apple pie. As for which fat to choose there is only one legitimate choice for Southerns and Midwesterners which are the parts of the country that understand American cuisine. Just kidding! But opinions do differ by regions. I think you know where I am going with this -lard. Butter is delicious and some pie makers will use half butter and half lard. But I am a purist. Your crust won’t have a pork taste at all but it will have a more savory mouth feel. Butter has a sweetness and lard doesn’t. Using lard gives you more of that amazing contrast. Save the butter for dotting the top of your fruit. If you cannot bear to make a lard crust then I think I would recommend at least not using sugar in the crust. It is fine to dust the pie with decorative large crystal sugar but the crust itself is best if it is not sweetened. If you dare to make your pie crust with lard and add a bit of starch to the filling, don’t forget to dab with butter – your next pie will be something to “write home about” at last. I recommend serving with vanilla ice cream as well or a thick slice of cheddar cheese. Still no one in Amercia would call that pie a failure. You made a beautiful delicious pie. I left a link to an Apple pie recipe I really like. As for the crust I use the recipe found in “The Blue Ribbon Cook Book” which was written by a Mid-westerner who has won many blue ribbons for her pies and ALWAYS uses lard for her fruit pie crust.
http://allrecipes.com/recipe/apple-pie-by-grandma-ople/
Wow Kathy, thank you so much for sharing! And it means so much to me that you actually like the look of my apple pie. I really felt like a loser when I posted it 🙂
I’ve been thinking so much about ways to improve this pie, and your tips are super helpful! However, I do think I’ll stick to an all-butter-crust… Rendering lard at home is just such a pain!
There is a product called Clear Jel that is a modified corn starch and is especially made to hold up under heat far better than ordinary corn starch. It is used by commercial pie bakers, but also available to home bakers in the US. I buy it through Amazon. I also use it in my chicken pot pies to make the gravy, and it works like magic! Many use it when canning their pie fillings, too, because it holds up under that much heat.
Wow, thanks for the great tip Barbara! I’ll see if I can get my hands on some 😉