 I’m wearing tiny shorts and a tank top and I’m sipping iced, homemade Elderflower Cordial through a paper straw, Lucy is snoozing on my feet, still a bit damp from her swim in the pond and the Rocking Rebel is slightly sunburned and shirtless. Yes! It’s definitely summer right now! As in: hot hot hot. As in: do-I-really-have-to-wear-clothes-today? As in: sunny with a chance of ice cream!
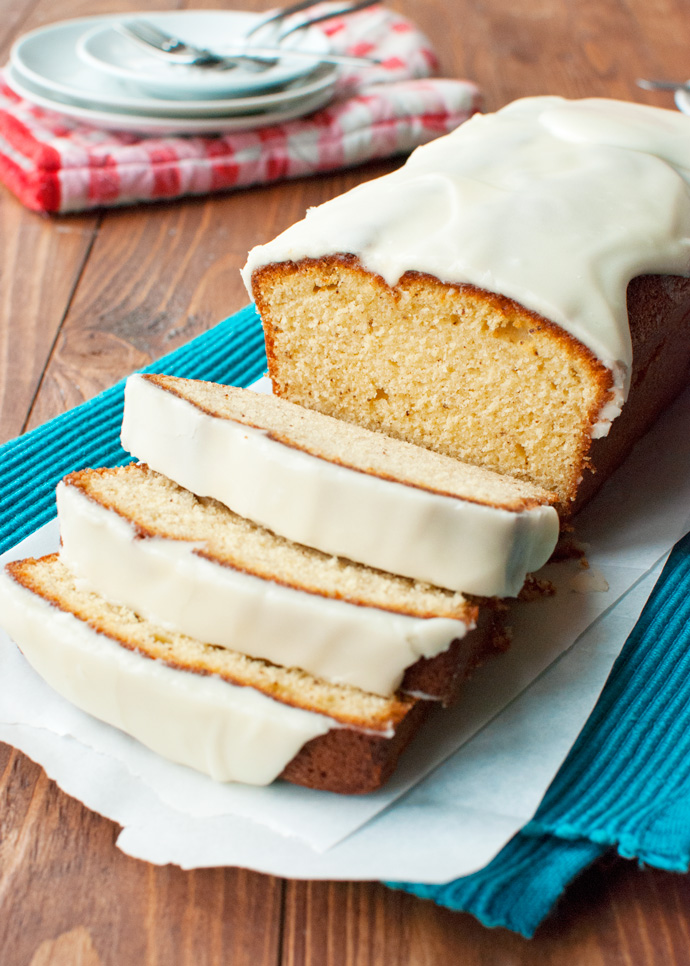
And better yet, I’ve made an amazing cake. A to-die-for cake. Make sure you don’t miss out on this one, because it’s the best! Remember how I didn’t want to brown butter for the cookies I told you about in my last post? The Chocolate Chip Cookies Stuffed with Dulce de Leche? This cake is why…
So yeah, it may be summer, but that doesn’t mean I’m suddenly making healthy things. To all my readers who have ambitious imma-fit-in-that-bikini-plans: I’m sorry, but I couldn’t keep this cake from you. It’s too good! Ridiculously good. In fact, this may even be one of my favorite cakes ever!
I know what you’re thinking. The best cake ever? But how? What makes this cake so special? What makes this particular cake sooooo delicious? I’ll tell you: brown butter… A double dose of brown butter, that is!
 Don’t worry: there’s actually not that much butter in the cake. I just gave the brown butter flavor a serious boost! As it turns out, it’s really easy once you understand that the typical brown butter flavor comes from the caramelized milk solids in the brown butter.
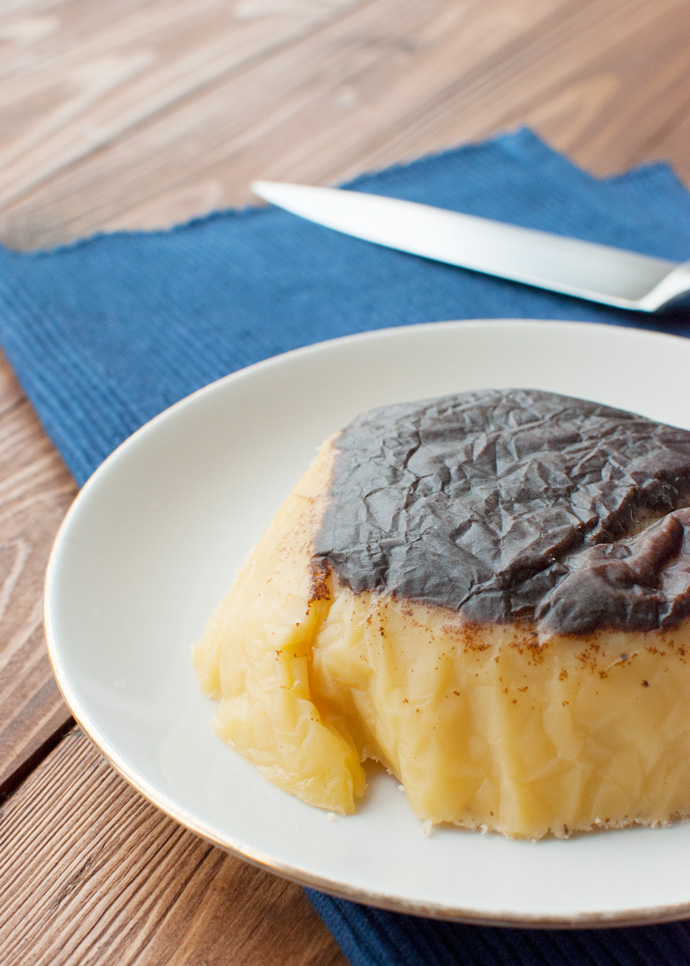
See that unattractive hunk of brown butter up there? It’s ordinary brown butter. It’s about twice as what my recipe calls for, but there’s nothing particularly special about it. Just brown butter: you plop butter in a pan and heat it until it starts to bubble and sizzle. You then heat it a little more until it starts to foam and fills your kitchen with the most delicious hazelnut-smell ever at which point you pour it into a heatproof bowl lined with backing parchment. As you cook the butter, the milk solids in the butter caramelize, infusing the butter with their caramelized, nutty flavor.
And here is where it gets interesting: the caramelized milk solids is where the flavor of the brown butter comes from!
So here’s the thing: if you allow the brown butter to cool undisturbed in the bowl, all the brown specks (the soul and spirit of your precious brown butter) sink to the bottom of the bowl. Once you’ve flipped the cooled butter onto a plate and peeled the parchment off, you’re left with a thick layer of clear brown butter and a thin layer of brown butter specks.
Soooo, if you then take a sharp knife and cut the entire layer of caramelized milk solids off the brown butter layer, and mix it with about half of the brown butter layer… Tadaa: you’ll have brown butter with twice the amount of delicious caramelized milk solids! Which is deeeeelish!
Brown butter boost!
And you can use the leftover, clarified brown butter to make an amazing Cinnamon Brown Butter Spread that tasted just like cinnamon buns!
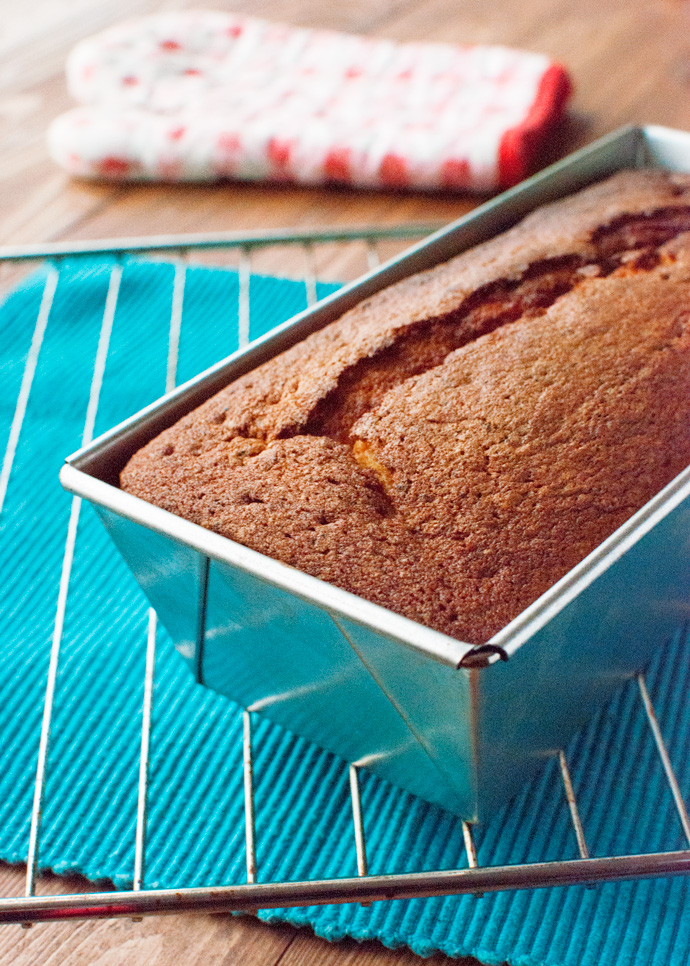 Aaaaanyway, I’ve used my extra delicious brown butter to make a fluffy, light cake.
Making the cake is really easy. Just cream the boosted brown butter together with some sugar and a tablespoon of buttermilk (yes, there’s buttermilk too! I told you this cake is good!). Mix for about five minutes, making sure to scrape the sides and bottom of the bowl every now and then. Creaming the butter and sugar properly is really important. Just take your time to get the butter as fluffy as possible. The sugar doesn’t need to dissolve into the butter at this stage – it will dissolve once you add the eggs – but you do want to trap lots and lots of little air bubbles inside the butter.
Once the butter-sugar-mixture is nice and fluffy, crack in an egg and mix well. Repeat with some more eggs, mixing well after each addition. Mixing well after each egg prevents the batter from seizing. Take your time with this. I usually mix about four minutes after each egg, just to make sure the batter will be fluffy and perfect…
Once all the eggs have been mixed in, mix in flour, baking powder, salt, buttermilk and a little bit of vanilla extract. The buttermilk ensures that the cake is moist and light, with a soft crumb, and the vanilla extract helps to bring out the brown butter flavor even more.
Which is exactly why I poured a sweet vanilla glaze on top of the cake!
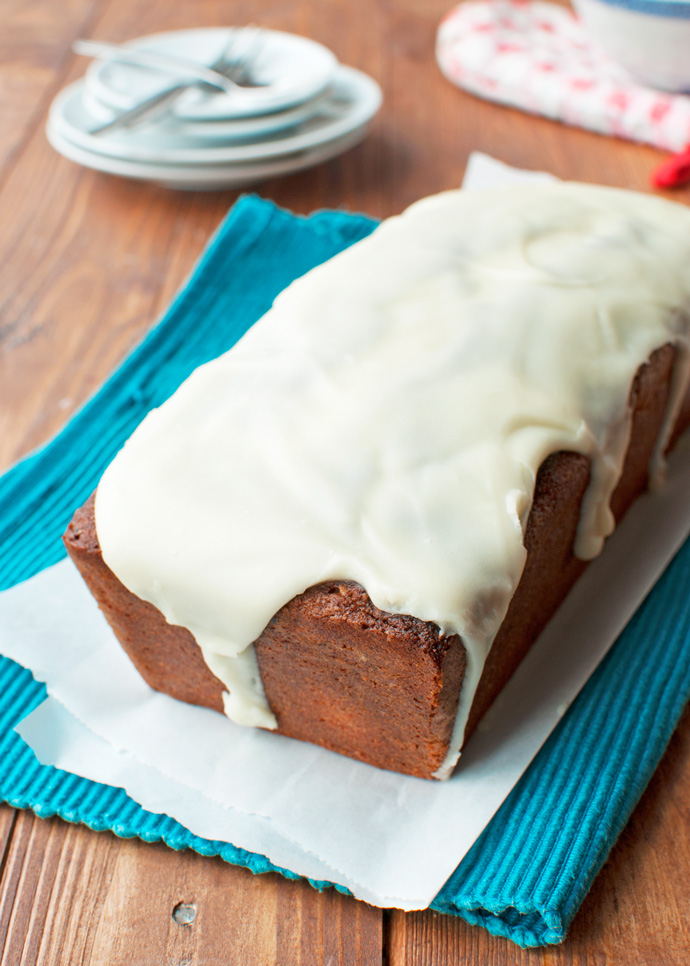 I made this glaze with powdered sugar, a splash of vanilla extract, a dash of salt and a few tablespoons of cream. You can use water, but I prefer the texture of a cream-based glaze.
Oh, and please don’t leave out the salt. It cuts through the sweetness and makes the glaze more delicious. The glaze won’t be salty, I promise. In fact, it’s delicious. You’ll love it!
Well, unless you’re like the Rocking Rebel. You see, the Rocking Rebel doesn’t really like this kind of sweet, sugary glazes (weird, right?) so whenever he sat down to enjoy a fat slice of cake, he fed me the glazy top. I’d say: lucky me! But if you’re like him and don’t like glaze – I won’t judge! – just don’t make the glaze and serve the cake naked and warm!
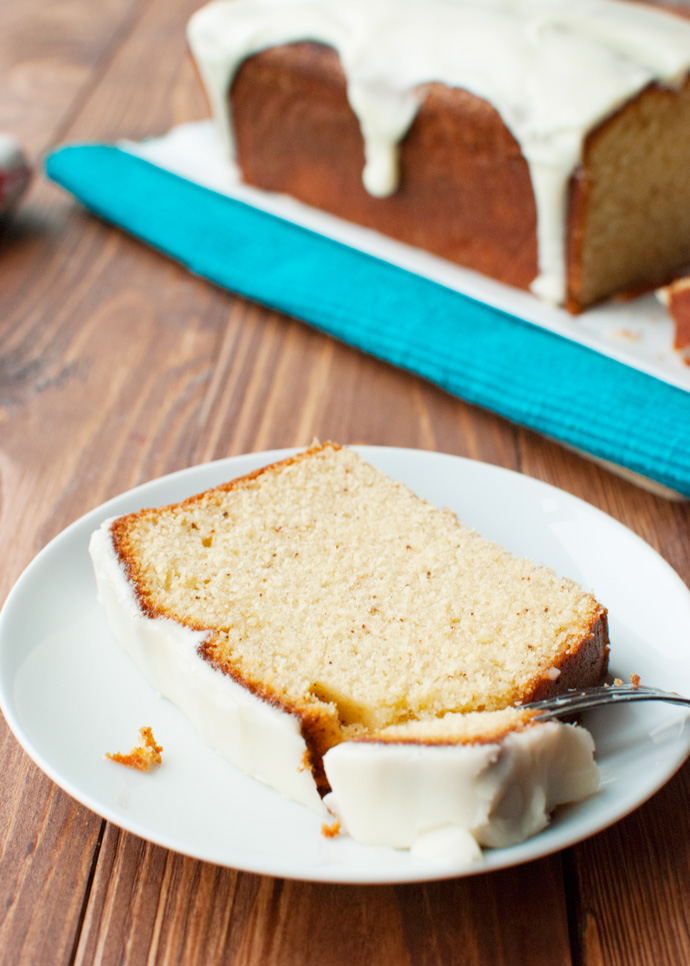 See those little specks of caramelized brown butteryness?
Hmmmm….
Oh, and for tips on browning butter, check out my tips and tricks on Browning Butter!
- 300g (or 1⅓ cup) unsalted butter
- 320g (or 1½ + 5 teaspoons) granulated sugar
- 4 large eggs, at room temperature
- 300g (or 2⅓ cup + 4 teaspoons) all-purpose flour
- 1¼ teaspoon baking powder
- ¾ teaspoon table salt
- 255ml (or 1 cup + 1 tablespoon) buttermilk
- ½ teaspoon vanilla extract
- 110g (or ¾ cup + 2 tablespoons) powdered sugar
- 4 tablespoons + 1 teaspoon whipping cream
- ¼ teaspoon vanilla extract
- pinch of salt
- Line a heatproof bowl with baking parchment. There's no need to be neat about it. Just crumble up the parchment, smooth it out again and press it into the bowl. Just make sure the hot butter can't spill out of the bowl later.
- Plop the butter in a heavy-bottomed and preferably light colored saucepan.The heavy bottom will make sure the butter heats evenly, while the light color ensures that you can check the color of the butter as it browns. Heat gently over low heat, until the butter has completely melted.
- Once the butter has melted, gently allow it to come to a boil. As it boils, the butter will bubble and splatter dramatically, so I always like to place a splatter screen over the pan. Give the butter a good stir with a rubber spatula every now and then, making sure to scrape the sides of the pan.
- At some point, the butter will start to foam. This is when you want to watch the butter like a hawk, as it is now undergoing the caramelization process. You will know by the unmistakable, nutty smell that will now fill your kitchen. Because of the foam, it’s very difficult to determine whether the butter has browned enough to your liking, even if you are using a light colored pan. To check it, try clearing away some of the foam with a spoon or take the pan off the heat and use a soup ladle to pour a little of the butter in a clear glass, so you can determine its color.
- Once you’re happy with the amount of caramelization, pour the butter in the prepared bowl, so that it cools immediately. If you were to leave the butter in the pan, the residual heat from the pan would continue to cook the butter, causing it to burn. Allow the butter to cool to room temperature undisturbed, then place it in the fridge until cold. Don't stir the butter! You want the milk solids to sink to the bottom!
- Once the butter has chilled, take it out of the bowl and remove the baking parchment.
- Using a sharp knife. Cut the dark brown layer of caramelized milk solids off of the thick layer of brown butter and place the milk solids into a small bowl.
- Add cubes of the thick, brown butter layer until you have a total of 160g (or ½ cup + 3 tablespoons + 1 teaspoon). In other words, you're working with 160g (or ½ cup + 3 tablespoons + 1 teaspoon) of boosted brown butter.
- Allow the boosted brown butter to come to room temperature. Keep the left-over brown butter for another use.
- Preheat the oven to 155°C/310°F (fan forced oven) and line a 1.6-liter or 6.5-cup loaf pan with baking parchment. I usually lightly butter the pan to help the parchment stick to it.
- In a large bowl, cream together the brown butter with the sugar and 1 tablespoon of buttermilk. This should take at least 5 minutes. Make sure to scrape the bowl with a rubber spatula every now and then.
- Once the mixture is nice and fluffy, add the eggs one at a time, mixing well (4 minutes) after each addition. Again, scrape the sides and bottom of the bowl every now and then.
- Once all the eggs have been added to the batter, combine the dry ingredients in a small bowl and stir to combine. Combine the buttermilk and vanilla in another bowl. Add one third of the flour mixture to the batter, together with one third of the buttermilk mixture. Mix until combined. Add half of the remaining flour mixture and half of the remaining buttermilk mixture and mix briefly until combined again. Add the remaining flour-mixture and buttermilk-mixture and mix briefly until the batter is smooth.
- Pour the batter into the prepared cake pan and tap the pan on the counter to remove any air bubbles and smooth out the surface of the batter. Place in the oven, making sure that the center of the cake pan is in the middle of the oven (I usually place the oven rack on which the cake pan sits in the lower third of the oven).
- Bake for about 55 minutes, or until a tester inserted into the center of the cake comes out clean. Remove from the oven and allow the cake to cool to room temperature (or serve warm!).
- In a small bowl, stir together the powdered sugar, cream, vanilla and salt until smooth.
- Pour the glaze over the cooled cake. Serve immediately with napkins or allow the glaze to set a bit first. Enjoy!


Hello Nila, as one literary translator to another: I salute you! I was wondering, as a brown butter (b.b.) connoisseur, have you ever tried browning your solidified b.b. again? Or would that be too much, resulting in scorched rather than delicious b.b.? I’m all set to follow this recipe to the letter (because double browned is better than brown, duh), but just wondering whether re-browned b.b. would have the same effect as boosted brown butter (b.b.b.?). Ha.
Hi fellow translator 🙂 I wouldn’t try browning butter twice. When you’re browning butter, you’re basically browning the milk solids in the butter. They can only brown once, I think. Brown them again, and odds are that you’d just burn them. Try boosting the brown butter flavor in your recipes by browning a double amount of butter and using all the browned milk solids with only halve the butter, like I do in this recipe.
And don’t forget to make the brown butter cinnamon spread! It’s the dream of every brown butter connoisseur 😉
I think you can up the amount of browned milk solids by adding skim milk powder to the butter. I remember using this trick a few years ago to make browned butter ice cream. I think I was inspired by a blog post entitled “Maillard” on a blog called La Peche Fraiche. I hope this helps! 🙂