This Pastel Rainbow Heart Cake is a rainbow dream come true! It’s made with subtly sweet vanilla cake layers, filled with super smooth vanilla ermine buttercream and tangy raspberry jam, and decorated with pastel buttercream and meringue heart pops. Delicious!
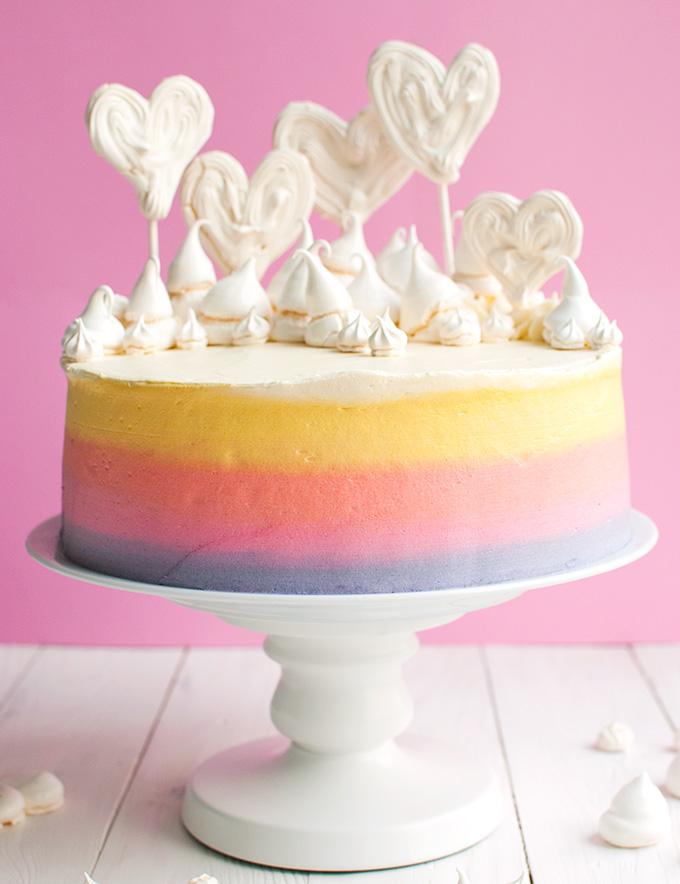 Yep, this is it. The ‘magical rainbow meringue wonderland’ cake I told you guys about in my last post. Isn’t it the coolest?!?
Oh wait, I already included a photo of it in said post about those cute meringue pops… Ah well, it’s still very impressive, even if you HAVE already seen it 🙂
Which reminds me… Have you seen my new menu yet? ↑ Before, I had both a ‘complete recipe index’ AND a ‘visual recipe index’, which was all kinds of confusing. Besides, the visual recipe index never quite looked the way I wanted it to look. So to make looking for great recipes a bit easier, I created this super handy drop-down menu. If you want a cake recipe, just go to ‘cakes’ and you’ll get a page with a picture of every cake I ever made. Or maybe you already know that you want a big party cake? Just click ‘big cakes’ instead!
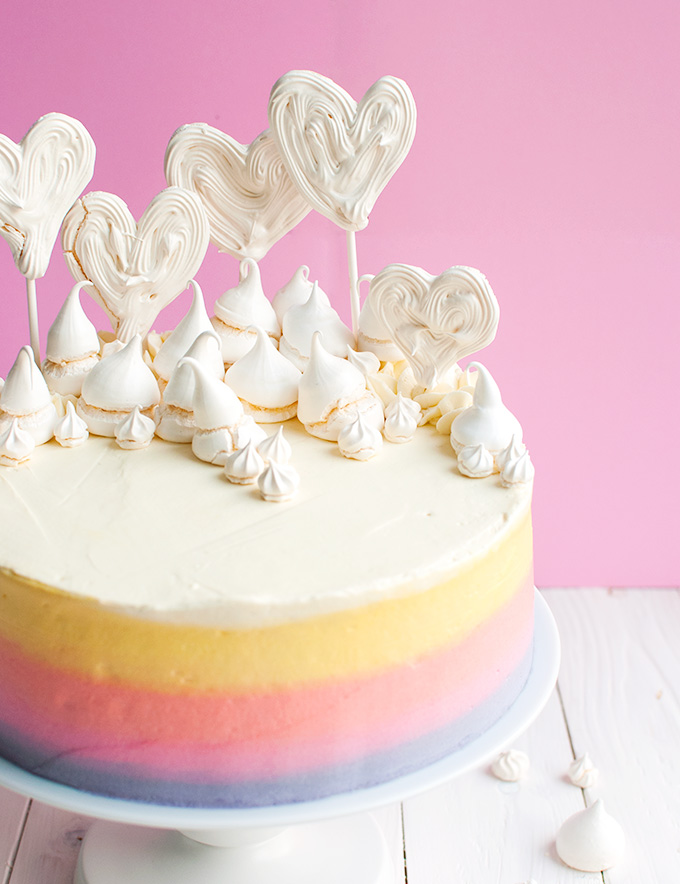
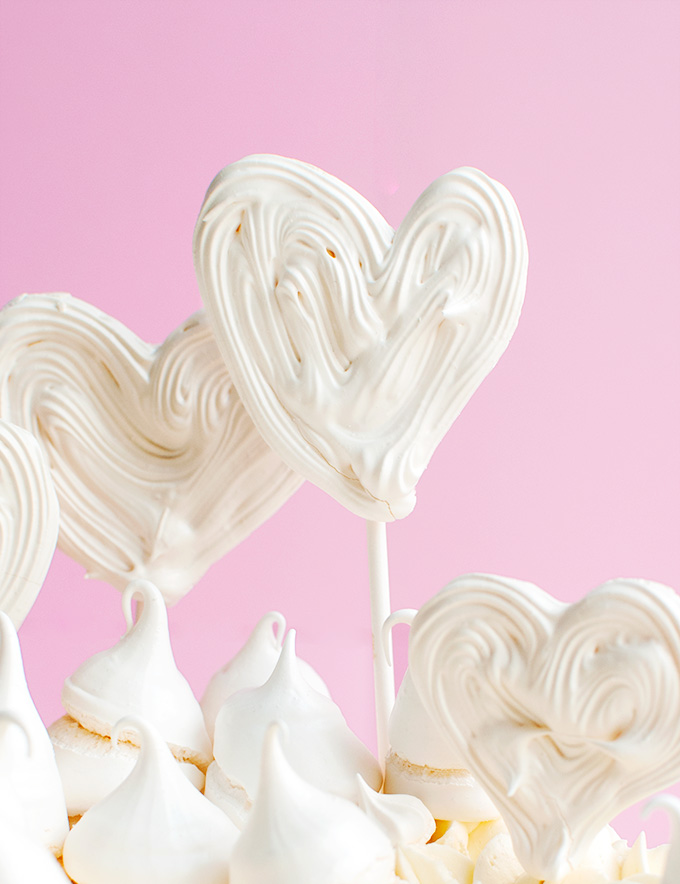
I’ve also added another, very cool menu item: ‘Cake Building Blocks’. I’ve been posting recipes for cake building blocks on the blog ever since I first started blogging in 2013, so they’re not exactly new. However, since they are SUPER helpful (just mix and match them to make the cake of your dreams!) I thought they deserved their very own menu item. There’s a lot of great stuff there, particularly frostings and fillings, but also a new category: cake toppers, which includes those super cute heart pops.
Over the next few months, I’m going to keep adding valuable building block recipes to the collection. Starting with two elements I also used in this cake: a ‘vanilla milk soak’ and ‘less sweet flour buttercream’.
But more on those later…
Let’s first talk about the cake itself. It is huge! Like 23-cm (9-inch) in diameter kind of huge. Enough to serve 20! I have a big family you see, and this cake had to feed 17 people.
If you want to make this fabulous Pastel Rainbow Meringue Heart Cake for a smaller party, you can size it down. All you need to do is adjust the amounts of ingredients to the cake pans you want to use using my super handy Round Cake Pan Conversion Formula. It’s really easy to use and it gives you a factor with which to multiply the ingredients called for in my recipe. For example, to turn this 23-inch/9-inch cake into a 18-cm/7-inch cake, just multiply all the ingredients with 0.612 and adjust the baking time. Easy peasy!
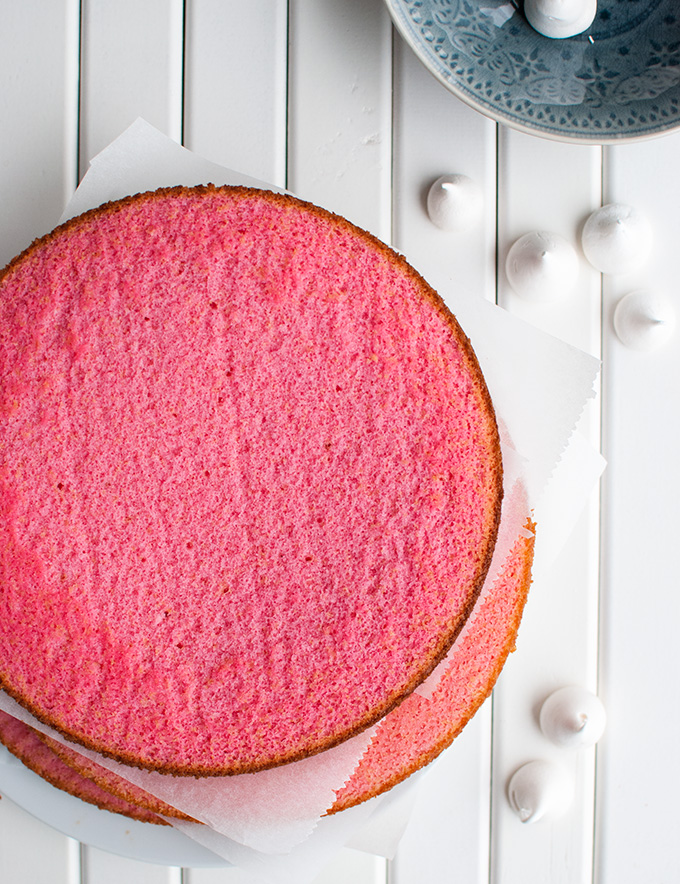
Another thing about this cake: it was pink on the inside. My niece turned six 😉
Tinting the cake is totally optional, and of course you don’t HAVE to use pink. You can use whatever color you want. You can even make each of the three layers a different color. I really liked the hot pink, though!
 This cake recipe is AMAZING, by the way. It’s tender and moist, but it has a sturdy, buttery crumb. It is subtly (but deliciously) sweet, with a hint of vanilla, and it pairs great with the less sweet flour buttercream (aka: ermine buttercream).
It’s a bit more difficult to make than your average cake, though. First, you melt butter into some warm milk and let it cool back to room temperature. In the meantime, you heat a mixture of eggs, sugar and vanilla in a bowl set over a pan of simmering water until the sugar has dissolved. Once the sugar has dissolved, you beat the mixture until it’s light and fluffy, and it, too, has cooled to room temperature. You then mix in flour, baking powder and salt, stream in the cooled milk mixture, and bake.
It’s not that difficult actually, just not the usual creaming of butter and sugar, mixing in eggs, and finally adding dry and wet ingredients.
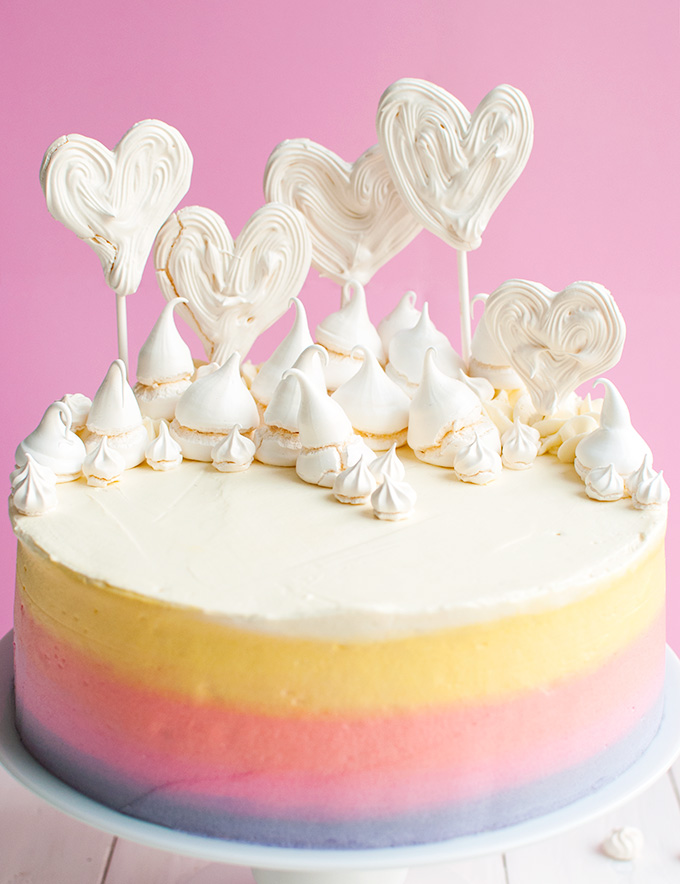 To make the cake even more delicious and flavorful, I drizzled the cake layers with a mixture of whole milk and vanilla extract before I filled the layers with a thick layer of super smooth buttercream and some store-bought raspberry jam. It’s a simple step, but it makes a huge difference. The ‘soak’ not only adds flavor and moisture, I also feel that it helps all the flavors meld together. The sweetness of the cake, the fluffy vanilla frosting, the tangy raspberry jam. Yum!
Which brings me to the buttercream. It’s AWESOME! The absolute BEST vanilla buttercream I have ever made or tasted in my entire life! Even better than my original vanilla ermine buttercream recipe. If you’ve made that, you might have an idea of just how awesome this new and improved frosting is 😉
When I made the Puking Unicorn Cake a while ago, which I filled with my usual vanilla flour buttercream and a simple imbibing syrup, I decided that my next vanilla cake could do with a little less sweetness. So I adapted my flour buttercream recipe for this cake and it just blew. Me. Away!! Who would have thought cutting back on the sugar a little would make such a dramatic difference?!?
It’s super light and fluffy, silky smooth, and vanilla-y, just like my original flour butterceam, just not quite so sweet. It’s more subtle. Mellow. With a more sophisticated, lighter, less intrusive flavor. And just so you know: it pipes beautifully, too!
Not that I had a lot of piping to do on this cake. I piped some little buttercream kisses here and there to keep the meringue kisses in place, but that was about it. The piping obviously isn’t what makes this cake so awesome. It’s the rainbow sides, duh!
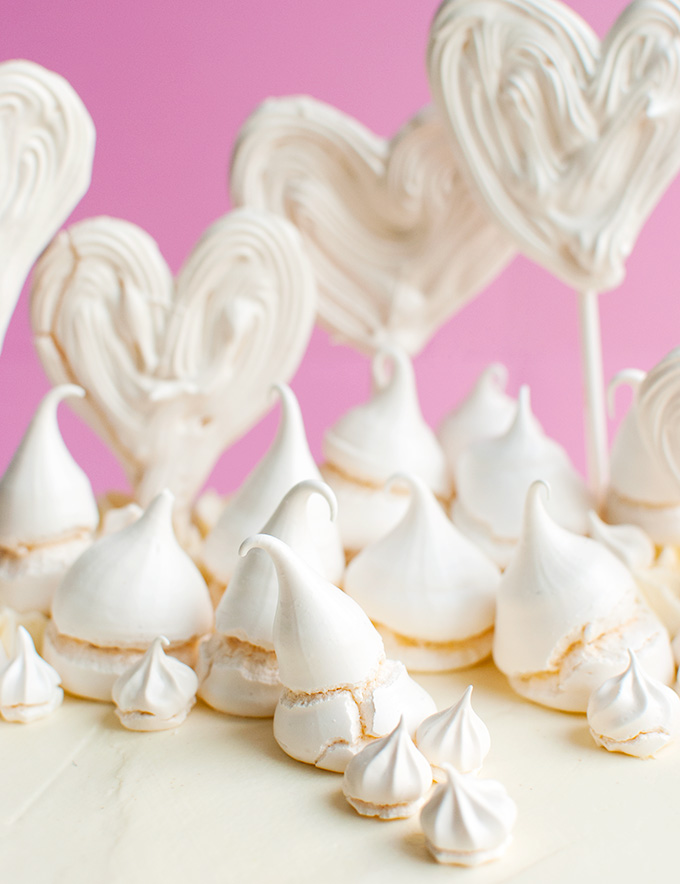
Making those beautiful rainbow sides is actually pretty easy. Granted, it IS a bit time consuming and yes, you DO need more buttercream than you would for a normal cake, because of the different colors and the scraping technique used to get those beautiful clean rainbow sides. But the end result is sooo worth it!
After I crumb coated the cake, I used the handle of an ordinary tablespoon to first apply a thick layer of all the different colors of buttercream to the side of my cake. First purple, then pink, red, and finally yellow. You need the layer to be a bit thicker than normal, because you’re going to scrape some of it off again (which is why you need to make almost 9 cups of buttercream). I then used a palet knife to frost the top of my cake with plain buttercream.
Using a cake scraper, I then scraped the excess buttercream off the side of my cake until the sides looked straight and smooth, making sure to scrape the excess buttercream I scraped off onto a sheet of baking parchment in between every scrape to prevent the colors from blending into each other.
If you’d like a visual, here’s a great video tutorial by Cupcake Jemma, making a Triple Rainbow Ombré Cake.
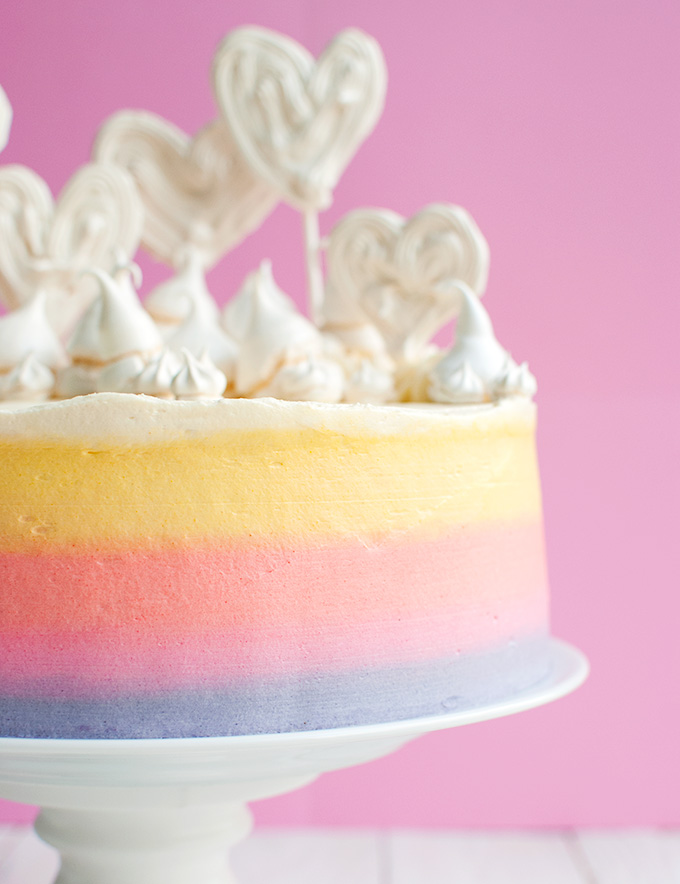
The sides are so pretty! I love, love, LOVE this cake ????
But since I made this for my niece, I made it even more special by placing some mini My Little Ponies on top. Photos coming somewhere this week, but for now, this is it!
If you like this post and would like to get more awesomeness delivered straight into your inbox, click here to subscribe to my mailing list and join the cool-kids club. As a member of the club, I’ll send you my super cute mini eCookbook ‘The Tough Cookie’s Five Favorite Frostings’ for FREE! It has a recipe for the best Nutella frosting in it, which I haven’t posted on the blog yet, so make sure to sign up 😉
Talk later guys!
- 2 large egg whites (about 66g or 2.3 ounces)
- 150g (or ¾ cup) granulated sugar
- ½ teaspoon vanilla extract
- 336g (or 2½ cup + 3 tablespoons) all-purpose flour
- 2¼ teaspoons (or 9g) baking powder
- ¼ teaspoon table salt
- 225g (or 1 cup) unsalted butter
- 240ml (or 1 cup) whole milk
- 600g (or 3 cups) granulated sugar
- 6 large eggs (about 330g or 11.6 ounces without the shells)
- ¾ teaspoon vanilla extract
- pink food coloring, about 3 pea-sized dollops
- 105g (or ¾ cup + 4 teaspoons) all-purpose flour
- 400g (or 2 cups) granulated sugar
- big pinch of table salt
- 720g (or 3 cups) whole milk
- 670g (or 2¾ cups + 3 tablespoons + 1 teaspoon) unsalted butter, softened at room temperature
- 1½ teaspoons vanilla extract
- 80ml (or ⅓ cup) whole milk
- 1 teaspoon vanilla extract
- 80g (or about ¼ cup) raspberry jam
- violet, pink, red, and yellow food coloring
- 5 freehand Meringue Heart Pops
- Preheat the oven to 90°C/195°F (standard oven setting).
- Using a rubber spatula, stir together egg whites, sugar and vanilla in a medium-sized, heatproof bowl. Set the bowl over a pan with simmering water (making sure the water doesn’t touch the bowl) and gently heat the mixture, stirring until the sugar has completely dissolved. To make sure the sugar has dissolved, rub a little of the mixture between your forefinger and thumb. Once the sugar has properly dissolved, you no longer feel any sugar crystals.
- Take the bowl off the water bath, transfer the egg mixture to a cool bowl and, using a mixer fitted with the whisk attachment, beat the mixture until it's cooled to room temperature and holds stiff peaks, 7-10 minutes.
- Line two baking sheets with baking parchment by sticking the parchment on the sheets with a little meringue. Transfer the meringue to a piping bag fitted with a large open tip. Twist the end of the bag to seal and push the meringue down towards the tip. Pipe as much kisses as possible by holding the piping bag straight and pulling it slowly up while squeezing, making sure the kisses don’t touch.
- Dry the meringues out in the middle of the oven for about 3 hours, until completely crisp. You should be able to easily pick them off the baking parchment. Let the meringues cool completely before storing in an airtight container for up to a week.
- Preheat oven to 170°C/340°F (no fan). Line the bottom of three 23-cm/9-inch round baking pans with baking parchment. DON’T butter the sides of the pan if you’re using a pan with a nonstick-coating. It makes the cakes collapse.
- In a bowl, whisk together flour, baking powder and salt. Set aside.
- In a saucepan, combine butter and milk. Heat over low heat until the milk is warm/almost hot and the butter has started to melt. Remove from heat and allow the residual heat to completely melt the butter. Set aside to cool but give it a stir now and then so the butter remains incorporated.
- In the meantime, combine sugar, eggs and vanilla in a bowl. Whisk until combined, then set the bowl over a pan of simmering water, making sure the water doesn’t touch the bowl. Heat, stirring with a rubber spatula (scraping the sides and bottom) until the sugar has dissolved. Remove from heat, transfer to the bowl of a stand mixer fitted with the whisk attachment, and beat until light, fluffy and cool, about 10 minutes.
- Turn he mixer off and use a sugar thermometer to check whether both egg and milk mixture have cooled to room temperature (18-20°C/64-68°F). If both mixtures have reached the right temperature, dissolve the gel food coloring into the milk mixture with a whisk. If you don't have a sugar thermometer, you can check the temperature of both mixtures by dipping your finger in each mixture and touching the mixture against your lips. The mixture should feel cool to your lips.
- Add the flour mixture to the egg mixture and mix on low for about 1 minute or until just incorporated. Stream in the milk mixture and mix until incorporated. Using a rubber spatula, scrape the sides and bottom of the bowl and mix again for about 10 seconds, or until the batter looks smooth.
- Transfer the batter to the prepared baking pans and bake on a rack in the middle of the oven for 20-22 minutes, or until a tester inserted into the center of the cakes comes out clean. Remove from the oven and allow to cool to room temperature in the pans. Remove from the pans by running a knife along the edges of the cakes.
- Combine flour, sugar and salt in a large 2,7-liter/2.8-quart pan. Whisk together. Add the milk slowly while whisking continuously and keep whisking until combined.
- Place pan over low heat and allow the mixture to come to a boil, stirring constantly with a rubber spatula and scraping the sides and bottom of the pan as you go. Once the mixture starts bubbling, cook for 5 minutes over low heat, stirring and scraping continuously and making sure the pudding doesn't catch on the bottom of the pan, then take the pan off the heat and stir vigorously for a minute to beat some of the heat out of the pudding.
- Scrape the pudding onto a rimmed cookie sheet and immediately cover it with plastic wrap, pressing the plastic wrap directly onto the pudding with your hands. This keeps a skin from forming. Allow the pudding to cool to room temperature (18-20°C/64-68°F).
- Once the pudding has cooled, beat the butter in the bowl of a stand mixer fitted with the paddle attachment until smooth and fluffy and lightened in color, 5-7 minutes. Scrape the sides and bottom of the bowl every now and then with a rubber spatula.
- Add the cooled pudding (which will look like very thick glue at this point) 2-4 tablespoons at a time, mixing well after each addition. Once all the pudding has been added, mix for another few minutes, until the buttercream looks thick, smooth and creamy. Add the vanilla and mix for another minute.
- Finally, use a rubber spatula to smush the buttercream against the sides of the bowl (aka: stir vigorously for about a minute) to get rid of any large air bubbles. Use immediately for best results or store, covered in the fridge, for up to seven days****.
- Place first cake layer onto a serving plate. Drizzle with half the vanilla milk soak. Top with 350g (or 1¾ cup + 4 teaspoons) buttercream, spreading it evenly over the cake layer using an offset spatula.
- Using a cake scraper or offset spatula, carefully scrape a very thin layer (as thin as a matchstick) of buttercream off the center. You want to end up with a completely frosted cake layer, with a thinner layer of frosting in the center and a thicker layer of frosting around the edge of the cake. This thicker edge will act as a dam to keep the jam in the cake. Spoon two tablespoons of the jam into the 'pool' you've just created and spread into an even layer.
- Top with second cake layer, pressing it down a bit. Drizzle with the remaining half of the soak, frost with another 350g (or 1¾ cup + 4 teaspoons) of buttercream, make a jam pool, and add the jam. Place the last cake layer on top, pressing it down a bit. Crumb coat the entire cake with buttercream, then place in the fridge to allow the crumb coat to set, about 30 minutes.
- While the cake is in the fridge, tint the buttercream for the rainbow sides. First, reserve about 190g (or 1 cup) of buttercream for decorations. Cover and set aside. Tint about 80g (⅓ cup + 4 teaspoons) buttercream violet, another 80g (⅓ cup + 4 teaspoons) pink, another 80g (⅓ cup + 4 teaspoons) red, and another 80g (⅓ cup + 4 teaspoons) yellow. Leave the remaining buttercream white.
- Once the crumb coat has firmed up, use the tinted buttercream to make the rainbow sides and frost the top of the cake with the white buttercream. Explaining how it’s done is difficult, so here’s a great video tutorial by Cupcake Jemma on how to do that!
- Once you’ve frosted the cake, decorate it with the remaining buttercream, the meringue heart pops and meringue kisses as desired.
- Cake will keep, covered or stored in an airtight container in the fridge, up to 3 days. Cake is best served at room temperature, so remove the cake from the fridge at least 5 hours before serving to ensure that it has time to warm up a bit.
** You can make these up to a week ahead!
*** Cakes can be made ahead. After the cakes have cooled to room temperature, remove from the pans by running a knife along the edges of the cakes to loosen them from the pans. Wrap cakes tightly in plastic wrap and refrigerate for up to 3 days, or freeze for up to 2 months. Allow frozen cakes to thaw in the fridge before use.
**** Allow buttercream that has been refrigerated to come to room temperature, then beat with a mixer fitted with the paddle attachment until smooth and creamy again.





wauw!
That’s what my niece said 😉
This cake is fabulous! Probably not the easiest to make (and make look this good) for people who aren’t very experienced bakers (me!), I admire your perseverance and creativity:)
Hi Monika, thank you so much! I was very pleased with how it turned out, too. And it REALLY isn’t that difficult to make. Just apply a lot of frosting and scrape it off with a cake scraper. I don’t even own a turn table for cake decorating, just a lazy susan! I bet you could do it, too 😉
Wow this is stunning! Love the pastel colours and the heart meringue pops.
Thanks Kat! 🙂
One of the prettiest cakes i have ever seen! Will need to schedule in aome time to attempt this as I can imagine it being a show stopper! #recipeoftheweek
Thank you so much Pam! Jaws definitely dropped when I revealed it 😀