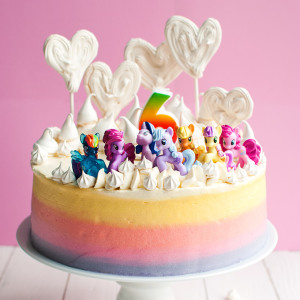
How to turn a beautiful cake into a cake fit for a kid’s birthday party? Answer: toy figures! For my niece’s sixth birthday, I made an easy My Little Pony Rainbow Wonderland Cake by borrowing her My Little Pony mini figures and putting them on top of that delicious Pastel Rainbow Meringue Heart Cake. Never seen a bigger smile 😉
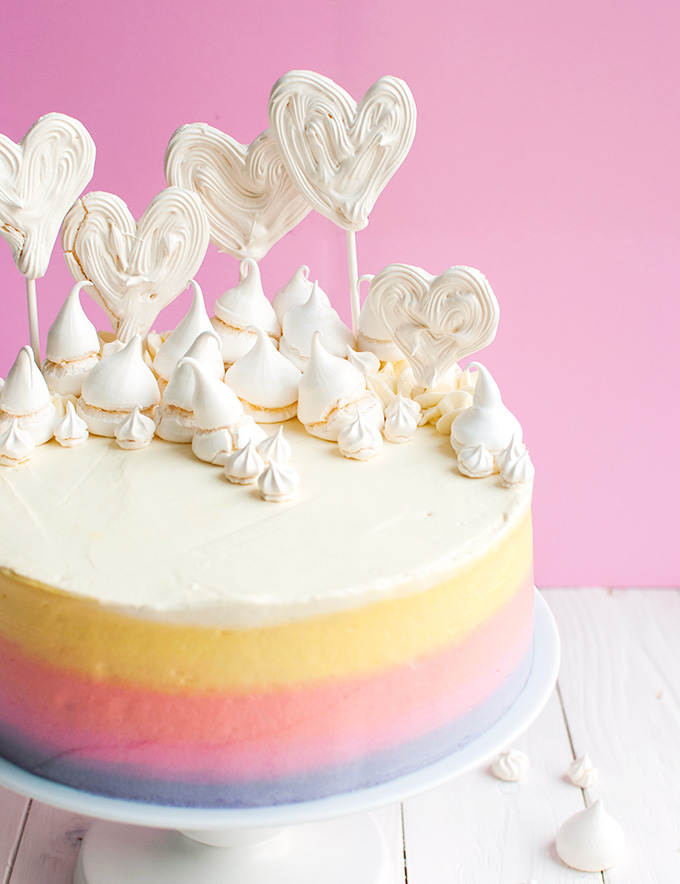
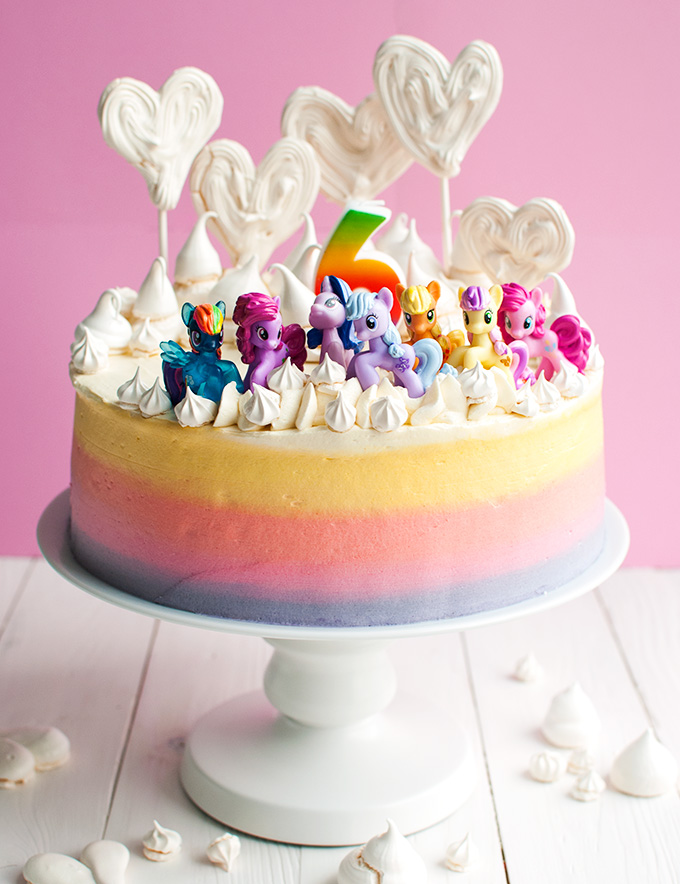 I almost forgot to post these photos! This is what happened with the Pastel Rainbow Meringue Heart Cake right after I photographed it. No, I didn’t bring it to my niece as it was, just rainbow sides and meringue heart pops. I first placed half a dozen My Little Pony figures on top.
She’d asked for a My Little Pony cake, see. She’s been obsessed with My Little Pony cakes ever since she first stumbled upon a Youtube video of a girl making My Little Pony themed cupcakes with little MLP figures on top. We’ve actually made them on several occasions, so I wasn’t the least bit surprised when she pressed those little figures in my hands when she asked me if I could make her a MLP birthday cake.
I’ve been my family’s birthday cake maker for quite a few years now, and while I try to make an awesome, impressive cake for every birthday, I always make more of an effort for the youngest members of our family: my 3 nieces, my youngest nephew, and of course my Baby Boy.
Impressive cake = HUGE smile ← worth all the trouble.
 But. There are limits. For one, I hate working with fondant. I don’t like the taste and the texture, so I don’t put it on my cakes. I also hate modelling fondant into cutesy shapes, even though you don’t have to eat those cutesy shapes. It’s just too finicky. And I hate making those typical bakery style, psychedelic fondant covered birthday cakes. Just don’t like the look of them. So basically: fondant. That’s where I draw the line 🙂
And I can imagine that there are a lot of family cake bakers out there who don’t like trying to make a hunk of what’s basically sugar clay look like Sparkle, Rainbow Dash, or, I don’t know, maybe Toothless the dragon. So I’m here to tell you: make a cake. Make it delicious. Borrow the little one’s favorite toy figures and… Put Those On The Cake.
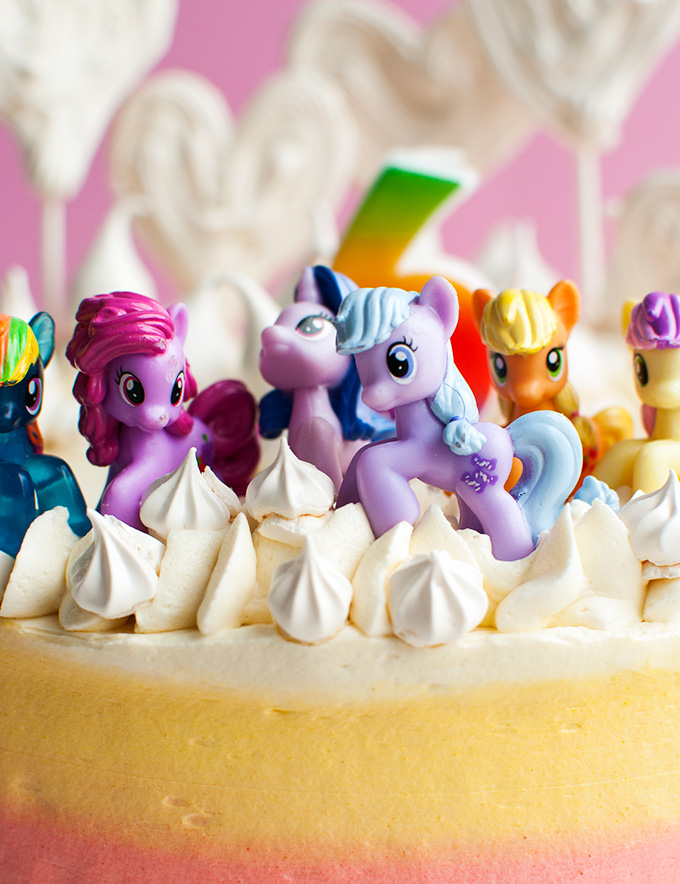 The resulting cake is probably prettier (unless you’re a fondant modelling expert), way more delicious (because yuck fondant), and just as impressive. Maybe even more impressive, because the birthday boy or girl can play with the toy figures, which I think is a plus in any kid’s book. If you want to go the extra mile, buy brand new toy figures as an extra birthday present.
All I’m saying is, kids like toys and putting toys on top of their cake is an easy way to make their birthday cake just a bit more special 😉
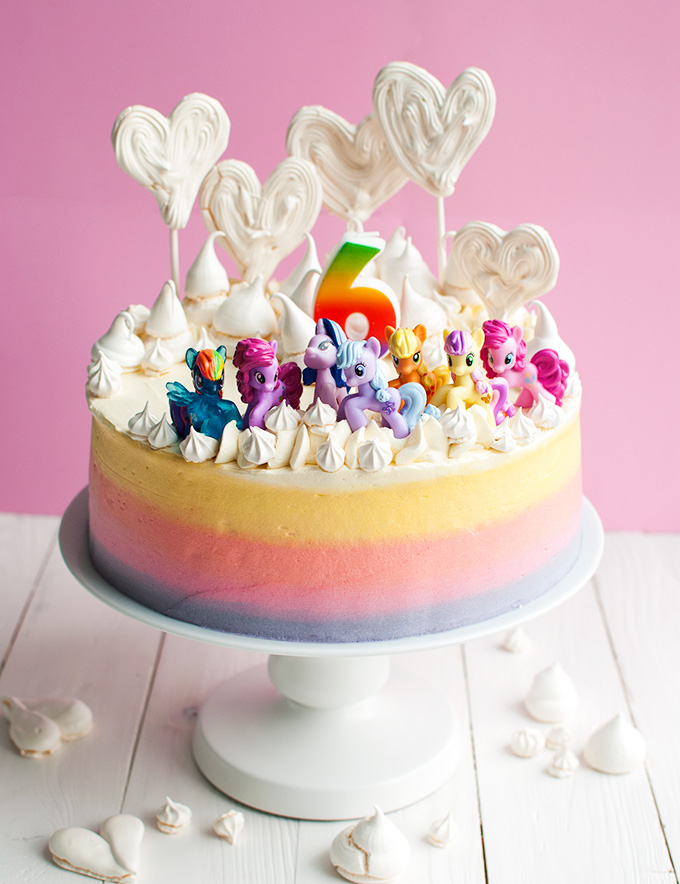 My niece couldn’t have been happier with her cake ????
If you like this post, click here to subscribe to my mailing list and get my mini eCookbook ‘The Tough Cookie’s Five Favorite Frostings’ for FREE because you’re awesome, or scroll down for a nice pin.
Talk later!
- 2 large egg whites (about 66g or 2.3 ounces)
- 150g (or ¾ cup) granulated sugar
- ½ teaspoon vanilla extract
- 336g (or 2½ cup + 3 tablespoons) all-purpose flour
- 2¼ teaspoons (or 9g) baking powder
- ¼ teaspoon table salt
- 225g (or 1 cup) unsalted butter
- 240ml (or 1 cup) whole milk
- 600g (or 3 cups) granulated sugar
- 6 large eggs (about 330g or 11.6 ounces without the shells)
- ¾ teaspoon vanilla extract
- pink food coloring, about 3 pea-sized dollops
- 105g (or ¾ cup + 4 teaspoons) all-purpose flour
- 400g (or 2 cups) granulated sugar
- big pinch of table salt
- 720g (or 3 cups) whole milk
- 670g (or 2¾ cups + 3 tablespoons + 1 teaspoon) unsalted butter, softened at room temperature
- 1½ teaspoons vanilla extract
- 80ml (or ⅓ cup) whole milk
- 1 teaspoon vanilla extract
- 80g (or about ¼ cup) raspberry jam
- violet, pink, red, and yellow food coloring
- 5 freehand Meringue Heart Pops
- Preheat the oven to 90°C/195°F (standard oven setting).
- Using a rubber spatula, stir together egg whites, sugar and vanilla in a medium-sized, heatproof bowl. Set the bowl over a pan with simmering water (making sure the water doesn’t touch the bowl) and gently heat the mixture, stirring until the sugar has completely dissolved. To make sure the sugar has dissolved, rub a little of the mixture between your forefinger and thumb. Once the sugar has properly dissolved, you no longer feel any sugar crystals.
- Take the bowl off the water bath, transfer the egg mixture to a cool bowl and, using a mixer fitted with the whisk attachment, beat the mixture until it's cooled to room temperature and holds stiff peaks, 7-10 minutes.
- Line two baking sheets with baking parchment by sticking the parchment on the sheets with a little meringue. Transfer the meringue to a piping bag fitted with a large open tip. Twist the end of the bag to seal and push the meringue down towards the tip. Pipe as much kisses as possible by holding the piping bag straight and pulling it slowly up while squeezing, making sure the kisses don’t touch.
- Dry the meringues out in the middle of the oven for about 3 hours, until completely crisp. You should be able to easily pick them off the baking parchment. Let the meringues cool completely before storing in an airtight container for up to a week.
- Preheat oven to 170°C/340°F (no fan). Line the bottom of three 23-cm/9-inch round baking pans with baking parchment. DON’T butter the sides of the pan if you’re using a pan with a nonstick-coating. It makes the cakes collapse.
- In a bowl, whisk together flour, baking powder and salt. Set aside.
- In a saucepan, combine butter and milk. Heat over low heat until the milk is warm/almost hot and the butter has started to melt. Remove from heat and allow the residual heat to completely melt the butter. Set aside to cool but give it a stir now and then so the butter remains incorporated.
- In the meantime, combine sugar, eggs and vanilla in a bowl. Whisk until combined, then set the bowl over a pan of simmering water, making sure the water doesn’t touch the bowl. Heat, stirring with a rubber spatula (scraping the sides and bottom) until the sugar has dissolved. Remove from heat, transfer to the bowl of a stand mixer fitted with the whisk attachment, and beat until light, fluffy and cool, about 10 minutes.
- Turn he mixer off and use a sugar thermometer to check whether both egg and milk mixture have cooled to room temperature (18-20°C/64-68°F). If both mixtures have reached the right temperature, dissolve the gel food coloring into the milk mixture with a whisk. If you don't have a sugar thermometer, you can check the temperature of both mixtures by dipping your finger in each mixture and touching the mixture against your lips. The mixture should feel cool to your lips.
- Add the flour mixture to the egg mixture and mix on low for about 1 minute or until just incorporated. Stream in the milk mixture and mix until incorporated. Using a rubber spatula, scrape the sides and bottom of the bowl and mix again for about 10 seconds, or until the batter looks smooth.
- Transfer the batter to the prepared baking pans and bake on a rack in the middle of the oven for 20-22 minutes, or until a tester inserted into the center of the cakes comes out clean. Remove from the oven and allow to cool to room temperature in the pans. Remove from the pan by running a knife along the edges of the cakes.
- Combine flour, sugar and salt in a large 2,7-liter/2.8-quart pan. Whisk together. Add the milk slowly while whisking continuously and keep whisking until combined.
- Place pan over low heat and allow the mixture to come to a boil, stirring constantly with a rubber spatula and scraping the sides and bottom of the pan as you go. Once the mixture starts bubbling, cook for 5 minutes over low heat, stirring and scraping continuously and making sure the pudding doesn't catch on the bottom of the pan, then take the pan off the heat and stir vigorously for a minute to beat some of the heat out of the pudding.
- Scrape the pudding onto a rimmed cookie sheet and immediately cover it with plastic wrap, pressing the plastic wrap directly onto the pudding with your hands. This keeps a skin from forming. Allow the pudding to cool to room temperature (18-20°C/64-68°F).
- Once the pudding has cooled, beat the butter in the bowl of a stand mixer fitted with the paddle attachment until smooth and fluffy and lightened in color, 5-7 minutes. Scrape the sides and bottom of the bowl every now and then with a rubber spatula.
- Add the cooled pudding (which will look like very thick glue at this point) 2-4 tablespoons at a time, mixing well after each addition. Once all the pudding has been added, mix for another few minutes, until the buttercream looks thick, smooth and creamy. Add the vanilla and mix for another minute.
- Finally, use a rubber spatula to smush the buttercream against the sides of the bowl (aka: stir vigorously for about a minute) to get rid of any large air bubbles. Use immediately for best results or store, covered in the fridge, for up to seven days****.
- Place first cake layer onto a serving plate. Drizzle with half the vanilla milk soak. Top with 350g (or 1¾ cup + 4 teaspoons) buttercream, spreading it evenly over the cake layer using an offset spatula.
- Using a cake scraper or offset spatula, carefully scrape a very thin layer (as thin as a matchstick) of buttercream off the center. You want to end up with a completely frosted cake layer, with a thinner layer of frosting in the center and a thicker layer of frosting around the edge of the cake. This thicker edge will act as a dam to keep the jam in the cake. Spoon two tablespoons of the jam into the 'pool' you've just created and spread into an even layer.
- Top with second cake layer, pressing it down a bit. Drizzle with the remaining half of the soak, frost with another 350g (or 1¾ cup + 4 teaspoons) of buttercream, make a jam pool, and add the jam. Place the last cake layer on top, pressing it down a bit. Crumb coat the entire cake with buttercream, then place in the fridge to allow the crumb coat to set, about 30 minutes.
- While the cake is in the fridge, tint the buttercream for the rainbow sides. First, reserve about 190g (or 1 cup) of buttercream for decorations. Cover and set aside. Tint about 80g (⅓ cup + 4 teaspoons) buttercream violet, another 80g (⅓ cup + 4 teaspoons) pink, another 80g (⅓ cup + 4 teaspoons) red, and another 80g (⅓ cup + 4 teaspoons) yellow. Leave the remaining buttercream white.
- Once the crumb coat has firmed up, use the tinted buttercream to make the rainbow sides and frost the top of the cake with the white buttercream. Explaining how it’s done is difficult, so here’s a great video tutorial by Cupcake Jemma on how to do that!
- Once you’ve frosted the cake, decorate it with the remaining buttercream, the meringue heart pops and meringue kisses as desired.
- Cake will keep, covered or stored in an airtight container in the fridge, up to 3 days. Cake is best served at room temperature, so remove the cake from the fridge at least 5 hours before serving to ensure that it has time to warm up a bit.
** You can make these up to a week ahead!
*** Cakes can be made ahead. After the cakes have cooled to room temperature, remove from the pans by running a knife along the edges of the cakes to loosen them from the pans. Wrap cakes tightly in plastic wrap and refrigerate for up to 3 days, or freeze for up to 2 months. Allow frozen cakes to thaw in the fridge before use.
**** Allow buttercream that has been refrigerated to come to room temperature, then beat with a mixer fitted with the paddle attachment until smooth and creamy again.



Sweet cake Nila! You can add me to the #fondantisyucky team. I have never understood the appeal of it. I am all about flavour too.
Let’s start a club! 😀
Oh!Grt details on My little Pony Cakes. Love it 🙂 I run a celebration blog called Purple Velvet Project. Do check out this My Little Pony cake feature. Hope you like it ..Cheers!