Oh yeah, after 3 weeks, 6 posts, 18 batches of would-be dulce de leche and about a zillion sugar highs it’s finally time to wrap up my ‘Making Dulce de Leche’ series! Not that I’m tired of dulce de leche or anything, but the series took me a little longer than I initially planned. Like, 2 weeks longer…
Organized? Me? Um, no….
I wish…
Anyway, I have learned so much from these series! Like how to make dulce de leche in a pressure cooker. In fact, before this series, I had never even used a pressure cooker! Plus, I also learned a lot about chemistry and physics. Like when will a heating can of sweetened condensed milk explode and when will it transform into something delicious! And what about that whole Maillard reaction? Pretty nerdy, right?
Like I said: I learned a lot. I now officially, even scientifically (!) know how not to make dulce de leche. Oh, and of course, I now also know which way of making dulce de leche is the absolute best!
So I guess it’s time to announce the winning method of this series…
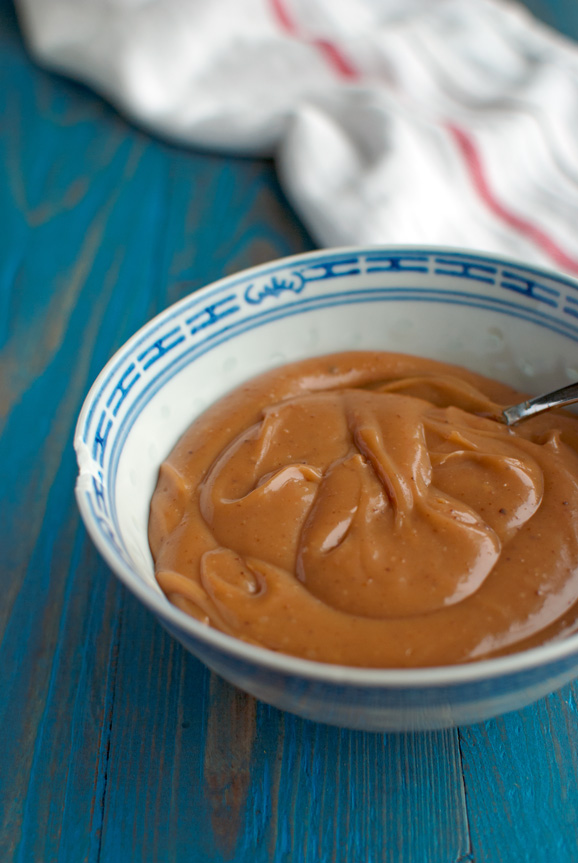
In first place: boiling a can of sweetened, condensed milk in a pressure cooker. It’s (relatively) fast, foolproof and the resulting dulce de leche is gorgeously golden and utterly delicious. It’s exactly what dulce de leche should be like: thick and puddingy, with a beautiful complex flavor profile.
In second place: boiling sweetened, condensed milk in a closed can. This method is simple and the resulting dulce de leche is amazing, just like the dulce de leche made in a pressure cooker: thick, puddingy and golden.
Other methods that make beautiful, delicious dulce de leche are the other methods that require cooking sweetened, condensed milk in a water bath. Aka: the oven method, the open can method and the double boiler method. I’d say these three methods share the third place. Why? Well, these 5 methods yield the same results (delicious dulce de leche), but these 3 require a little more work. Even if it is only punching a hole in a can or stirring every now and then…
But hey, now that you know which methods I do like, which methods didn’t I like?
Well, I really didn’t like making dulce de leche in the microwave. The method is easy enough – just pour the contents of a can of sweetened, condensed milk in a big glass bowl and nuke it, stirring every 2 minutes, until it caramelizes – but the results were very disappointing. Not only was it incredibly messy – regardless of the fact that I used a 2½-liter (or about 2½-quart) bowl to make a mere cup of dulce de leche and the fact that I covered the bowl with plastic wrap – but the dulce de leche I ended up with had a crystallized feel to it and was very tough and chewy. As it cooled, it hardened to a solid, grainy mass…
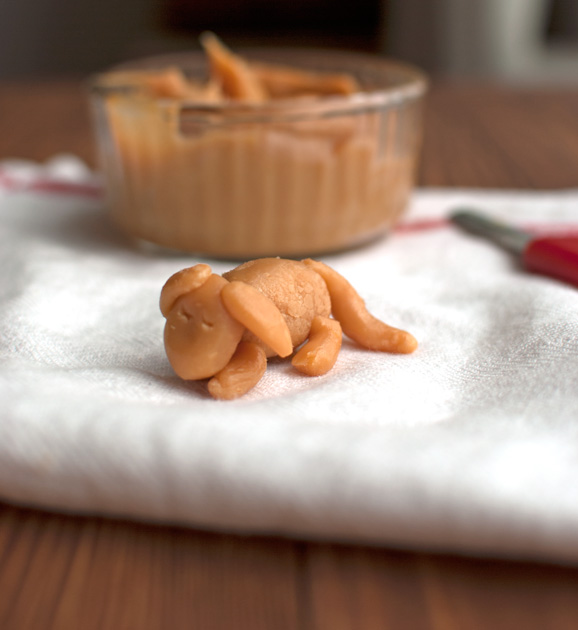
Is it just me, or are you supposed to be able to mold little sleeping puppies out of dulce de leche?
Anyway, it’s too bad that microwaving sweetened, condensed milk didn’t work out, because the microwave method only takes about 15 minutes in total. So, if this method would have worked, it would have been the fastest method by far!
Update: one of my readers (thanks HC!) told me that the dulce de leche crystallizes in the microwave because the water in it evaporates as you nuke it. Adding a teaspoon to a tablespoon of water each time you stir the dulce de leche ensures a smooth texture and enables you to cook it to a deep golden brown!
But as I experimented with different recipes, I again and again found that rushing the process of caramelizing sweetened, condensed milk is not a good idea.
The pan method also sounded very promising to me at first. The idea is that you just pour the contents of a can of sweetened, condensed milk in a saucepan and heat and stir it until it caramelizes. Supposedly, this would give you a beautiful dulce de leche in under 10 minutes. Sounds too good to be true? Well, that’s because it is. This method doesn’t work. At least, it didn’t for me. Because the water in the milk evaporates as it cooks, the resulting ‘dulce de leche’ will not only be incredibly sticky and tough, it – like the microwave dulce de leche – also hardens as it cools.
Soooo not what you want in dulce de leche. Again: it should be puddingy!
The next recipe I tried was not a proper dulce de leche recipe. It was a shortcut I once saw on Masterchef Australia. In the 30th episode of season 3 (I just checked, I’m not a freak who knows these things) one of the chefs (Georgie) makes a Caramel Ripple Ice Cream similar to the one I made a few posts ago. He just didn’t add the nuts. Anyway, in the show, he starts off with a saucepan, to which he adds a can of sweetened, condensed milk and a little golden syrup. He then cooks this mixture for 6 minutes, stirring continuously. Next, he pours in some whipping cream and allows the sauce to cook for another 4 minutes.
I tried this and sure enough I did end up with a saucy substance, but it was far from pretty. In fact, it had a lot of specks of burned milk in it. Besides, to me it tasted more like regular caramel sauce, made with sugar and cream. Not like dulce de leche.
Again: not what you want in dulce de leche!

Up next were the ‘making dulce de leche from scratch’ recipes. One tip: don’t go there. Take it from someone who has spent hour after hour after hour poured over the stove, stirring milk, hoping against hope that it would transform into something that remotely resembled dulce de leche.
It’s just not worth it!
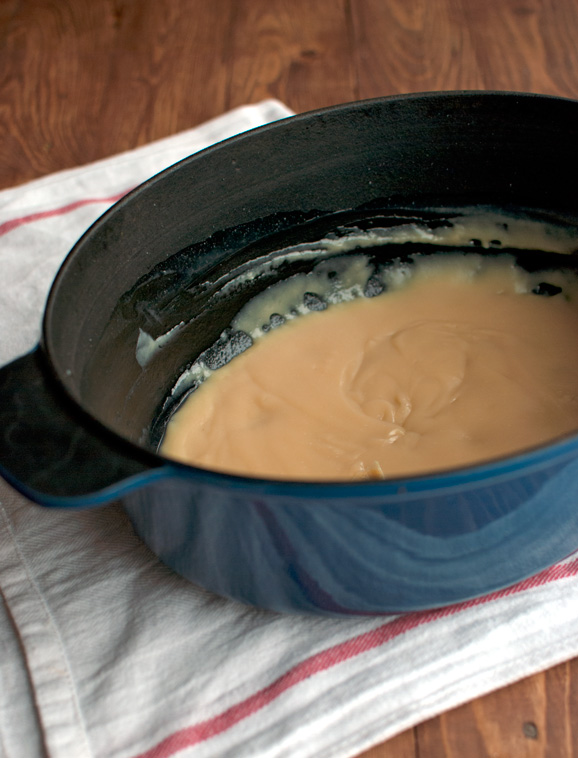
I tried a number of such recipes, and each of them was a massive fail. First, I tried combining sugar, milk and baking soda in a large Dutch oven and cooking it until the milk reduces and the mixture browns. It did brown. To the point of burning. But did it thicken? No… Not in the least… It just turned into this blackish, grainy sludge that wasn’t pleasant in taste or texture. I tried to adapt the recipe, hoping that if I added the baking soda – which helps the mixture to brown – later on, after the sweetened milk had thickened, that it would turn out okay, but it didn’t. It was still horrible…
As were the results when I tried making dulce de leche by cooking a mixture of sweetened, condensed milk, evaporated milk and corn syrup. This mixture did thicken. Quite considerably, too. To the point at which I couldn’t get my spoon out after it had cooled.
Two words: rock solid…

I also wasn’t too happy with the color of the finished product. You can’t really tell from the picture, bu it was too pale. Not the kind of deep, dark golden that indicates that the dulce de leche has a gorgeous, complex flavor. I thought about cooking the mixture a little longer to deepen the color (and flavor), but I quickly realized that all that would do is turn the ‘dulce de leche’ into something to cut diamonds with…
So finally, I attempted to make dulce de leche from scratch in a water bath. Which took me forever! Again, it all sounds great in theory – just cook milk and sugar in a water bath until the milk reduces and browns – but after 7 hours of cooking (!!!) the milk still hadn’t browned. It had reduced, yes, but it just looked like sweetened, condensed milk to me. I started wondering why I was doing this again. I mean, why cook something for 7 hours, only to end up with the stuff you can buy in a can?
It just doesn’t make any sense….
But hey, I proceeded with the recipe, anyway. After 7 hours of cooking, I didn’t want to end up with nothing! I needed something sugary and delicious! So, like a good tough cookie, I transfered the homemade sweetened, condensed milk to a Dutch oven and cooked it, stirring continuously, until it thickened. After which the sweetened, condensed milk that took me 7 hours to make, looked like thick sweetened, condensed milk.
That’s right. It still hadn’t browned…
It certainly looked nothing like dulce de leche! Besides, it had a grainy texture and lacked that velvety smooth, pudding-like consistency. I couldn’t do anything with it than throwing it in the bin.
Luckily I had a can of proper dulce de leche in my fridge, so I quickly got myself a spoon – because I’m sophisticated – snuggled into the couch and helped myself to spoonful after spoonful of the good stuff in all its glory and abandoned the whole idea of making dulce de leche from scratch.
There is only so much patience I can muster…
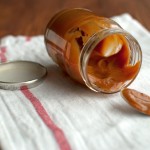
Anyway, I hope that you enjoyed this series and that this post – like the other posts – has been helpful! Now go make some real dulce de leche!


Hi Nila, what an impressive experiment! Now I know what method to go for. Just one question: can I cook 3-4 cans of condensed milk and put them back into the cupboard and use a few weeks later? Or in other words: what is the shelf life of an unopened can of ddl?
Thanks Hanna! Nice to meet you, by the way 😉 Personally, I have never really had the patience to store cans of dulce de leche for a very long time. I always find something to do with them, even if I’ve made 3 or 4 at once… But to answer your question, I have heard people say it’s safe to store dulce de leche until the expiration date on the can. However, I recently kept an open can of dulce de leche in the fridge, and after about 2 weeks, I noticed that the color of the dulce de leche had a greenish/grayish hue to it. I’m sure it wasn’t moldy, or anything and I suspect the discoloration was caused because the metal of the can reacted in some way with either the food or the ‘humid’ air in my fridge…
Having said that, I have to admit that right now, I do have a few cans of dulce de leche hidden away so I can open them in a few months to check whether they are still good to eat 😉 Until then, just go for it! Store them for as long as you want, but make sure to open a can a few days before you want to use it. If it’s gone bad, you still have time to make fresh dulce de leche 😉 At any rate, I will post an update on my dulce de leche recipes as soon as I know!
It have been a pleasure to read and learn about your testing the best methods to make dulche de leche :))
In Norway, we have the ” brown cheese” – who we love to eat on bread, crisp breads and waffles…. and the brown cheese is made of milk boiled so long until it’s caramelizes, it’s the same colour as dulche de leche and sweet in taste. It’s mostly made of cow milk, but also of goat milk who has a stronger taste.
But I have a question about making dulche de leche- is there a problem to put several cans in the pressure cooker, when making these? I just think if the cans dump into each other when pressure is building up..
I’m just thinking economical – if I’m going to boil for 3-4 hours (ordinary method) or pressure boil, then it’s okay to make several batches at the same time?
Best wishes ~ mayK
Thanks mayK! I’m so glad you liked the series! I had heard about the Norwegian Hamar Pålegg, but I had never heard about this ‘brown cheese’ before! It sounds amazing 😉
I have had no problems cooking 3 cans of sweetened, condensed milk at once in a pressure cooker or an ordinary pan. Like you said, it’s just very economical to do so. I think that as long as there’s enough water in the pan it shouldn’t be a problem. Sure, the cans can bump into each other, but if you cook a single can it can also bump against the sides and bottom of the pan… Just make sure that the pan is large enough for the cans to all sit comfortably on the bottom of the pan (aka: don’t overcrowd the pan) and fill it with plenty of water!
You can never have enough dulce de leche, right? 😉
Thank you so much for this post. Believe it or not I just discovered dulce de leche and absolutely love it. I am so glad you do all the hard work for me 🙂 Although you are much more motivated than I am.
Hi Kim, I’m so glad you like the post! Always here to help! And yes, I am easily motivated when it comes to things like dulce de leche 😉
Hey Nila, your website is amazing and I have learned so much just from the series on how to make Dulce de Leche. My friend from Argentina introduced me to it and it brought me back to when I was a kid, in Italy we have candies we call ‘mou’ which I believe is nothing else than harder dulce de Leche. So I started wandering how to make it on my own and I found your website. This morning I went to the store and bought a can of evaporated milk just to discover I should have bought condensed milk… Bummer. So my question is: should I go and exchange that for a condense milk can, or I could still use it in the pressure pot but increase the cooking time?
Thanks do much for a very well done website as well as very thorough.
Benny
Hi Benny, nice to meet you! Thank you so much for your sweet words 🙂
About the evaporated milk, I really think you should go back to the store and get yourself some sweetened, condensed milk. Evaporated milk is really just thickened milk, whereas sweetened condensed milk is thickened milk with a lot of sugar added to it. The sugar, in combination with the protein from the milk, is what makes dulce de leche so irresistible. Use the evaporated milk in your coffee (people do that here in the Netherlands) or use it to make the Dulce de Leche Cheat Sauce!
I hope this helps 😉 Let me know how it turns out!
Hello, I have a preference of making mine in a crock pot. Lay the can on its side, cover with hot water and cook for 6 to 8 hours. After the can cools you can open it to find a creamy, delicious DdL treat!
What were the results of your storage test? I have two cans that i made last night but i am not sure if i am going to be able to use them right away.
Also, you have to try making Dulce de Leche buttercream. It is amazing!
2 sticks unsalted butter, creamed until fluffy
Slowly mix in 2lb powdered sugar, 1/2 teaspoon salt, 1 tablespoon good vanilla. Afterr it is all well blended, scrape the bowl, add in 3T of heavy cream and mix very very well. Frosting should be stiff but fluffy.
Add 1 can cooled DdL and mix until well blended. DO NOT OVERMIX!! It will get all grainy and gross if you do.
Frost whatever you want. Cakes, brownies, bodies… It makes almost anything taste awesome.
Hi Jill! I love the idea of making dulce de leche in a crock pot! I’ll have to try it some time!
By the way, the dulce de leche buttercream sounds amazing! Dulce de leche is so versatile, don’t you think? If only I had a can of dulce de leche, I would make it right now! Not that I have a cake or brownie to frost at the moment, but there’s always the Rocking Rebel 😉 haha!
In Argentina they use dulce de leche to fill cakes covered in fondant as dulce de leche does not perish out of the fridge. I was thinking about making some sort of dulce de leche buttercream, just to get a more fluffy consistency.
Would you use such buttercream to fill a cake that needs to stay out of the fridge?
Hi Gisele, there is some debate about whether butter needs to be stored in the fridge at all, and I have on several occasions stored cupcakes or cakes covered with buttercream out of the fridge without running into any problems. It depends on your preference I guess, and on how risky you think it is. I think it will be fine, but storing a cake in the fridge is always a bit safer, I think. I hope this helps 😉
Great post! The secret to making microwave dulce de leche is adding water as you go. Water doesn’t evaporate from the mixture in the sealed can methods, but in any open can method it does. Hence the mixture tends to dry out before you can achieve a proper caramelization, and it gets too thick and crystallizes as it cools. Add a tsp. to a tbsp. of water with each stir and you can cook away until you reach a nice deep color, and there will be enough moisture to leave a smooth, soft, and non-crystallized dulce de leche. It’s the only method I use now, and I’ve tried almost all of them! I also add quite a bit of salt to mine. Yum!
Wow HC, thanks for sharing! That’s a great trick 😉 I thought it had something to do with the water evaporating, but it never occurred to me that I could fix this by simply adding a teaspoon of water!
And yeah, salt, salt, salt… 😉 It makes caramel so much better! Have you tried my caramelized white chocolate chunks with sea salt? Hmmmmm….
I hope you know how amazing you are!! Thanks for all the reseach
Thanks Donna! That makes me so happy 🙂
My dulce design Leche is too runny what should i do
Hi Kelila! You could try cooking it over a water bath or in the oven to get it a little thicker 🙂
I’ve just made several Jars of ddl in the slow cooker using 4 oz canning jars. Any idea how long these will last?
Hi Jennifer, as you’ve cooked the dulce de leche in the cans, I’d say it will last a good long time! A few months? Maybe a year, maybe two years? Who knows… There’s a can of dulce de leche in my pantry waiting to be tested 😉
I’d say, just store them and use them whenever you feel like it. If it still looks and smell okay, I’d say it’s good. Sweetened condensed milk has a long shelf-life to begin with, so dulce de leche made in the can should last a pretty long time as well…
When, for what ever reason, we had plenty of extra milk from out dairy cows, Grandmother used to make Dulce de Leche over an outdoor fire in a large copper pot. Helpers would take turns stirring it. Actually, we called it manjar blanco, and added cloves and cinnamon sticks towards the end to add flavor. This was obviously paler
and served very soft. Yes you can make dulce de leche harder and press into shapes or cut into squares, kind of like fudge. Using the short cut of condensed milk in the unopened cans is the best, especially in the pressure cooker. (This is especially true if you live at a high altitude) The factory product, like from Argentina, has thickeners and things besides just milk and sugar….I don’t care for it. Even if you look carefully at cans of condensed milk, some have agar or other things added. Be sure to use the ones that are only milk and sugar. Use on bread or toast, make cake icing out of it adding coconut, make icecream out of it plain or with coconut or toasted coconut, put it on bananas, or my favorite on green apples, etc etc……Americans grow up with peanut butter, Latin American grow up with dulce de leche :):)
Thanks for sharing Christina! I love the idea of cooking dulce de leche (or manjar blanco, as you call it) over an open flame outside 🙂